Thanks a lot man, I just went and download them as well.
1 Like
Another app challenge, another entry in my journal ![]()
This time, I will start with a concept “app”, just showing the progress bar/circle and how to transfer data to Apple HealthKit.
In the next step, I will do the basic layout of my app and describe the functionality. Probably by then, I will post the progress here.
Then, I will merge the gained knowledge of my concept app with the “real” app.
Let’s get this started ![]()
3 Likes
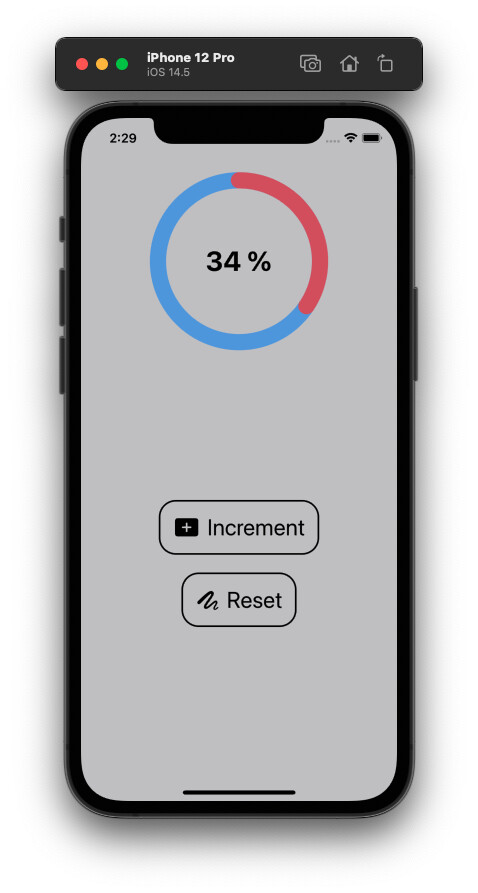
So, building the progress circle (or progress rectangle or any other shape) is quite easy.
I want to give my remarks to the linked article/tutorial:
There is no need to write self in front of the progressValue or the progress. This was required in an earlier version of Swift, but not anymore. Without self, I think it’s more intuitiv.
To let the progress start at the top of the circle, you could use .rotationEffect(Angle(degrees: 270)) but instead of 270 you could also specify -90 (again, I think this is more intuitiv).
I added a “Reset” button to play around without stopping and starting the “app”.
ContentView:
import SwiftUI

struct ContentView: View {

    @State var progressValue: Float = 0.0

    var body: some View {

        ZStack {
            // Just another background color
            Color.gray
                .opacity(0.5)
                .edgesIgnoringSafeArea(.all)

            VStack  {

                // Progress circle
                ProgressBarView(progress: $progressValue)
                .frame(width: 200, height: 200, alignment: .center)
                .padding(30)
                Spacer()

                // Button to increment the value
                Button(action: {
                    incrementProgress()
                }, label: {
                    HStack {
                        Image(systemName: "plus.rectangle.fill")
                            .font(.system(size: 25))
                            .foregroundColor(.black)
                        Text("Increment")
                            .font(.title)
                            .foregroundColor(.black)
                    }
                    .padding()
                    .overlay(RoundedRectangle(cornerRadius: 20)
                                .stroke(lineWidth: 2.0)
                                .foregroundColor(.black))
                })

                // Button to reset the value
                Button(action: {
                    progressValue = 0.0
                }, label: {
                    HStack {
                        Image(systemName: "scribble.variable")
                            .font(.system(size: 25))
                            .foregroundColor(.black)
                        Text("Reset")
                            .font(.title)
                            .foregroundColor(.black)
                    }
                    .padding()
                    .overlay(RoundedRectangle(cornerRadius: 20)
                                .stroke(lineWidth: 2.0)
                                .foregroundColor(.black))
                })
                .padding()
           Spacer()

            }
        }

    }

    func incrementProgress() {
        let randomValue = Float([0.0500, 0.125, 0.225, 0.343].randomElement()!)
        progressValue += randomValue
    }

}

struct ContentView_Previews: PreviewProvider {
    static var previews: some View {
        ContentView()
    }
}
ProgressBarView:
import SwiftUI

struct ProgressBarView: View {

    @Binding var progress: Float

    var body: some View {
        ZStack{

            //Background circle
            Circle()
                .stroke(/*@START_MENU_TOKEN@*/Color.blue/*@END_MENU_TOKEN@*/, lineWidth: 20)
                .opacity(0.5)

            //Progress circle
            Circle()
                .trim(from: 0.0, to: CGFloat(min(progress, 1.0))) // no need to put self.progress anymore, just progress
                .stroke(style: StrokeStyle(lineWidth: 20, lineCap: .round, lineJoin: .round))
                .foregroundColor(.red)
                .opacity(0.7)
                // Start the progress circle at top (circle goes clockwise and if the start of the circle needs to be ajusted, it's also clockwise, so 3x90° = 270° but -90 would also be OK
                .rotationEffect(Angle(degrees: 270)) // order is important: .rotationEffect as firt point right after Circle() will result in an error
                .animation(.easeInOut)

            // Text inside the circle
            Text(String(format: "%.0f %%", min(progress, 1.0)*100)) // modifier will round the value, so there is no decimal point
                .font(.largeTitle)
                .bold()

        }
    }
}
Formatting is strange. If anyone wants to use the code, just delete the START MENU TOKEN and END MENU TOKEN
Result should look like:
1 Like
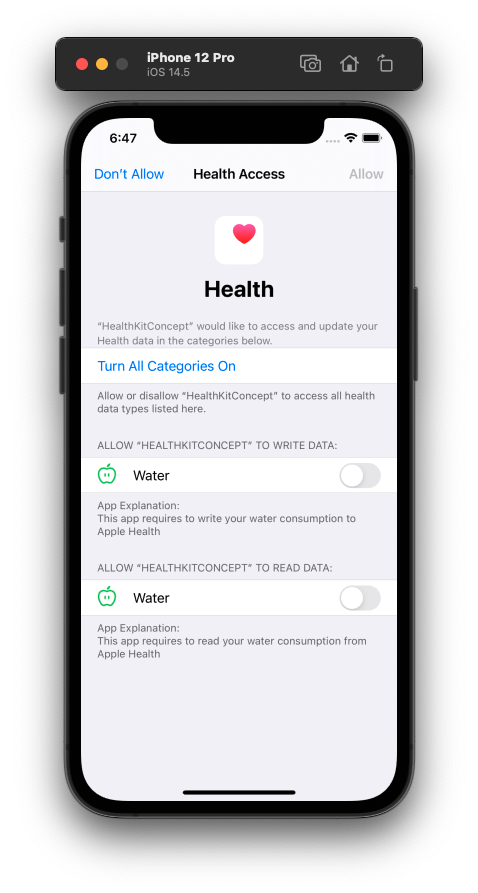
So, getting / asking for access to the HealthKit for the water consumption is working. Also for reading the data (which is 0 in the simulator; I hope it’s really 0 and not a bug  ).
).
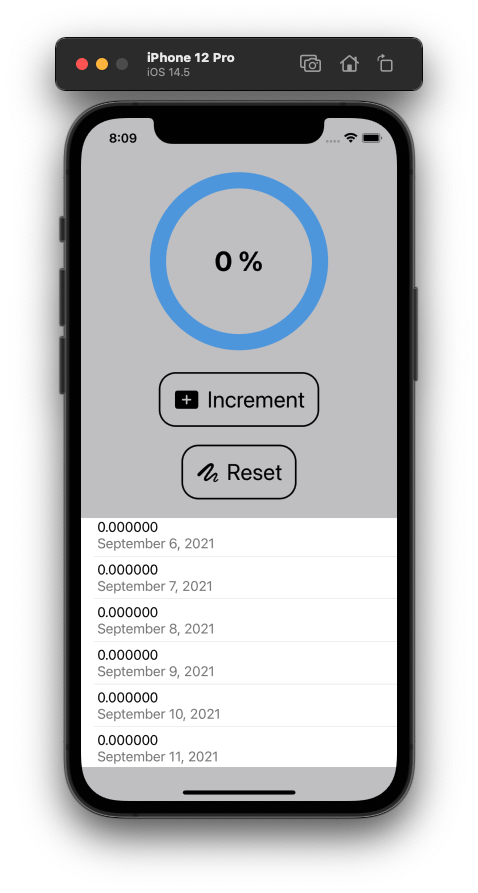
Tomorrow, I will try to write the water consumption amount to the healthKit data and display it.
Then, I will try to add more functionality (like consumption of water, coffee, tea, soda, beer, wine … something like that) and finally will create a new app which incorporates all the learnings from this app challenge.
Stay tuned 
2 Likes
Just a quick update:
On the pro side:
- I strengthen the skills I learned in the foundation course
- I struggled with some “simple” tasks but could solve them
- I force myself to create “reusable” code instead of writing the same code or even similar code two times (or even more) in a project. Easy example: I defined a color for my button. I wrote this code directly to the button in the view. Then I needed the same color somewhere else and I wrote the same code again (copy&paste) in that place. Then I wanted to make a slight change to the color. Argh. So I defined the color as a variable and used that variable all over the place.
- I also try to structure my code to make it more readable. As an example, I put all the code in the action part of the button. There are some if else clauses, so the whole action part got quite long. I then created functions and just referred to those functions in the action part of the button. Looks way more professional.
On the negative side:
- I’m far behind my schedule

Some key learnings:
- Do not name your view “TabView” if you want to use a tabView in this view … it will not work and you will only see an error message with no suggestions how to solve it. I renamed my into TabViewHydration.
- If you think you’re smart by displaying a numerical keyboard to make sure that the user can only input an integer value … you will find out, that the numerical keyboard will not disappear like the default keyboard when you tap anywhere on your screen. You need to add a button which does
UIApplication.shared.sendAction(#selector(UIResponder.resignFirstResponder), to: nil, from: nil, for: nil)
The last part made me think to get the user weight by the HealthKit. I will put this on my nice-to-have-list.
4 Likes
Still not finished. Why?
I was on vacation and there was some increased workload at my regular job before/after that
I still struggle to decide/use the correct variable types to pass data between the views. Looking at tutorials clear things up, but take some time
I still struggle to decide where (in which file) all the calculations should be done in the most efficient way
Although I think that this monthly challenge is great to learn the fundamentals … the app topic itself is kinda boring to me. I was more enthusiastic to display sports data than counting how much water you drink each day. Yeah. Stupid excuse. I know.
So, I have a nice splash screen to ask for access to the HealthKit

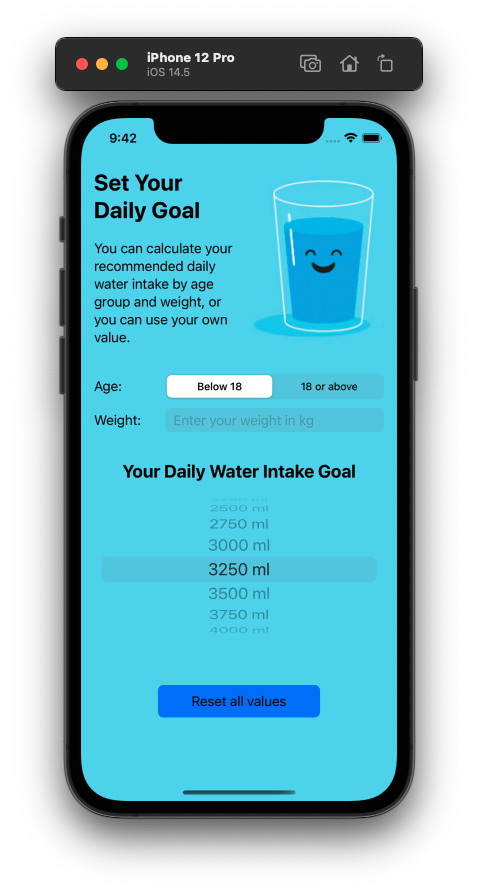
And the screen to enter your drinks:
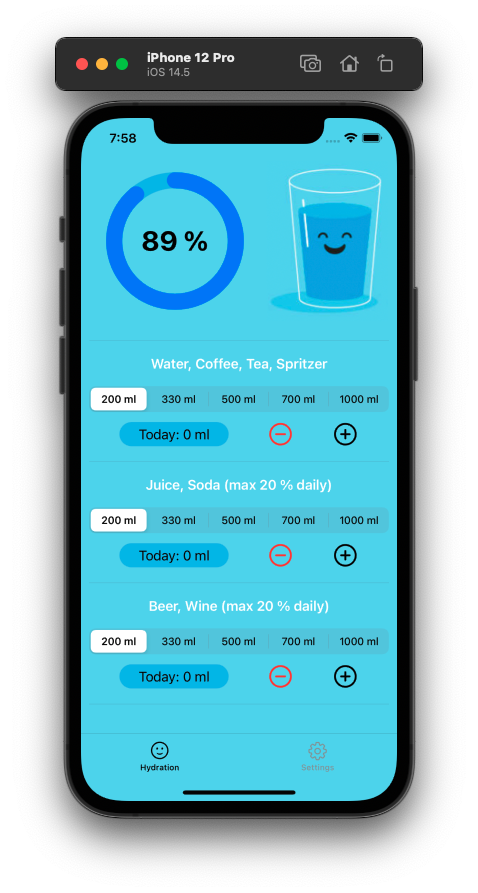
The face on the glass is changing based on the overall progress.
I can control the pickers individually.
I have the calculations done to add the drinks (and limit the overall intake to max 20% juice/soda and 20% of alcoholic beverages)
A picture of the settings tab is shown in above posting.
Still I need to do some work on the buttons and their actions and reset the values every day at midnight.
My plan is to finish the app within next week.
1 Like
Request access to HealthKit: 
Check for authorization status before showing the main view of the app:
Setting a default water consumption goal value:
Providing default water consumption goal values to the user:
Letting the user calculate the individual water consumption goal value based on his/her age and weight:
Update all calculations and views when the water consumption goal is changed:
Let the user add water/coffee/… to his/her daily goal:
Limit the consumption of juice/soda and beer/wine to each 20% of the daily goal:
Update the progress circle:
Limit the progress circle to 100%:
Update the water glass face in relation to the water consumption:
Let the user remove data (i.e. accidentally clicked on the plus button or logged a bottle of water but only drank half of it):
Add all the logics to not be able to get to a minus value for the water intake:
Still to do:
Write values to the HealthKit
Store data in user defaults
Create video of the working app
Reset all values each day
Ohhhhhhhh First time writing data to HealthKit and it’s working! 
As a beginner, it is a great feeling to extend the existing methods to calculate the amount of milliliters of the water intake (and for my 20% cap of soda and beer), link to the new variable and save the amount to HealthKit.
Probably as a total beginner, I would have written additional methods, but now I could just add some more lines to existing ones.
Aaaaaand, I can not only add the water intake, but also subtract if the user decides to do so. That was someting I feared I would not be able to do so easily.
Need to get some sleep now, will continue tomorrow.
(For me, there are so many small details in my app, I don’t know how to show everything in a short video )
The more I work on that challenge, the more I love it!
")