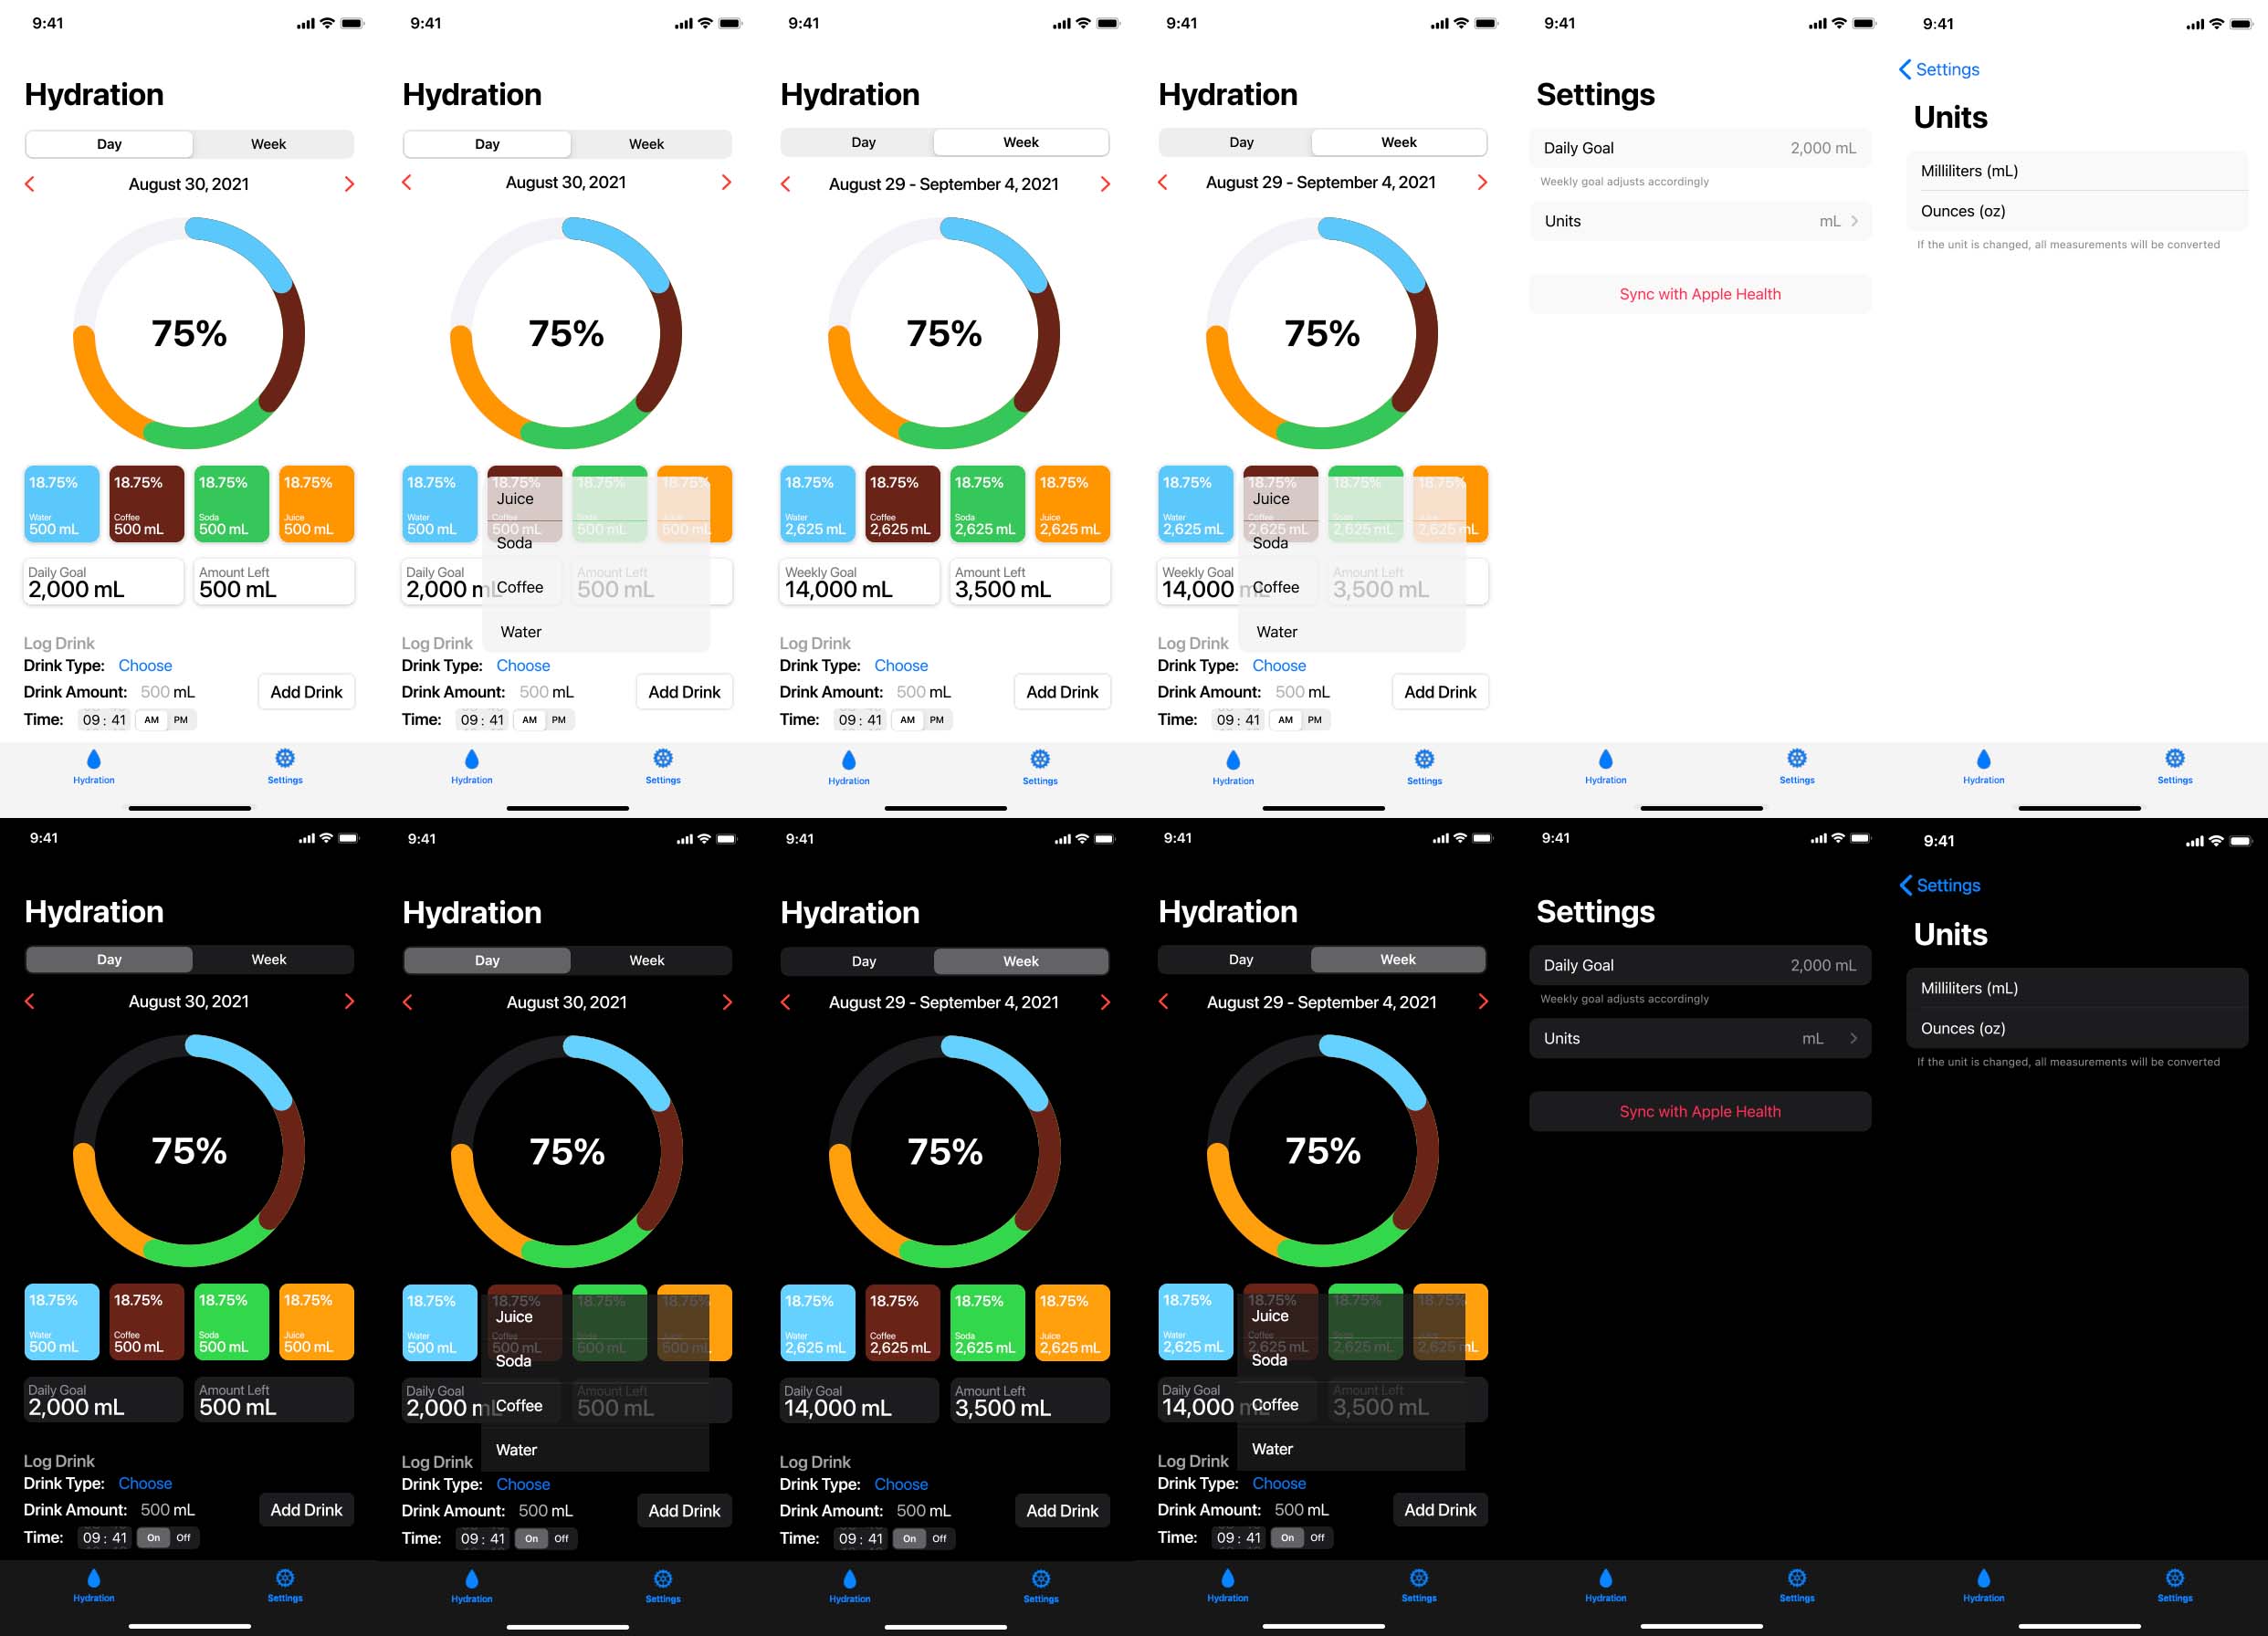
The first days were spent planning out my app and making mocks in Figma. The export for the images didn’t render properly in some cases (mainly the drink type menu), but it should give an idea of what I’m going for.
I did plan out some onboarding screens, but I’m not entirely sure what I want them look to like.
There are some things like Apple Health support, adding custom drink types, and a selectable accent color I’d like to add, but I’m not entirely sure what type of time I’ll have since college started for me last week.
I believe what I mocked up here should be doable at the very least.
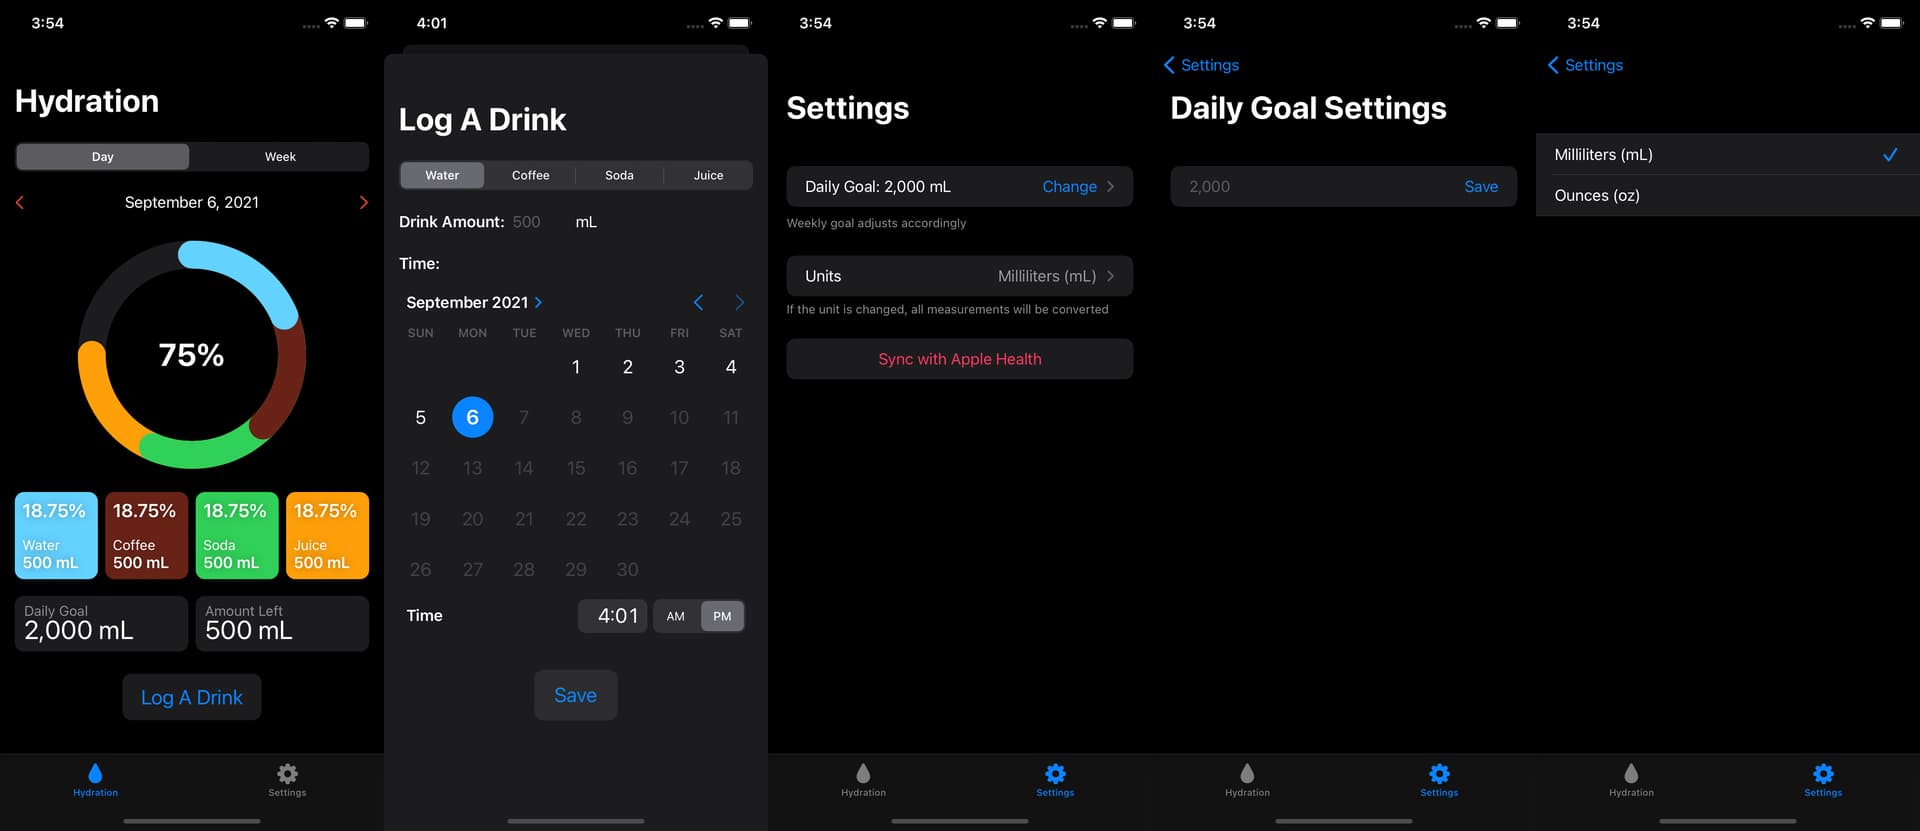
As you may have noticed, some things look a little different from my mocks in Figma.
I decided to give the drink logging it’s own screen separate from the data. The drink type is with a Segmented Picker instead of a Menu Picker. Since I have more space to work with now, I expanded the date/time picker, which is locked to make future dates unselectable.
The Settings took some reworking, especially for the Daily Goal. How I had it mocked up, it turns out, isn’t possible (or at least I couldn’t get it to work). To change the goal, a second screen is added where you can type in the number.
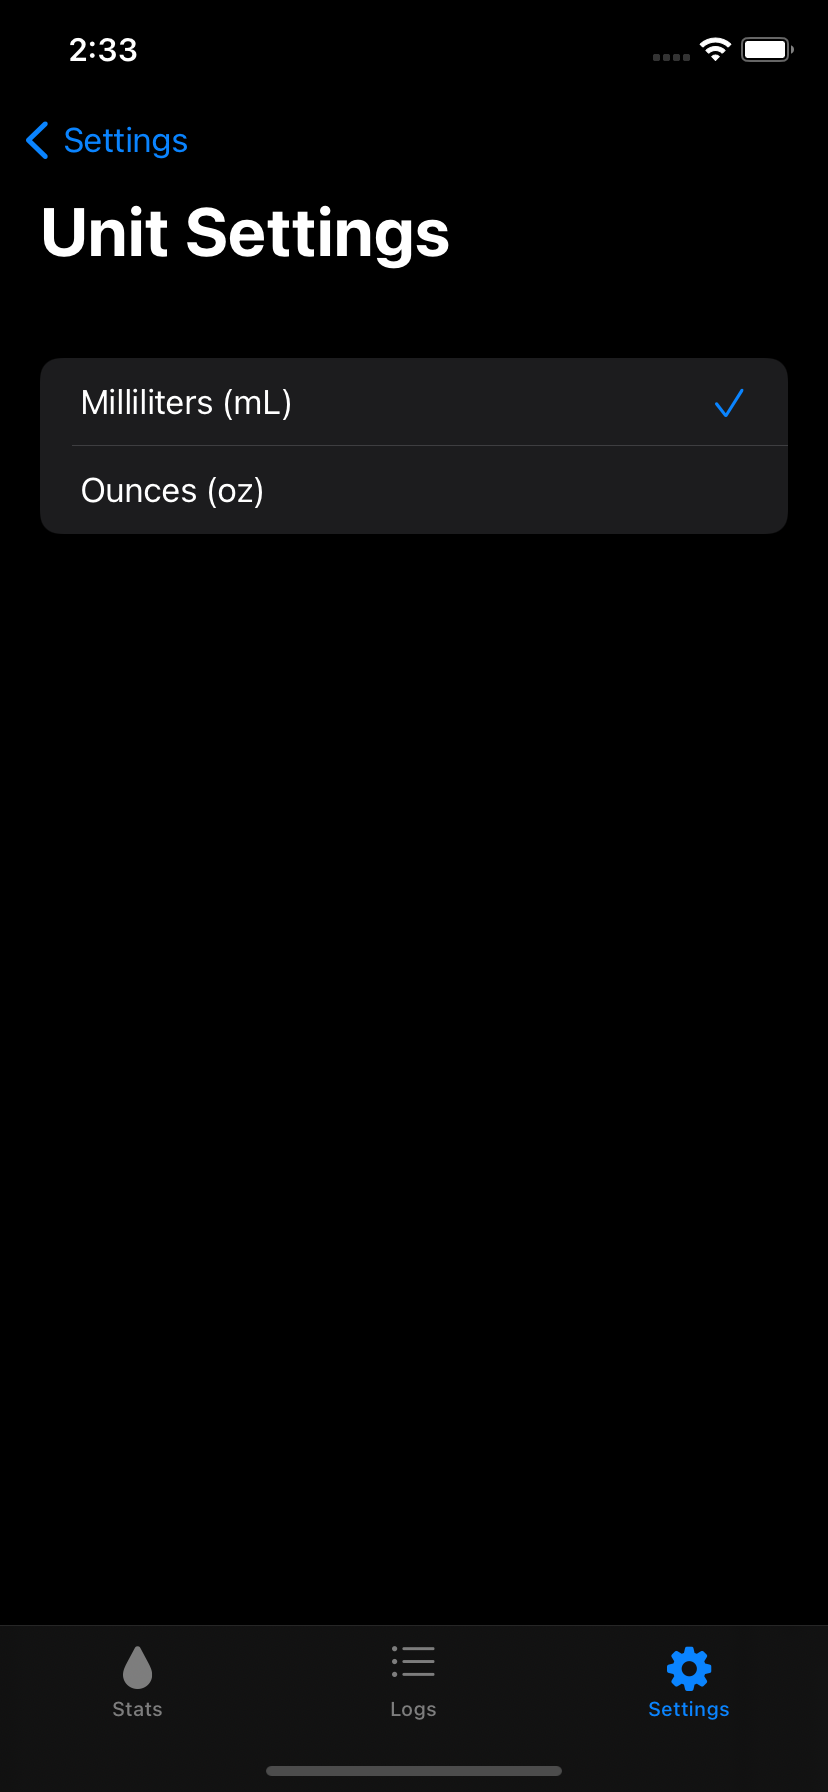
The other settings didn’t really change from the mock. However, I’d like to change the unit picker screen so it conforms to the rest of the settings UI and add a title. I haven’t figured out how to do this yet.
I’ve been considering have an extra tab that shows your hydration data in more detail. At the very least showing a breakup of when you drank something and what it was.
A lot of data are placeholders and things like logging a drink, changing units, and weekly data don’t really work at this point.
I’m not sure when my next chance will be to work on this, but I’ll probably add the extra tab next. I want to have the UI design squared away before I start the model.
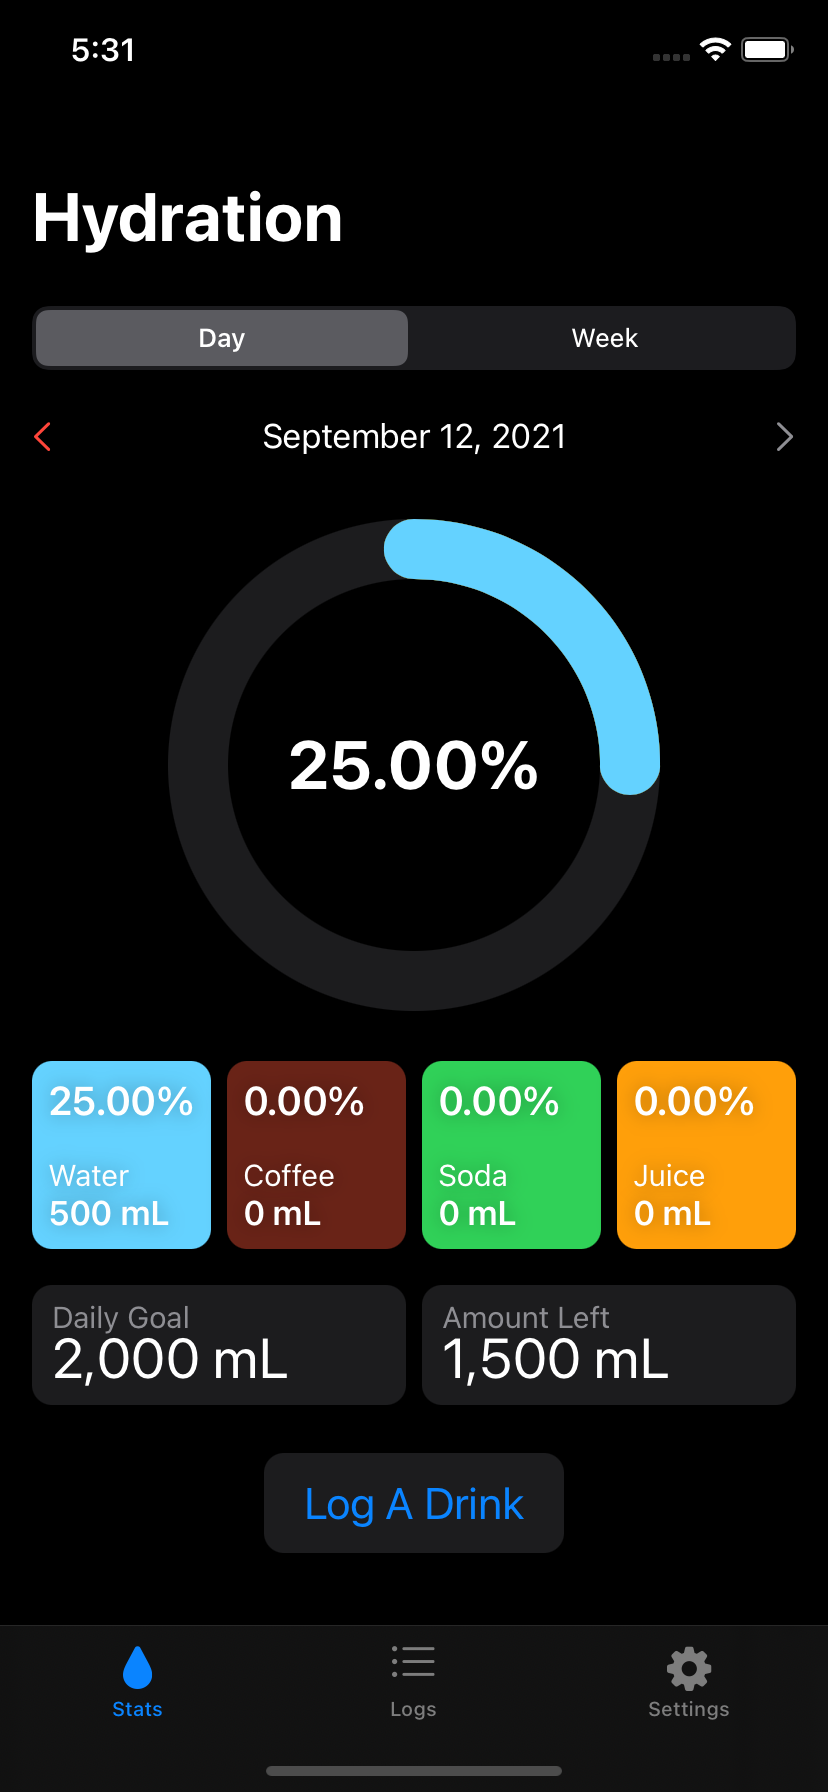
I wanted to show some of the same data as the first tab, but condense it down a little to make room for the logs.
I also started to put together my models and view model today. Using the UserDefaults tutorial, I set up loading from and saving to UserDefaults. So far, the app is set to save data when the daily goal is changed, when the unit is changed, and when a drink is added.
A lot of my work today involved elements that didn’t need me to log a drink. For instance, changing the daily goal and switching units and converting measurements based on settings.
A lot of the ground work is laid for logging drinks and displaying their data. This will lead to removing the placeholder percentages and remaining measurements. The calculations for the remaining placeholders still needs to be done as well.
Like yesterday, I continued work on hooking up the UI to the ViewModel. Everything is fully hooked up. Percentages, measurements, daily goals, and units.
I did have to create a bunch of functions for my ViewModel to retrieve the percentage or amount per drink type and the total. These functions work by using the current day or day and drink type.
Also, unit conversion is now across all measurements with my work today being on the Hydration and Logs tabs.
My next task will be on getting the day selector to work, so you can filter through days in the Hydration and Logs tab. For now, anything that requires a date uses the current day’s date and time (so today it’s September 8th, tomorrow it’ll be September 9th, and so on).
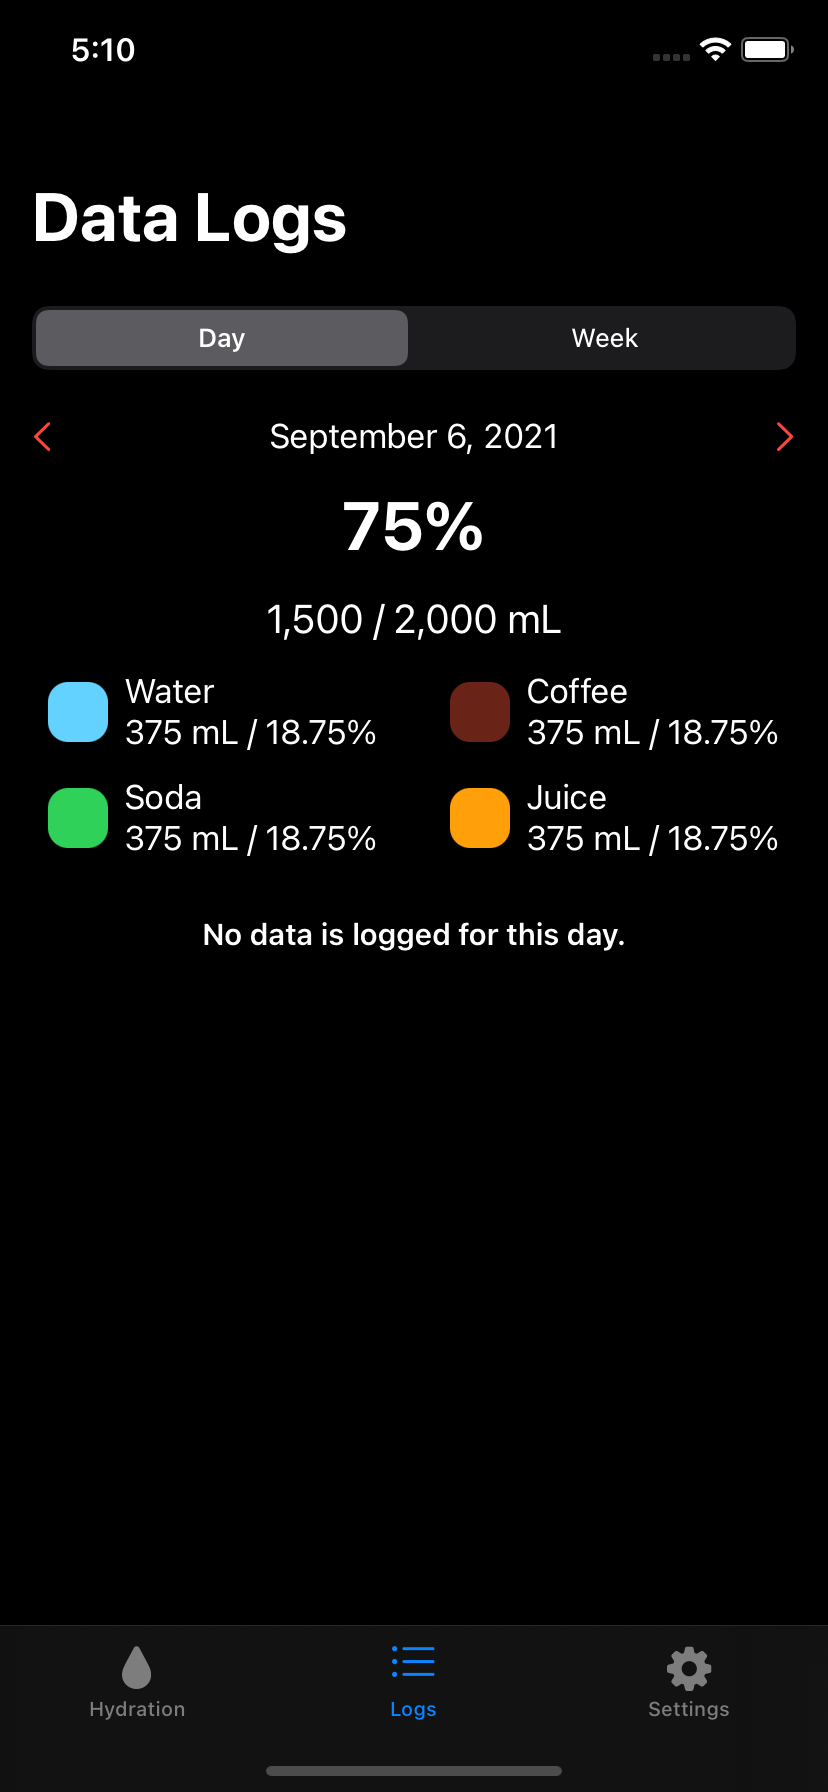
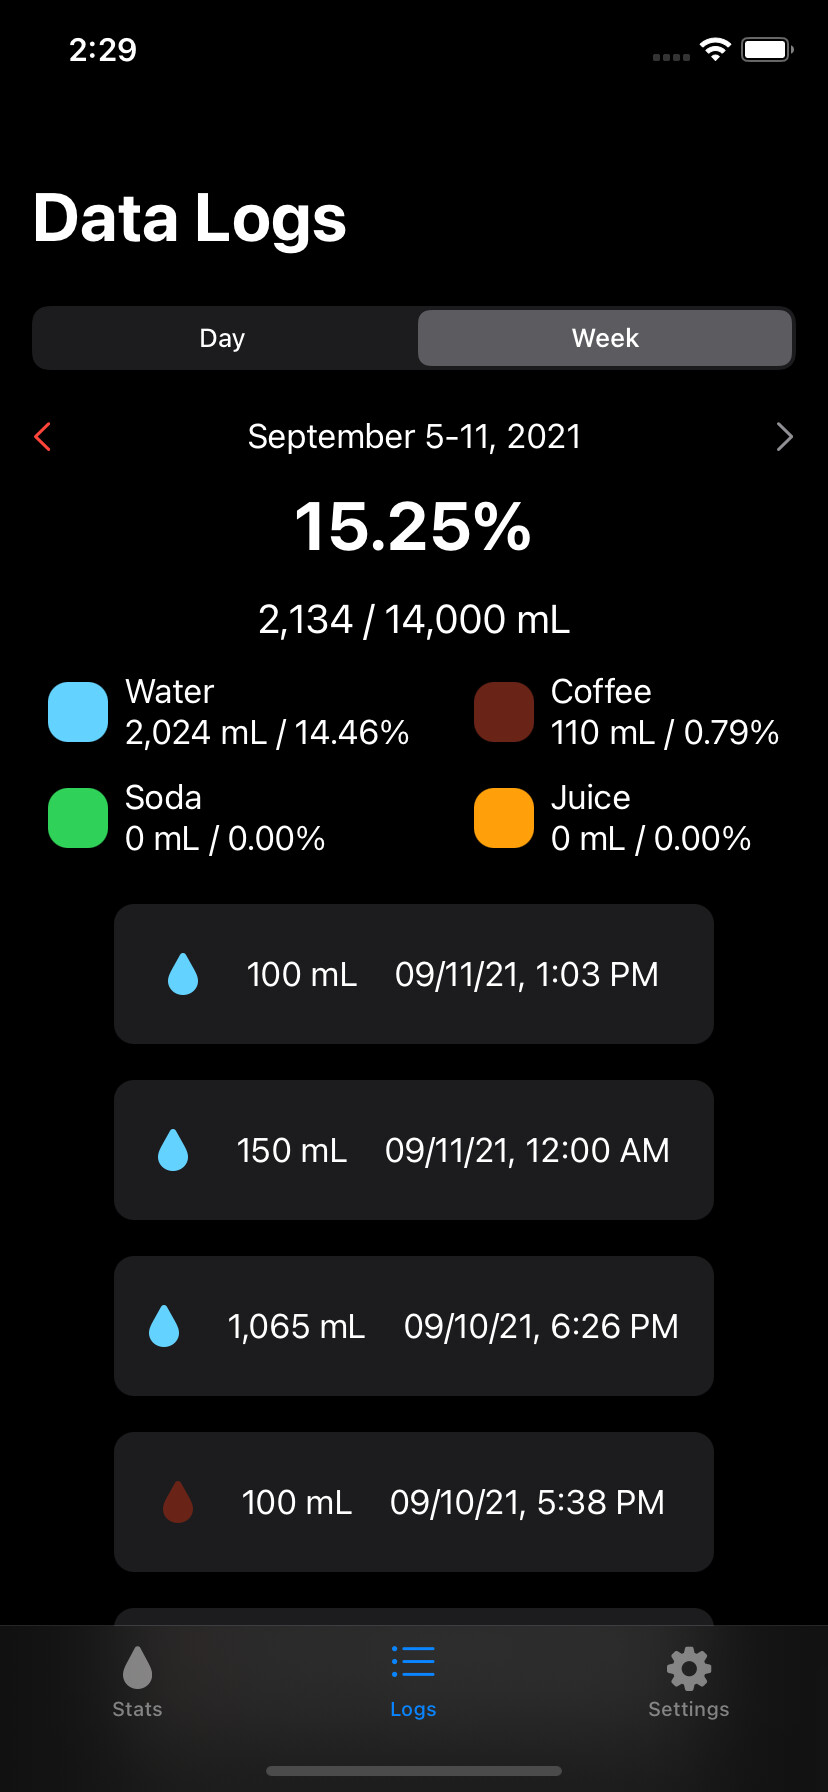
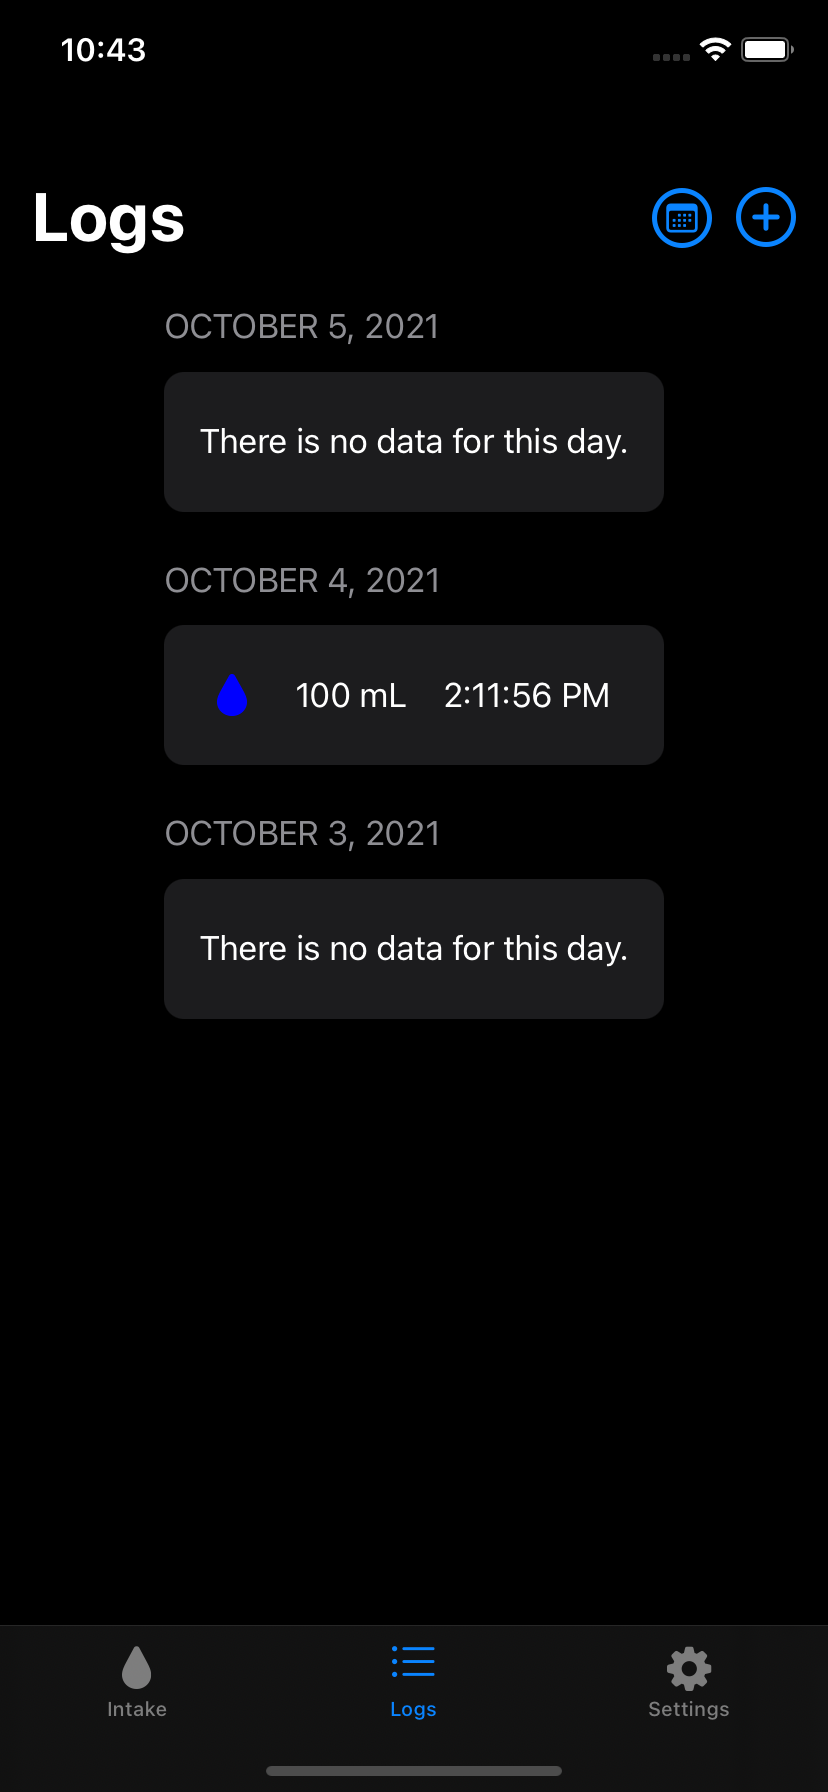
The only piece of UI I have to show today is the logs tab with drink logs.
First I worked on filtering through days on both the Hydration and Logs screen. You can’t go to a future data and the button is grayed out and doesn’t do anything. I also added a property in the DrinkData model to keep track of which day is selected, so it’s consistent across the Hydration and Logs screens.
The remainder of my work involved looking a data by the week.
A lot of it was in the view model. First I added a property in the DrinkData model to keep track of which week is selected.
Then I created methods for my view model to retrieve data by the week. A lot of these methods are similar to the ones for the for retrieving data by the day.
I then started to modify the Stats UI to pull data from the ViewModel.
This started with the Day or Week Filter. I had to split this into two separate views to accommodate a Date vs. a [Date]. For this I had to get a day range for a given week and then compute how the display text. What if the month is/isn’t the same? What about the year? It’s not as simple as a single date.
My next chance to work on this, will be spent on fully updating the UI to display the data by week.
Today I worked on getting the rest of the app to display weekly data.
I actually ran into a problem with the selectedWeek property. I set as a [Date()], but some of the weekly functions assume there are 7 days in this property, I had to add an update piece of code to this property right after the UserDefaults data was retrieved.
It also turned out I called the wrong function in one of my functions. The functions as suppose to get the amount of liquid type consumed across the week. I called the function that gets all the drinks for the week.
From there, I went an updated the UI across the Stats and Logs screens to display weekly data. A lot of it was done with inline checks against the selectedTimePeriod State variable so I know what data to call, which is linked directly to the Segmented Picker.
Just like the days, the week selected is also consistent across both tabs, when week is selected for both.
The only major change made in the Logs screen was putting some reused code in its own file, so I don’t have the same code written four times.
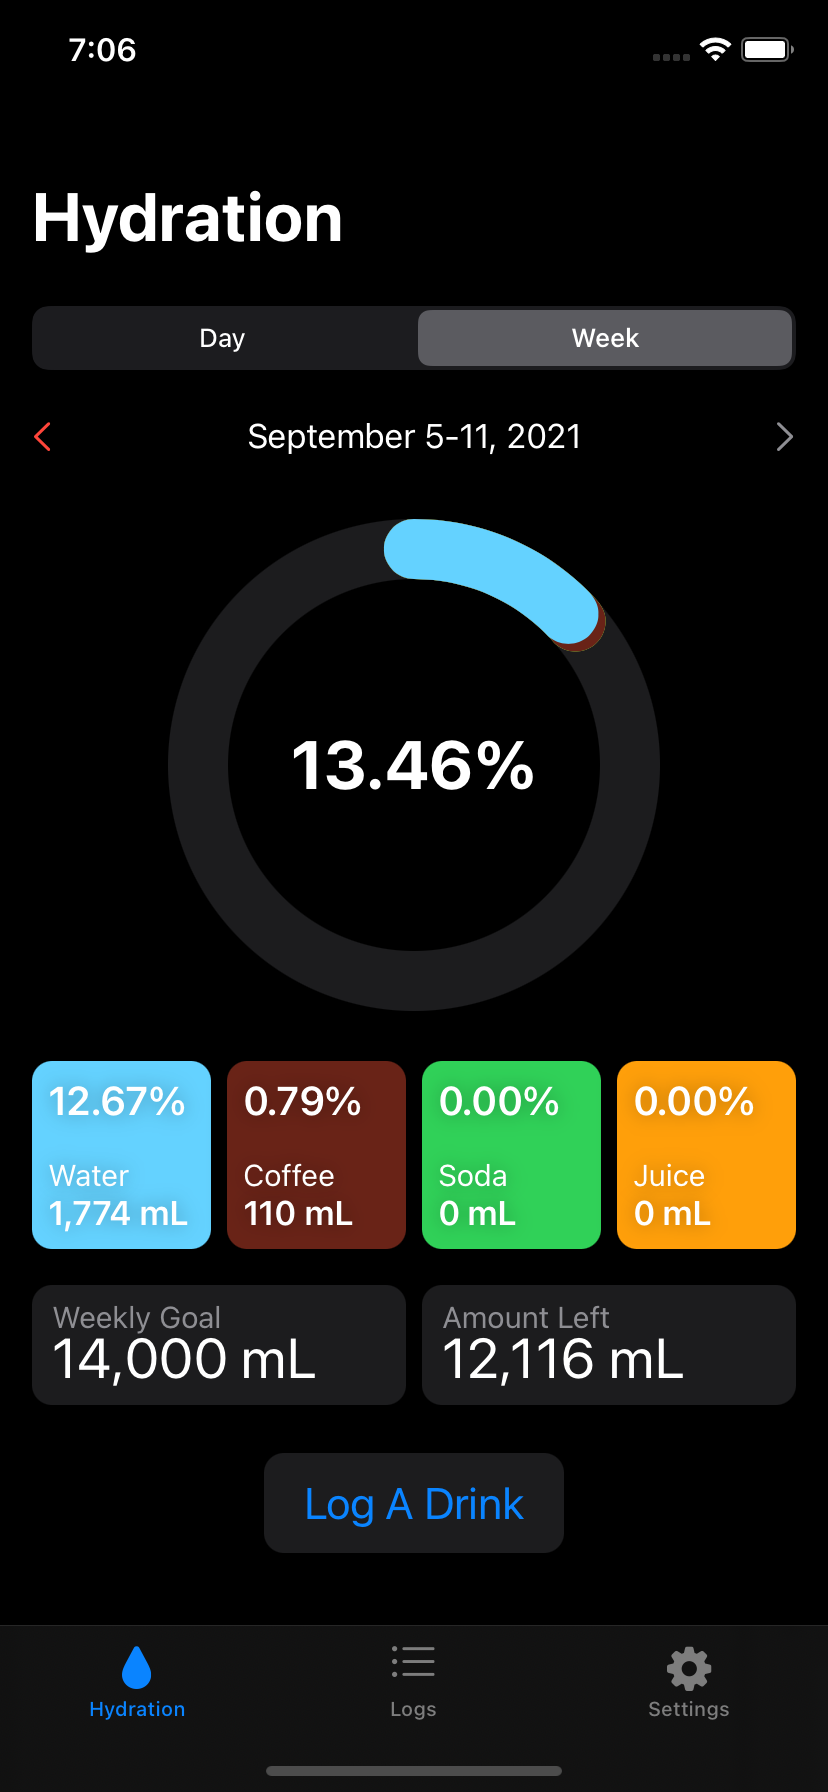
Here you can see what the weekly data views look like now:
The only major UI issue I want to fix is the alignment of the drink type breakups in the logs screen. I’m also toying around with changing the name of the Hydration tab.
My next goal after this is Apple Health support. The button is still in the Settings tab, but just doesn’t do anything as of yet.
I did however, make some minor UI improvements. I fixed the alignment of the drink breakup for the Logs screen and added the date in the logs screen when week is selected. I also gave the Units selection a UI consistent to the rest of the Settings. I decided to rename the Hydration tab to the Stats tab.
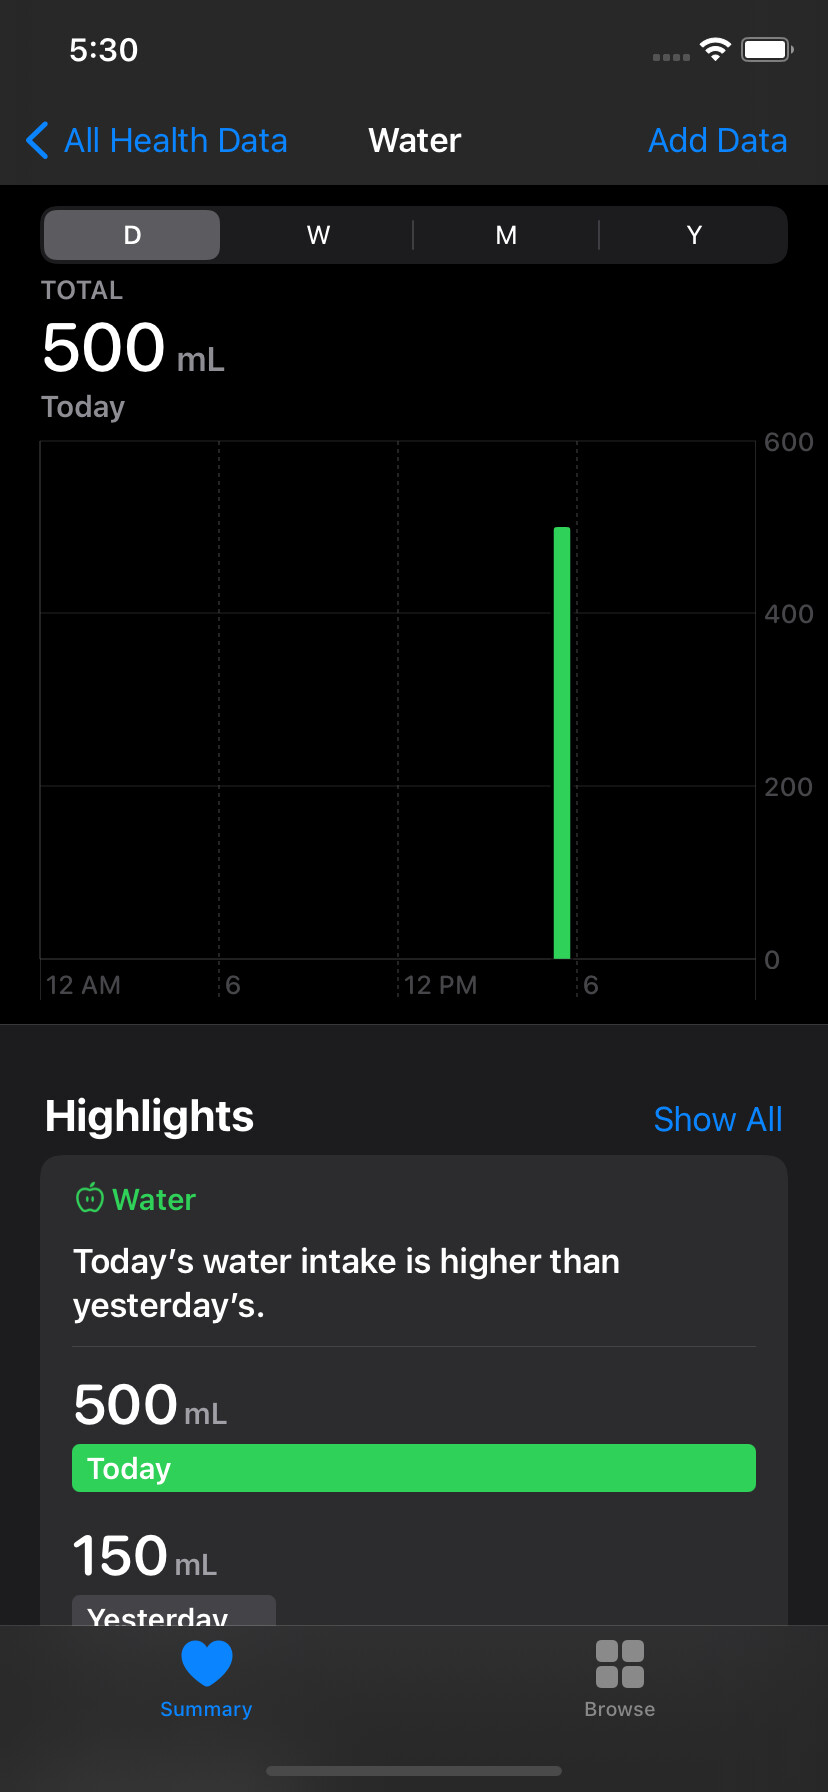
HealthKit support was a little complicated for me to wrap my head around at first. The SwiftUI tutorial in the announcement post for this challenge for the most part got me through, but what got me was the interval to check data at.
From the video, the interval was by the day, so the data was lumped together. If I drank 15 oz and 9 oz of water on the same day, it would combine this data (you can see this in the second log from the top). It took me a little to figure out if I changed it to by the minute, I could get the exact time and prevent the data from being combined.
When a drink from Health is added, I check to make sure the amount consumed isn’t 0 mL/oz and that it doesn’t already exist within the app. The second check is by comparing the amount, drink type, date, and time of a Health drink against the app.
I’m not sure how much more data I can pull/write to Health. There aren’t any metrics for soda and juice consumption and there is only a metric for caffeine intake, which can vary depending on what type of coffee you drink and is measured in milligrams, which doesn’t measure fluids. I’d have to ask what type of coffee was consumed and use an average caffeine content to put it in Health.
So far, the app only reads from Health, not writes. My next step will be getting the app to write data to Health.
Today I worked on getting the app to write to Apple Health.
Using the WWDC 2020 video provided in the challenge announcement post, I was able to figure this out fairly quickly. However, I wanted to skip the drinks already in Health.
In order to determine which data to save to Health, my model now has a property that tracks when the last save to Health occurred as a Date. When logged drinks fall past this date, they will be saved to Health. This value can be nil, in the event that Apple Health syncing was just set up.
As of now, data is pushed to Health when the Sync button in settings is pressed or when a drink is logged. The later, doesn’t seem to work properly, with nothing be saved. I think this is because the drinks array hasn’t updated with the new drink yet.
I don’t think I’m going to implement any support for Caffeine intake, so this will probably be scrapped.
My next priority, is ironing out the bugs with this and expanding the units selection past milliliters and US fluid ounces (Imperial fl oz, US cups, Imperial cups, and liters).
Here is a screenshot of synced data across my app and Health for today:
Today I was able to iron out my bugs with logging data to Apple Health.
I also added Imperial Fluid Ounces into the app. Because I now have a third unit, I can’t assume anymore that if it’s not Milliliters, it US Fluid Ounces. I reworked my measurement conversion completely.
The function now takes in two strings: what the unit was and what it is now. It compares these strings to the unit names in the Constants file to determine what conversion to use.
This is also where I discovered the Measurement structure and UnitVolume class. Since HealthKit handles unit conversion regardless of what you push to it, I wondered if there was something similar outside of HealthKit, and there was.
These can handle unit conversion with much more accuracy than the decimals I was using. Turns out there’s UnitLength, Mass, Angle, Pressure, Temperature, and so on. Which I’d imagine work similarly for conversion.
Another thing I had to rework is unit abbreviation and names. I was using mL or fl oz as something to compare off of through the app. But, with Imperial Fluid Ounces, I decided to use the full name instead of just the abbreviation.
Like today, I’ll work more on expanding unit support to cups and liters tomorrow.
I decided to streamline the way the unit conversion function works. Instead of having a bunch of if/else if statements, I created a dictionary in the Constants file. It takes in the name of the unit and spits out the UnitVolume equivalent.
I added Liters and Cups (US) as unit options. Because these units are bigger than Milliliters and Fluid Ounces they often have decimal points in them. I had to change the way decimal amounts were displayed depending on if the amount was a whole number or not. Also both instances of the keyboard are the Decimal Pads now.
I also decided to remove Imperial Fluid Ounces as a unit option. The reason is because of Cups. Cups, like fluid ounces, have US and Imperial variants. There’s actually a third variant of cups called Metric Cups. UnitVolume only has metric cups, while HKUnit only has imperial cups. Because unit conversion and HealthKit uploading would be a problem.
There are some UI tweaks I want to do along with better supporting smaller iOS devices.
The app checks whether to update the current day and week when the app is opened after being closed.
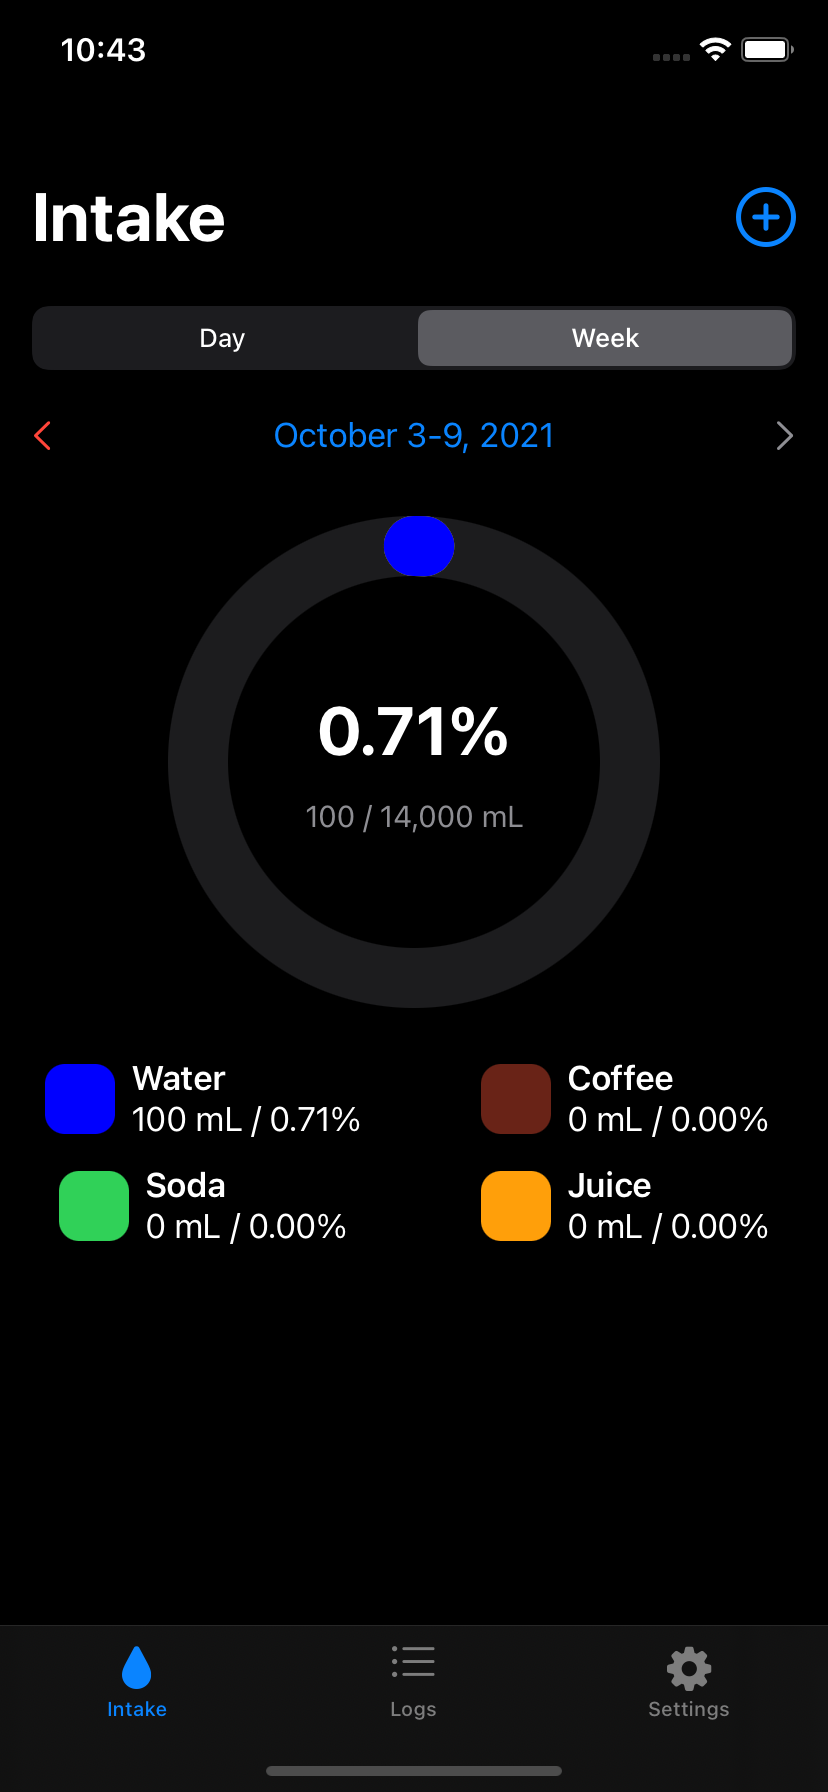
The Stats (now Intake) View uses the Data Log Drink Breakup instead
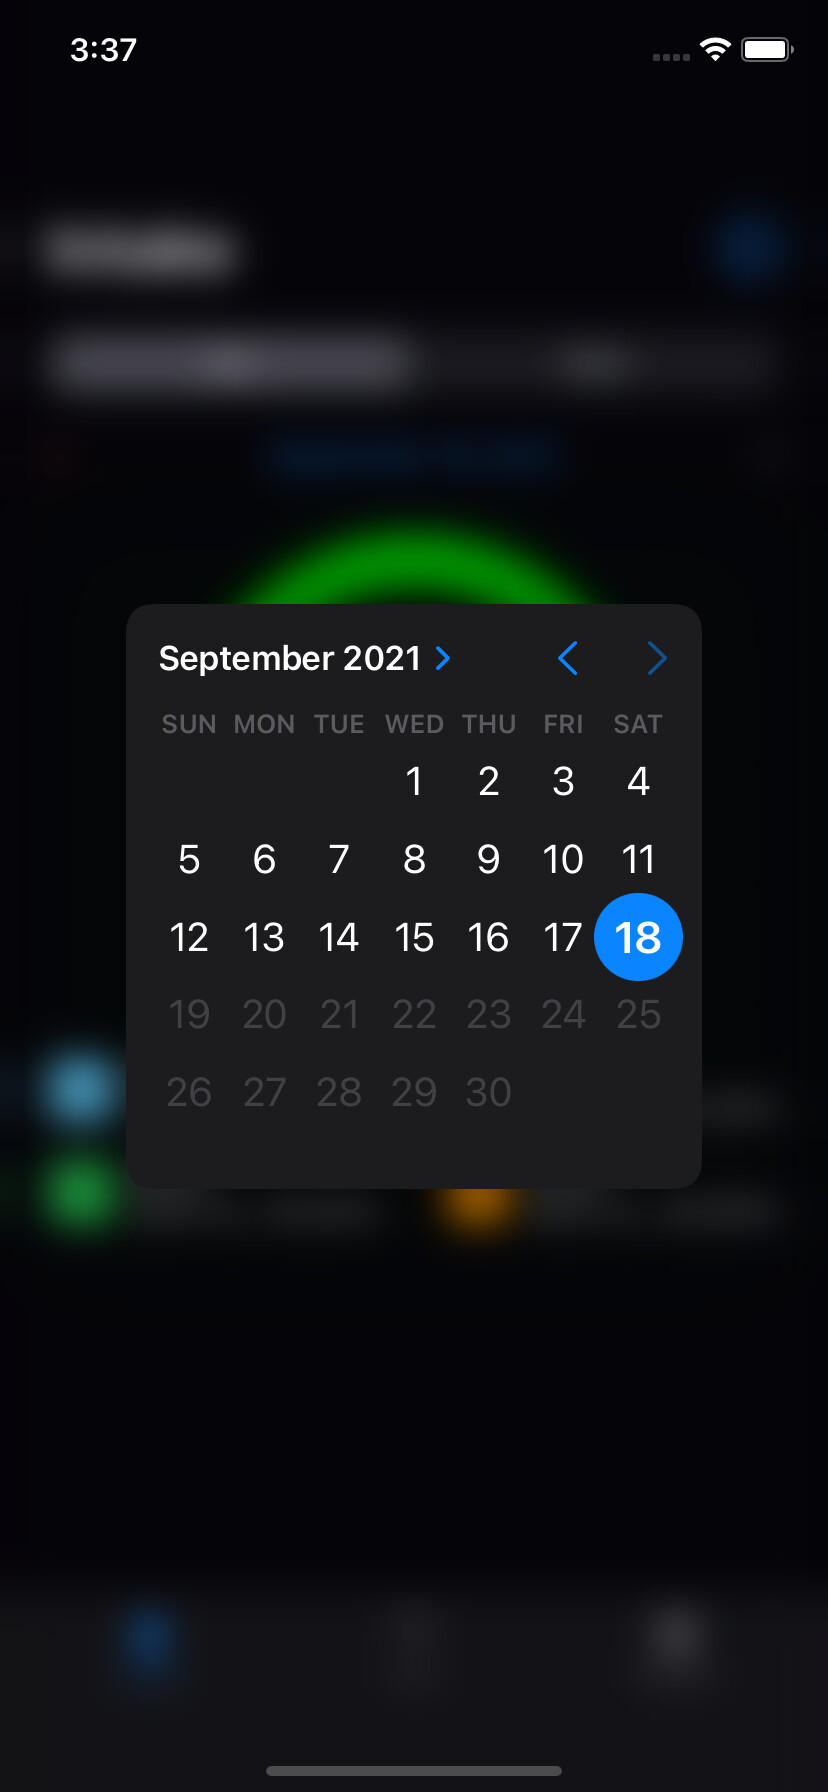
By tapping on the date or week range, a DatePicker appears, allowing for more precise control over displayed data. This updates accordingly for both by Day and by Week.
When the user meets/exceeds their goal, the split Progress Bar is a green circle (a different green from the Soda color)
The “Add Drink” button is now placed next to the title of the Intake View
Cups is displayed as a unit option (I forgot to update the Settings view for it)
Here is a gif of the animation between 100%+ and <100%:
Next time, I want to update the Logs View.
I want to put the date for the data by week outside the specific log. Kinda like a section header with a Form.
I think I’m going to remove the Drink Breakup information from the Data Logs view so there’s more room for the logs, especially for smaller iOS devices.
I’m also considering just using the pop-up DatePicker instead of the Day/Week Selector.
Most of the elements were completely removed with the focus being on the logs. The day-week selectors, percentage, and drink type breakup.
With the day-week pickers and specific day/week selectors removed, the logs view operates based on weeks. I felt this makes a little more sense.
The date can be changed by a button that shows a pop-up calendar. Like in the Intake View, the week will be adjusted accordingly. Additionally, you can now log drinks from this screen as well, with another button right next to this one.
Additionally, the logs now have sections by date and it won’t show information from a day that hasn’t happened yet. Any previous days with no logs will display that there aren’t any logs.
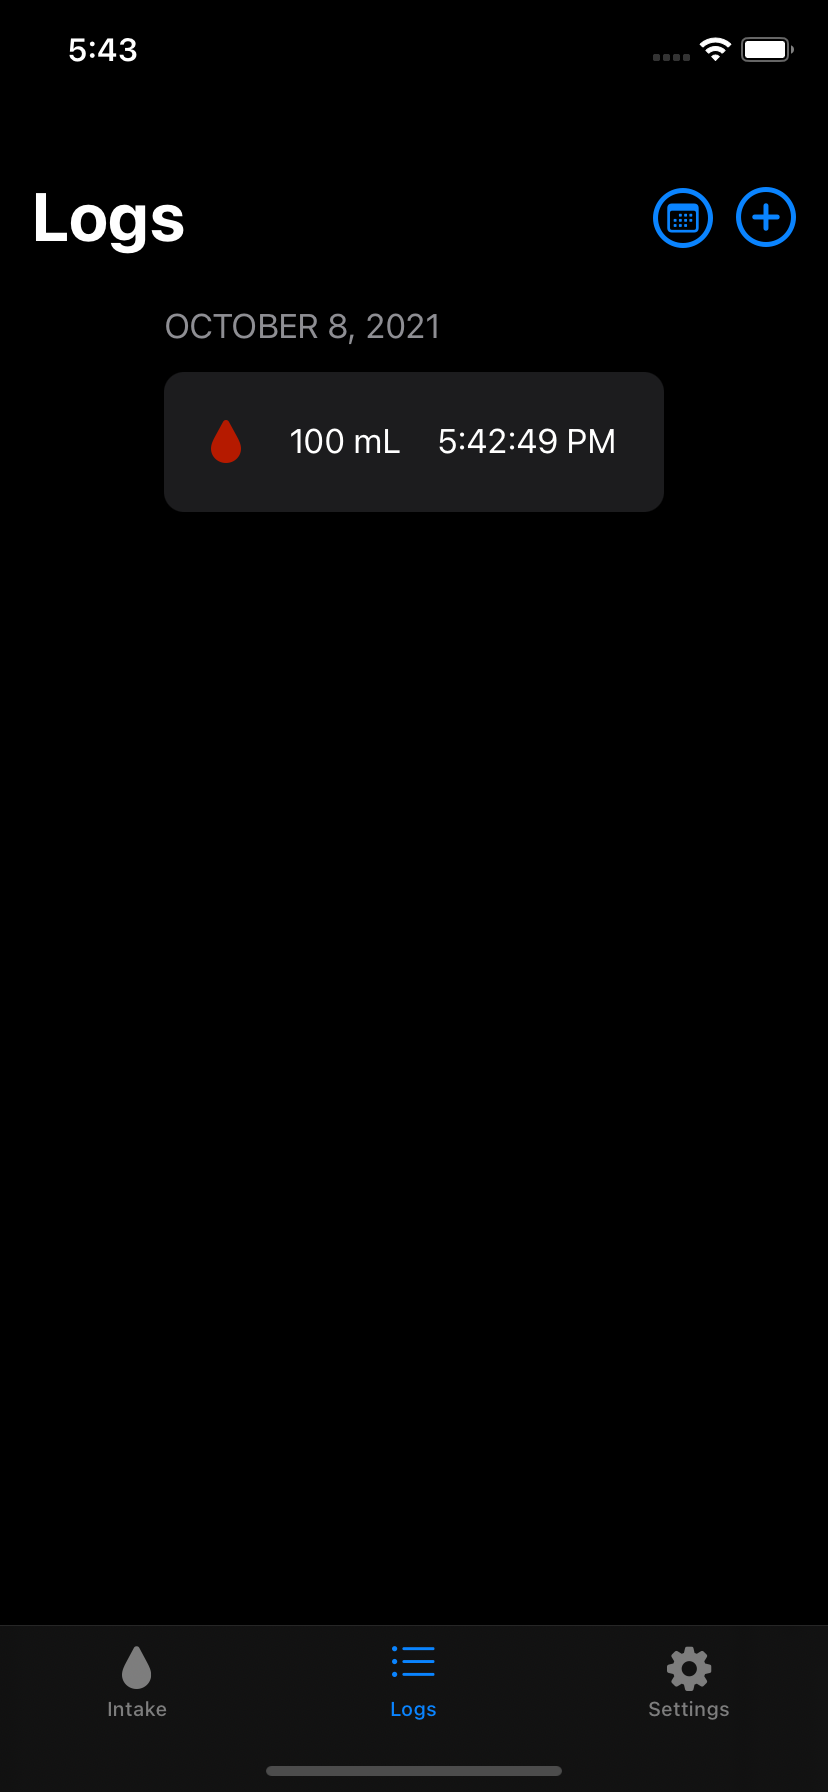
Really the only surviving thing was the way logs are displayed. The drop, amount, and time.
Something else to note, with the release of Xcode 13 and iOS 15, I decided to continue to work with iOS 14 for the remainder of the challenge. This is mainly because I don’t have a lot of time to work on this.
Time permitting, I want to optimize the app for the other iOS 14 iPhones.
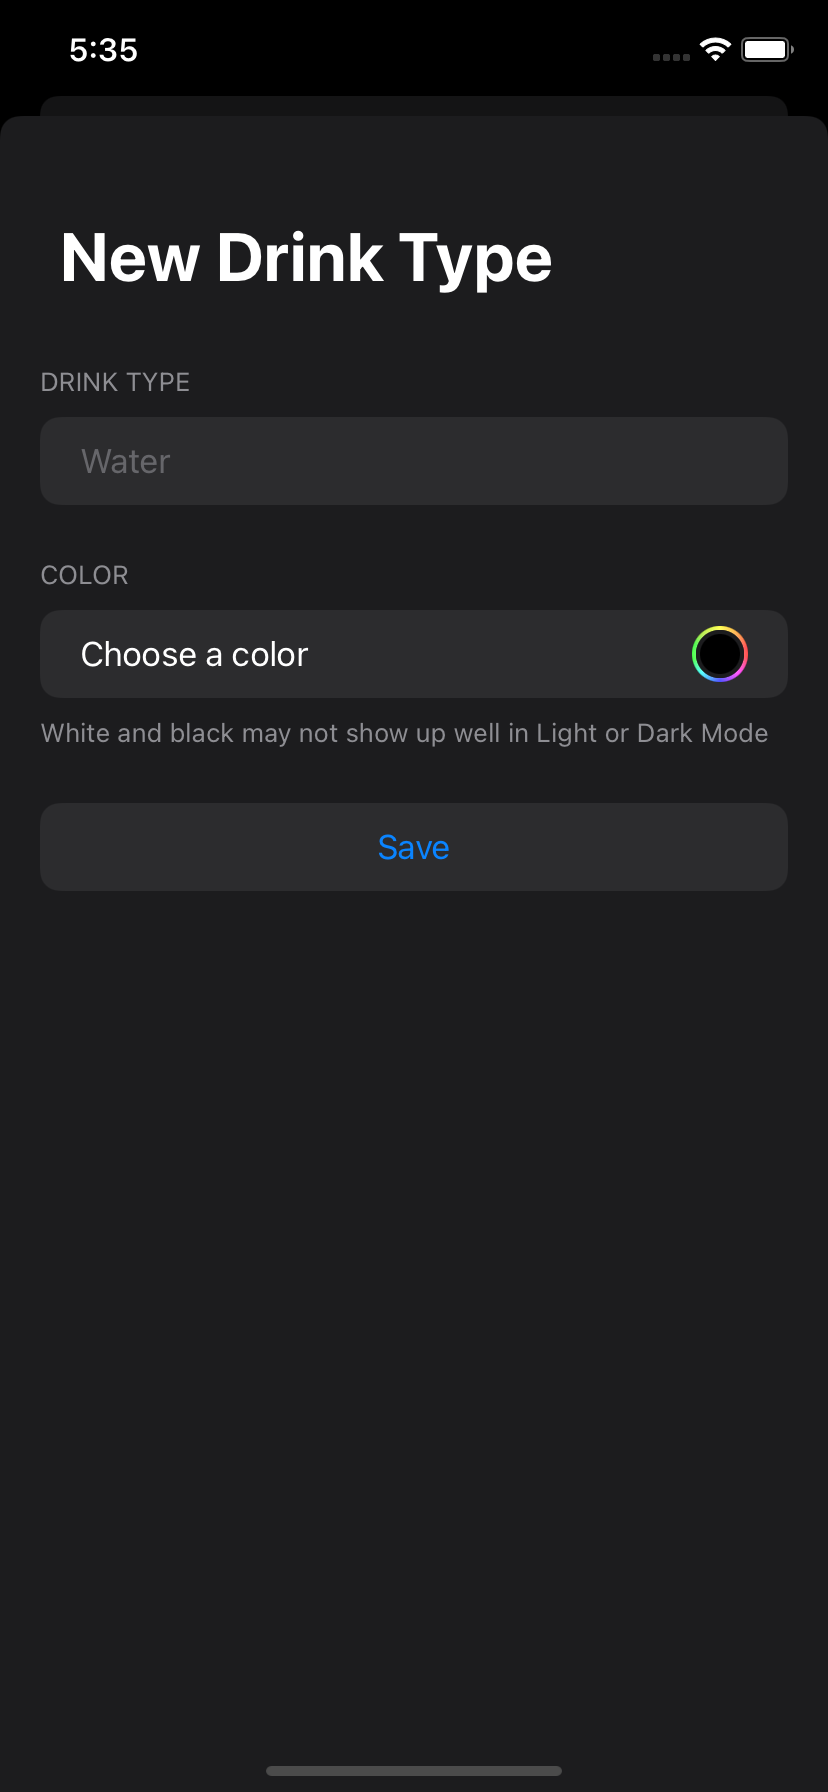
Next, I’ve been working on the ability to add custom drink types.
My current system uses variables in the Constants file to get the right drink type and color. However, this system doesn’t work for custom drink types and colors.
My first thought on this, was to have drink types and colors stored in the model, as none of the colors and custom drink types would save otherwise. I created an array with the drink types and copy-and-pasted the dictionary that I had in the Constants file.
However, this is a problem with this. My models have to be Encodable and Decodable, which is a protocol that Color and UIColor, don’t conform to.
I had to make a new struct, called CodableColor that stores a UIColor that can be encoded and decoded. I gave it a function that converts the stored UIColor into a Color, to make things a little easier.
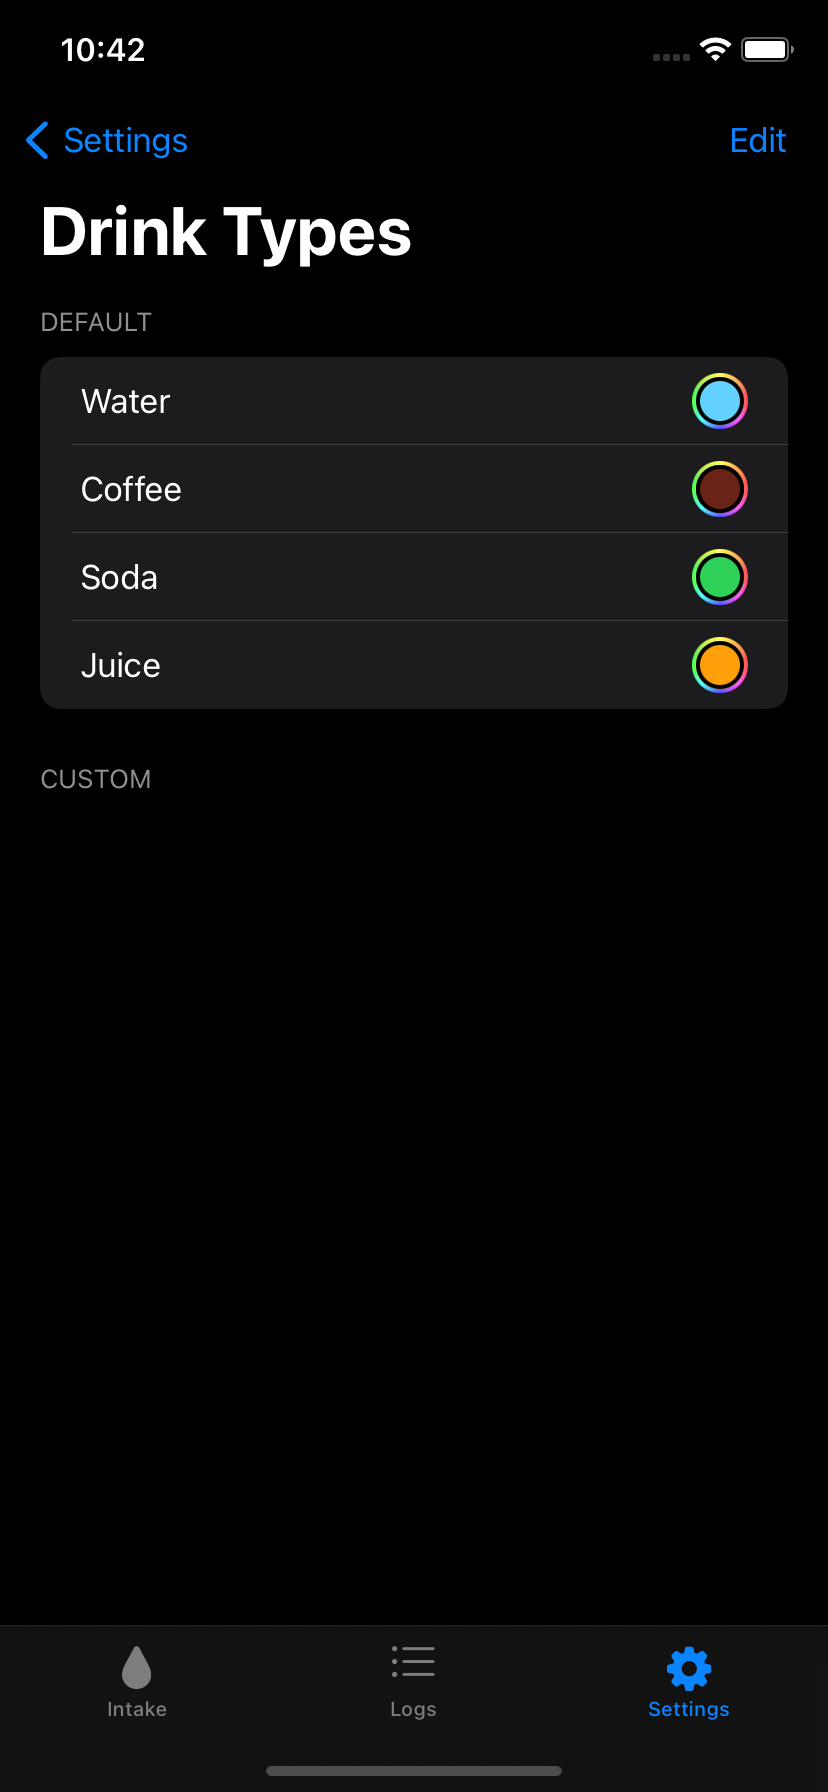
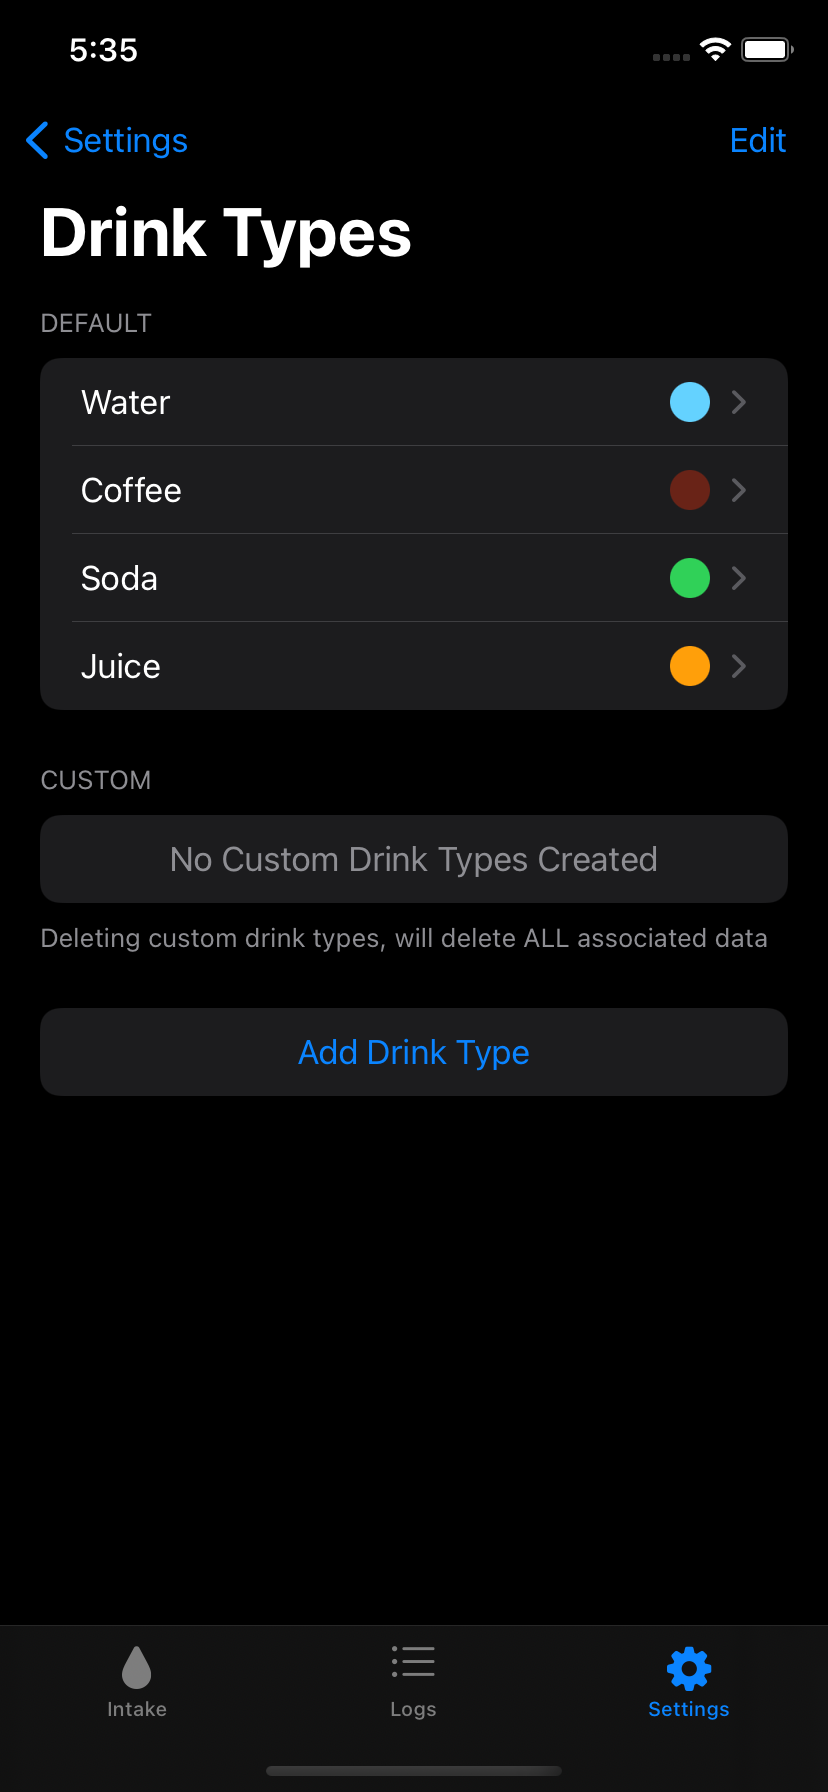
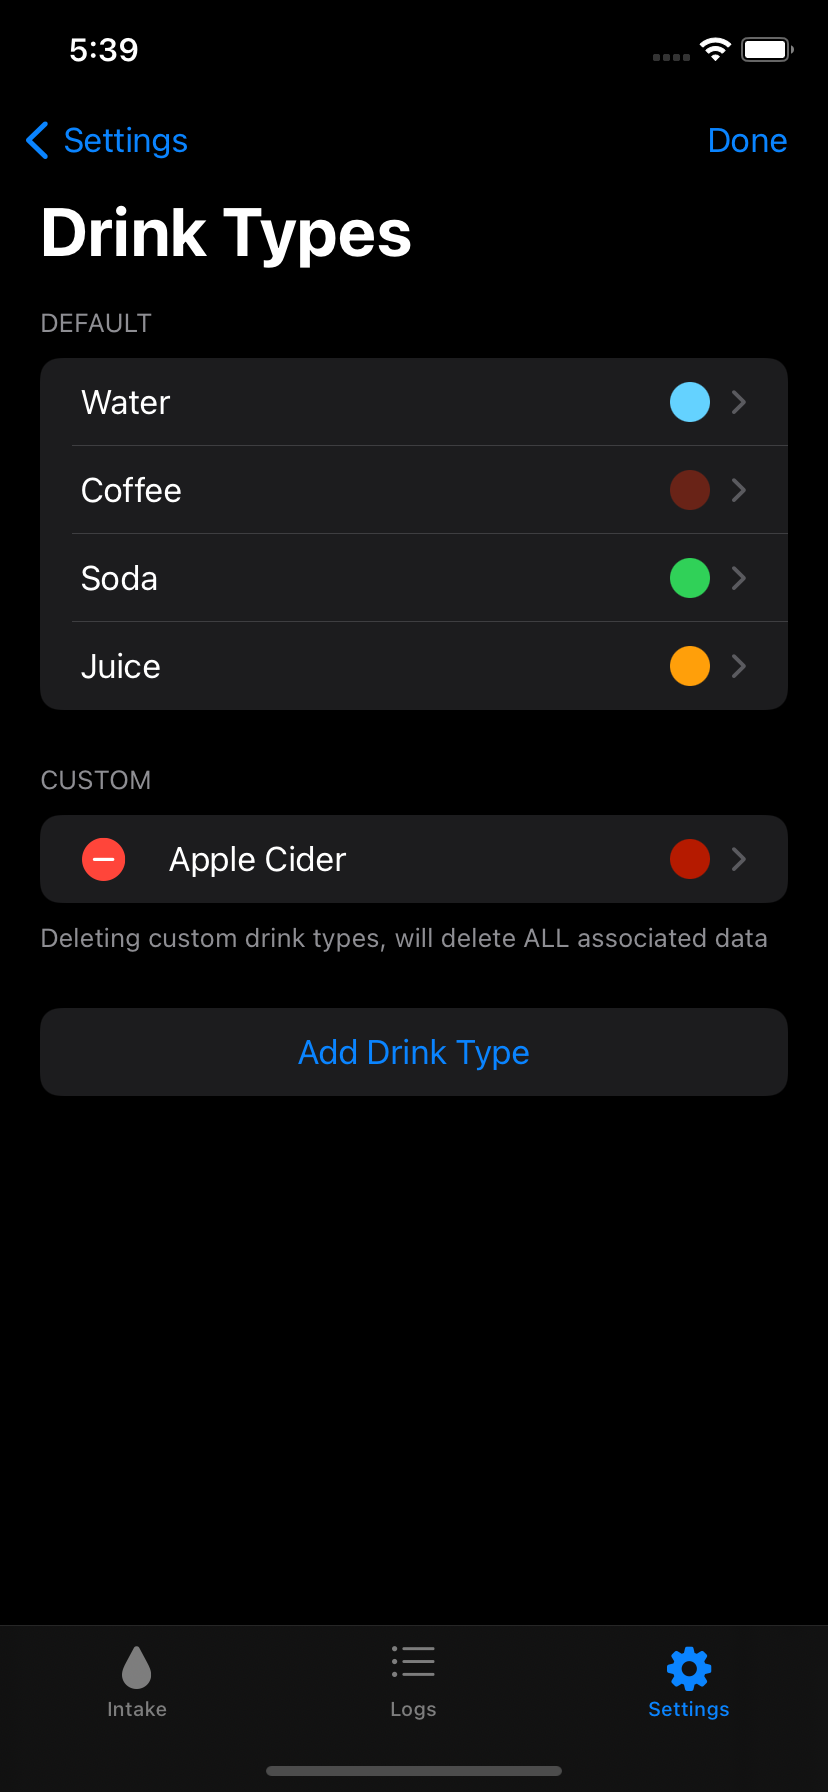
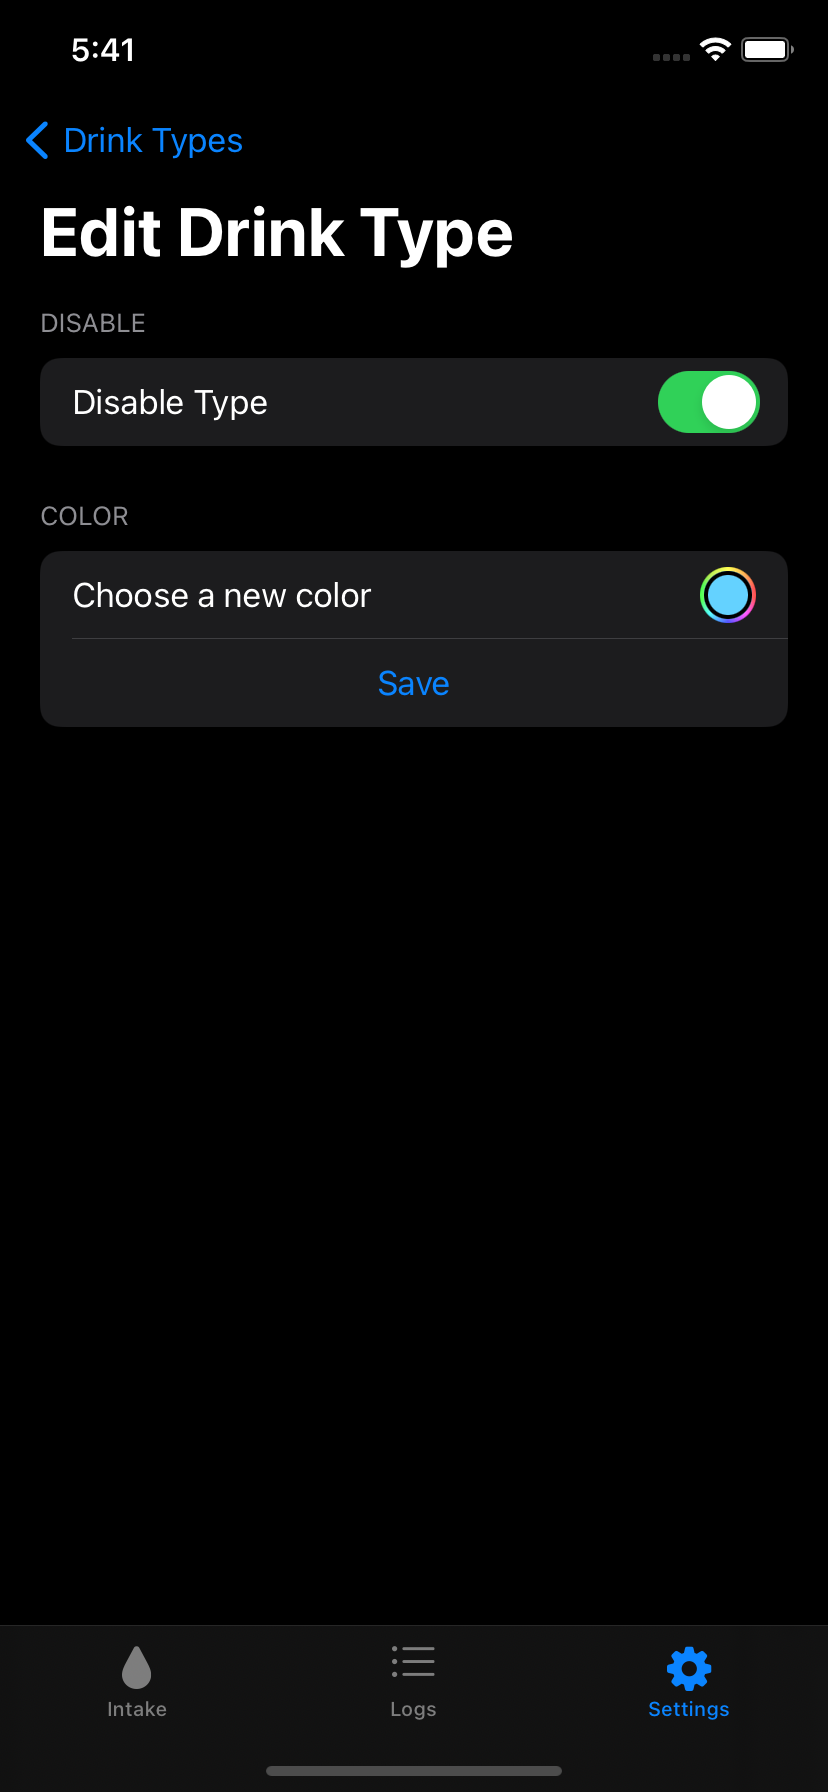
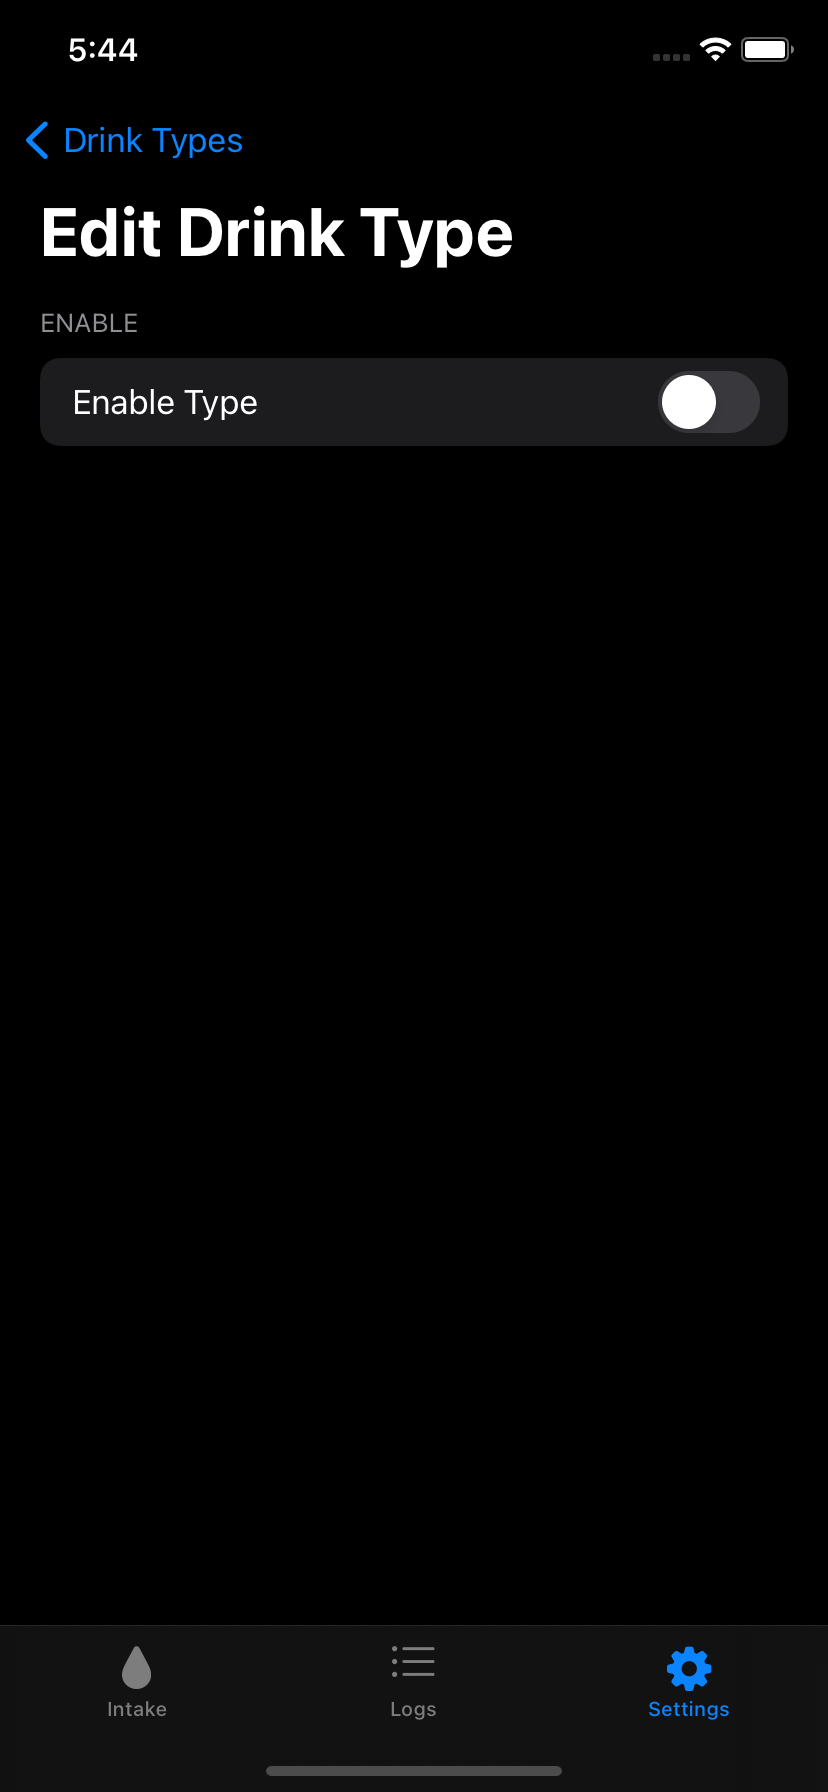
Settings have a new page for Drink Types now. The default colors (Water, Coffee, Soda, and Juice), now have an option to change their colors using a ColorPicker, which is reflected across the rest of the app.
I also had to go through the app and have the app pull color and drink types from the model instead of Constants. That being said, the key for water in Constants is still used, primarily in HealthKit functionality.
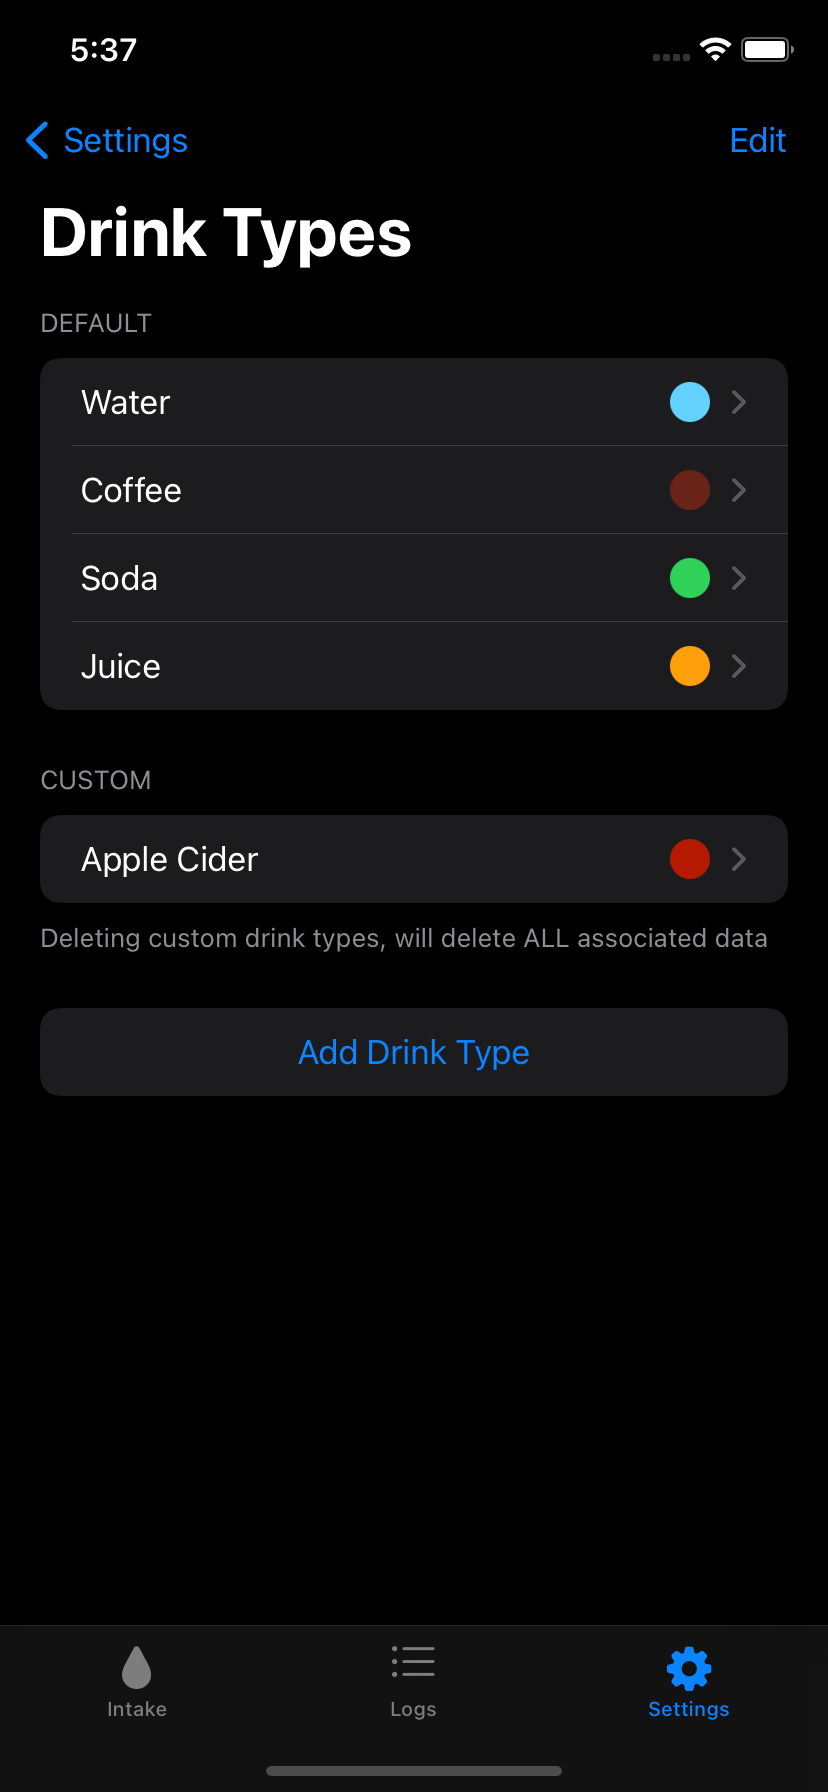
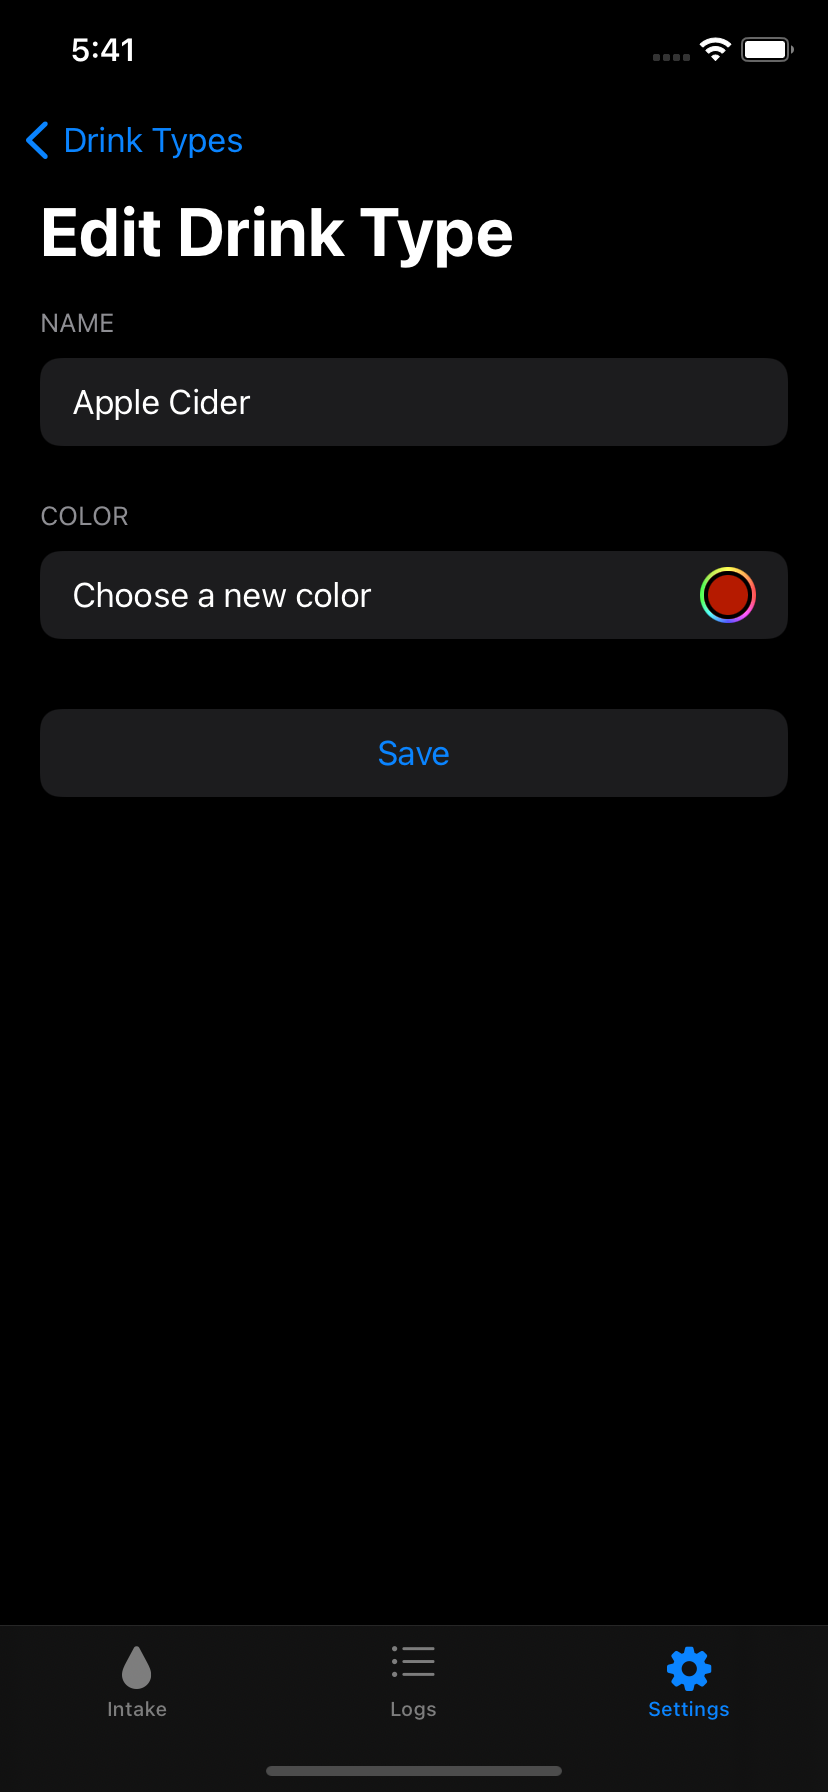
In addition to displaying custom types, you can delete them to. You can either press edit or swipe to delete. As you may have noticed the UI for the drink types looks a bit different, there’s a reason for this.
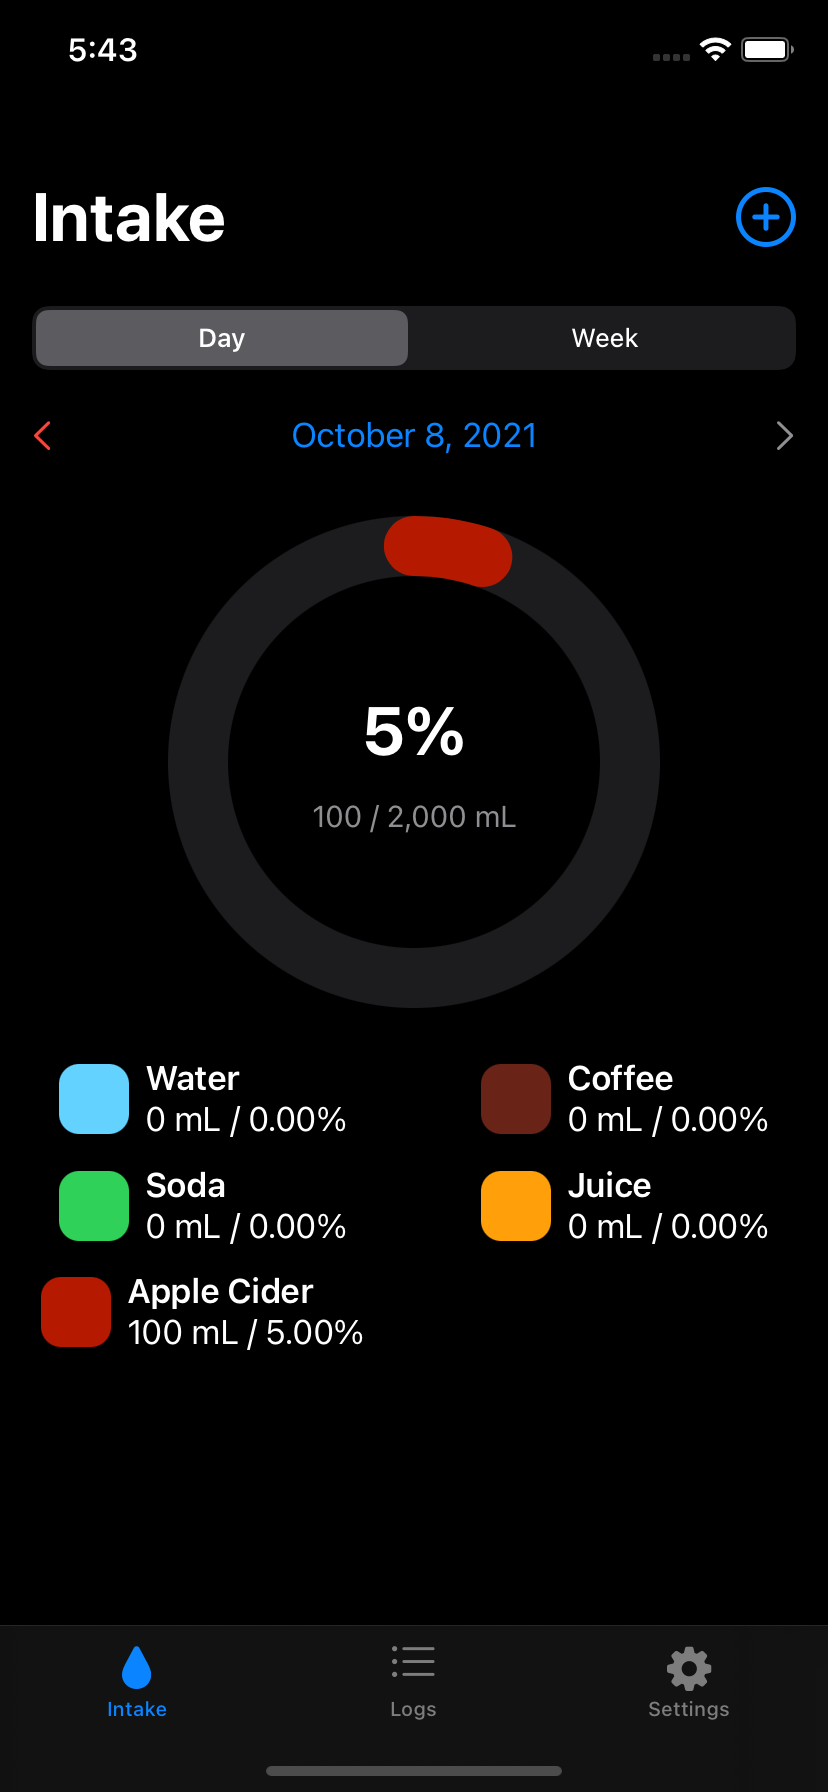
In addition, custom drink types are reflected across the rest of the app:
In the process of recording the video, I found a major bug.
When going through dates using the arrows, sometimes the progress wheel, the data by drink, and the data as whole will be inconsistent. Interestingly the data logs, are unaffected by this issue.
It seems when changing the date, the program sometimes doesn’t have enough time to update the current date before the program gets the data for the next day. This causes the inconsistencies. This can even cause the progress wheel and the data by drink type to be inconsistent with each other.
This was caused by selected day and week being stored into the model. By using bindings between the Intake views, the UI updated properly.
I also ran into an issue where the app would crash after renaming a custom drink type and no data would display in Data Logs until selecting a date. This were relatively quick fixes.