How to add customed fonts in Xcode 14?
Thanks
How to add customed fonts in Xcode 14?
Thanks
It’s the same process used in earlier version of Xcode.
Drag the font file (should be TTF type file) into the Xcode window and drop it into the panel on the left where all the other project files are. Make sure that the “Add to Target” is checked and “Copy if needed” is also checked when the dialog box appears.
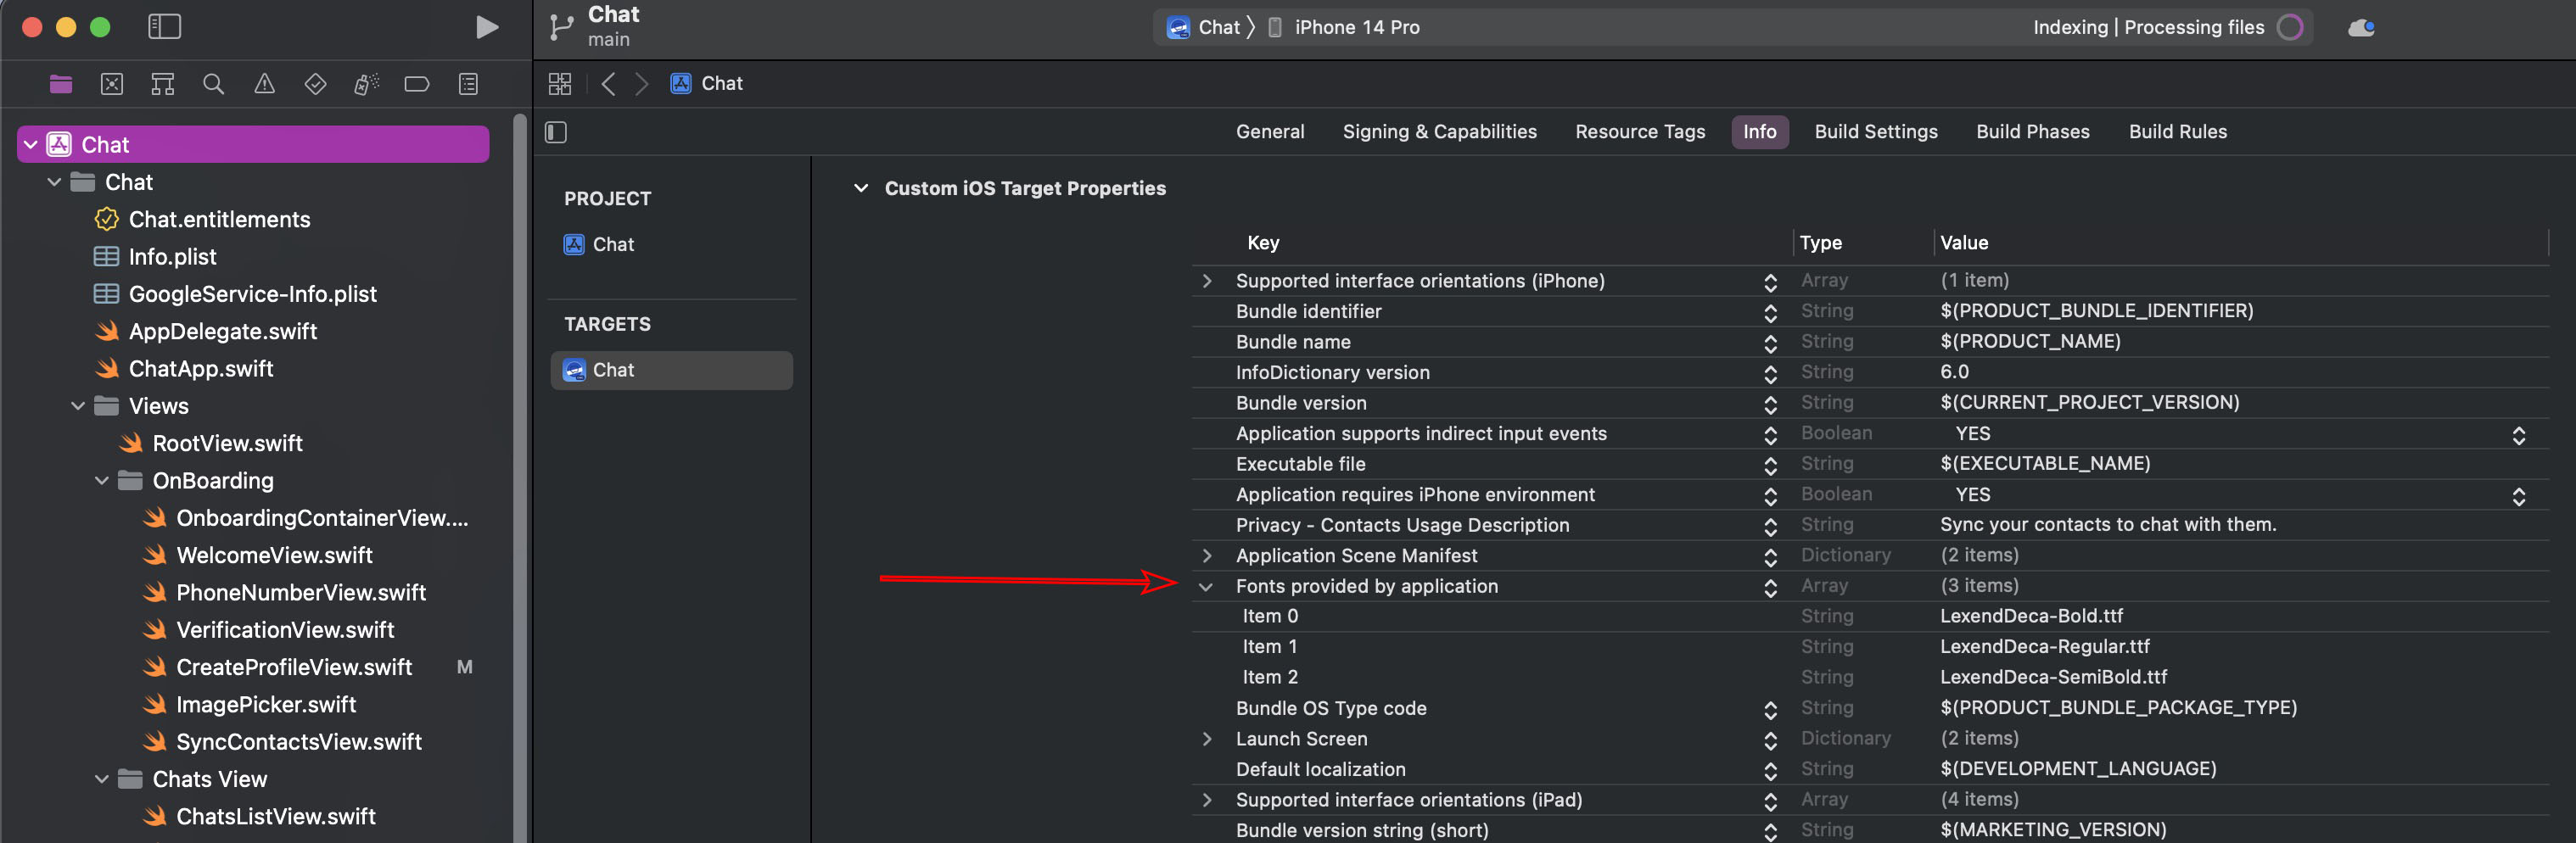
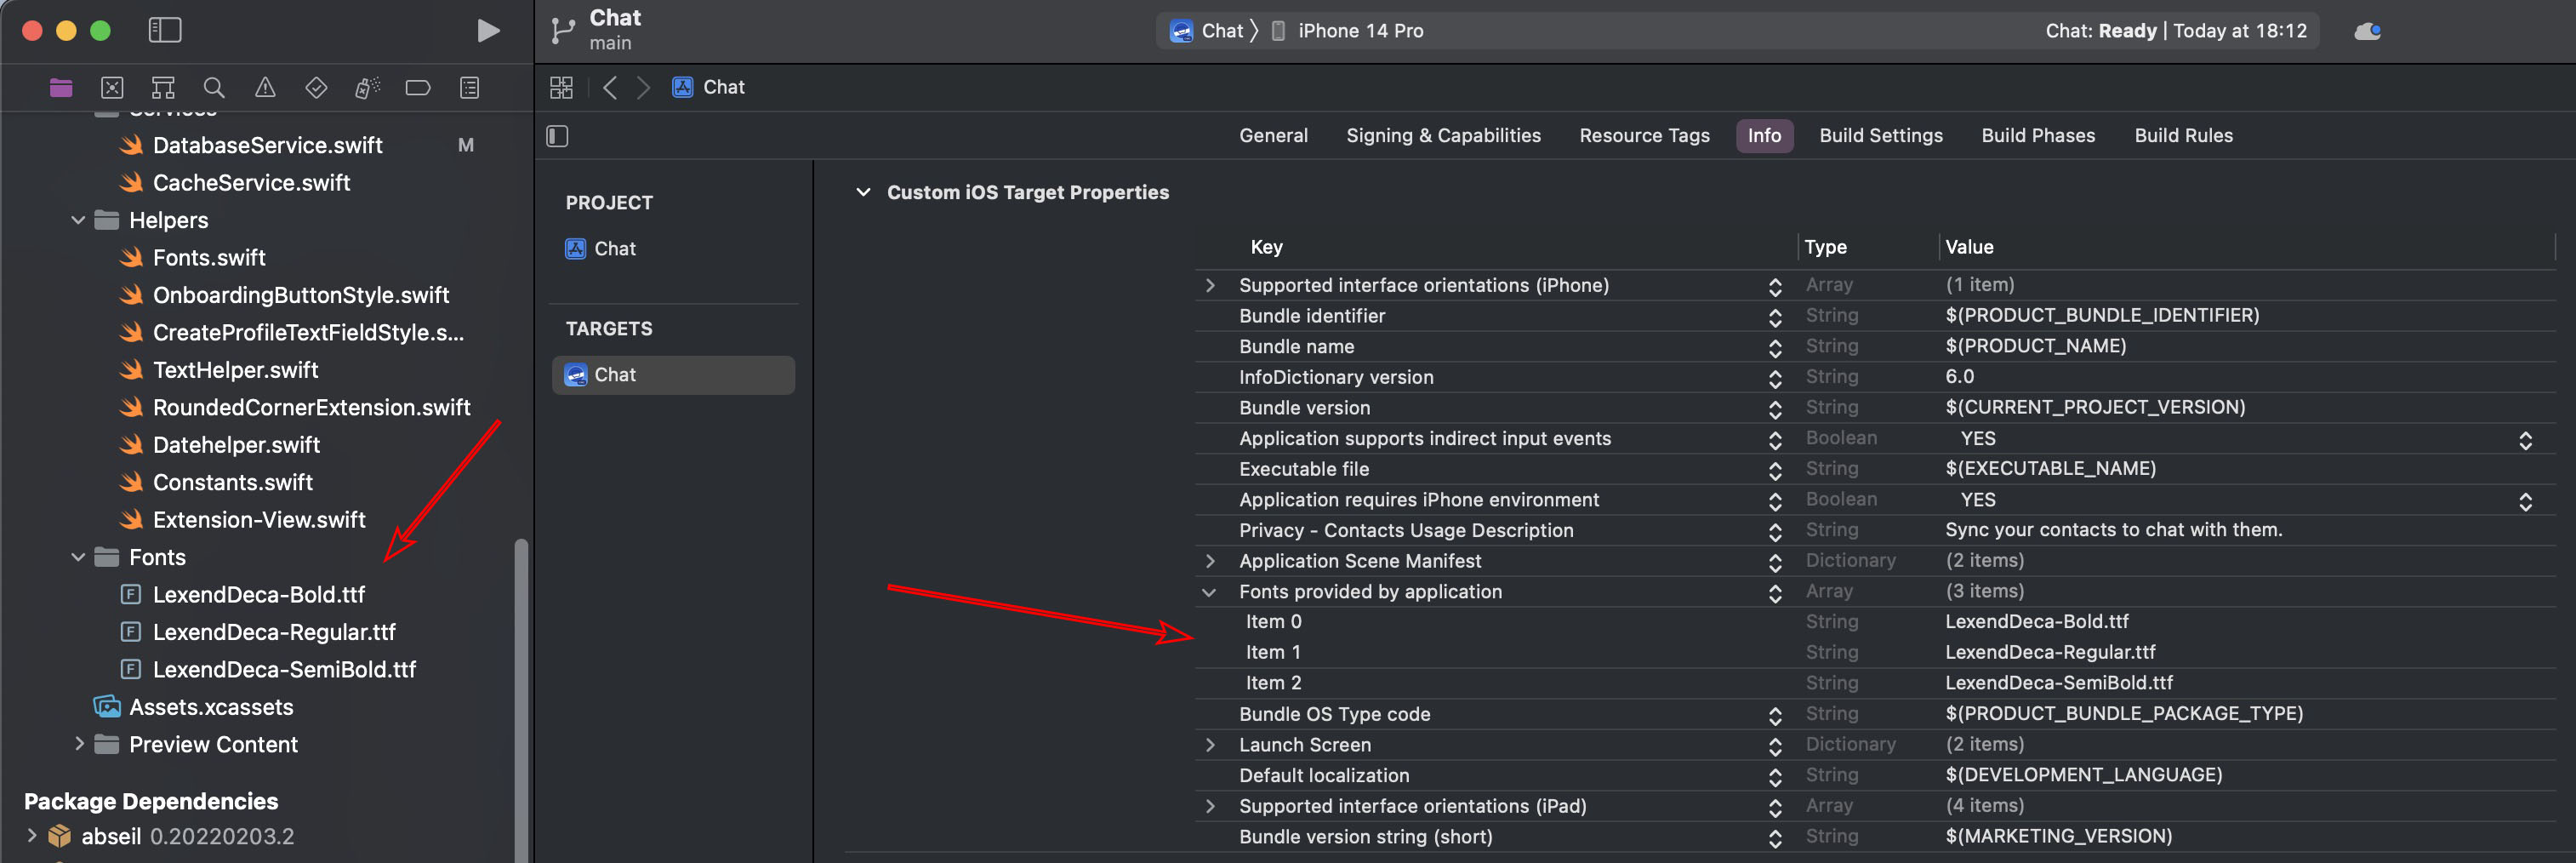
See the screenshot examples below, which is the Chat App from the course of the same name. You need to add an entry in the “Info” section of your App. ie, the property list, in order to indicate that there are Custom font files available in the App bundle.
The entry you need to add is “Fonts provided by application” and then add each item
This screenshot shows you how I added the fonts into a separate folder just to make things tidy.
If there is anything that is not clear please advise.
There are just a couple of things to add:
Instead of adding the Fonts provided by application key in Info.plist, add Application fonts resources path (autocomplete will help you there) and set this to the path relative to the app’s bundle’s resources directory where the fonts can be located. IN most cases (i.e. unless you start adding them to copy files phases) you can just set the value to . (period).
This is a unique identifier for fonts and is what is placed in the SwiftUI Font.custom(_:size:) first parameter (name). To find this, open the font in Font Book and install it. Then open Font Boom and go to the My Fonts section to find the font just installed. Open the identifiers section and copy the post-script name.
As a shortcut though, Google always names their fonts with the post-script name (plus extension) so I’d recommend just trying the filename (without the extension) first and checking if your custom fonts appear. If not, it is most likely the issue with yoour post-script name.