During module 4 (guidebook app) Chris mentions learning how to apply diagonal border to image on detail view in a later video, but this wasn’t covered. Has it been covered in a different module/any pointers on how to do it?
Hi Andy,
Welcome to the community.
I remember following that course but I can’t remember Chris Ching talking about applying a diagonal border around an image. That said, this is a way you can add a border.
The image is one that I added to the assets catalogue to demonstrate the process.
You can use the .overlay modifier or you can use the .border modifier:
struct ContentView: View {
    var body: some View {
        VStack {

            Image("CloudySky")
                .resizable()
                .aspectRatio(contentMode: .fit)
                .frame(width: 300)
                .overlay(
                    Rectangle()
                        .stroke(lineWidth: 2)
                )

            Image("CloudySky")
                .resizable()
                .aspectRatio(contentMode: .fit)
                .frame(width: 300)
                .border(Color.black, width: 4)

        }
        .padding()
    }
…and this is how it looks
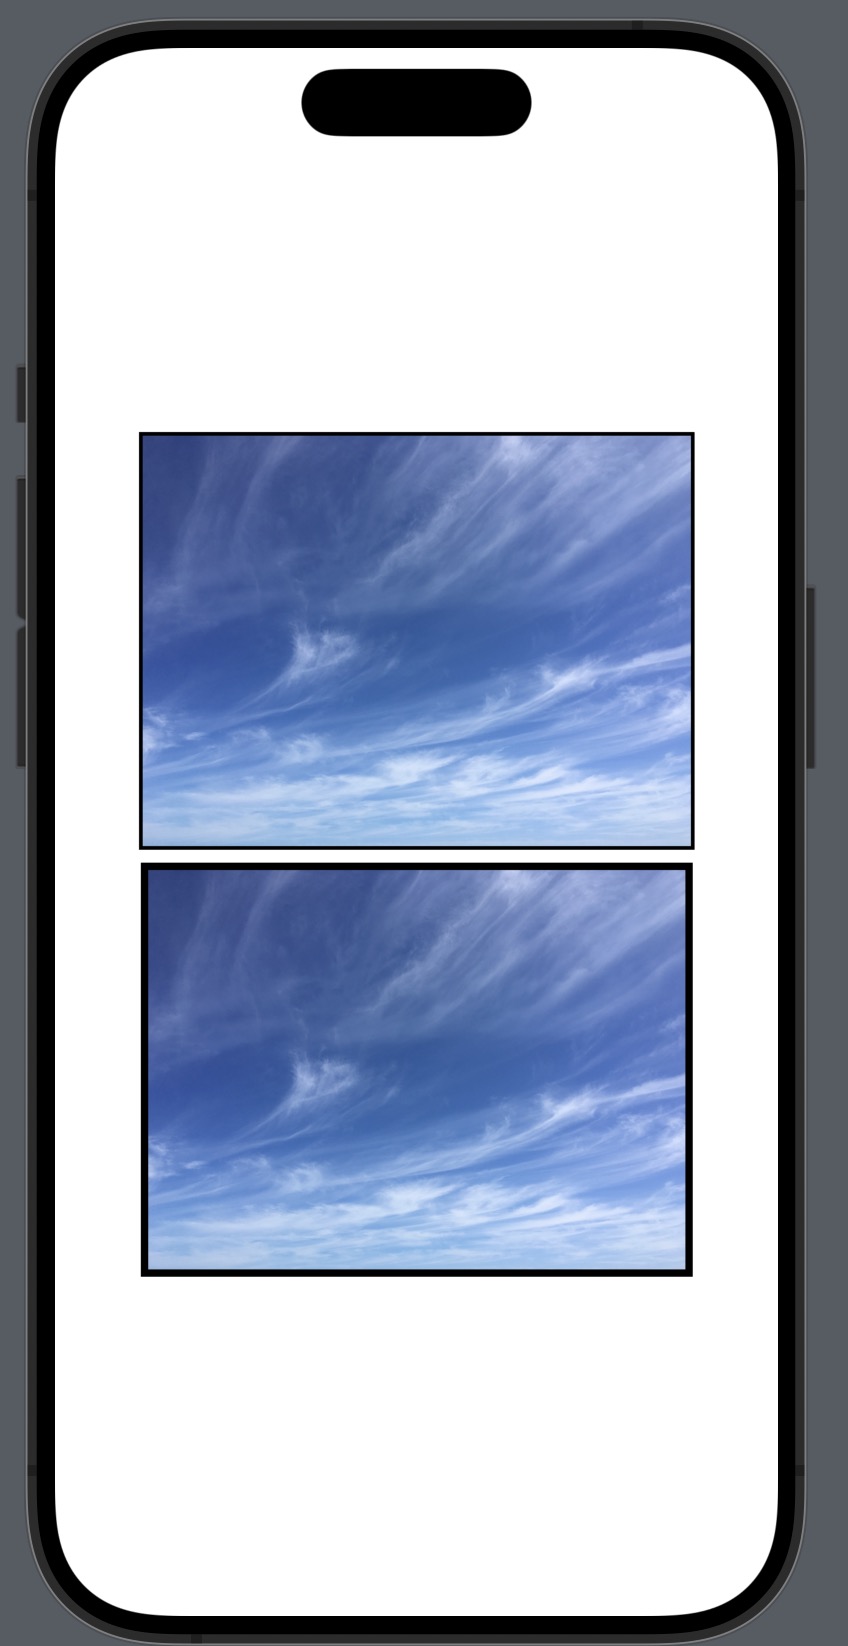
Note that the result is different. The .overlay adds to the outside edge of the image via the lineWidth value and .border encroaches in from the edges of the image by the width value.
I’m glad you brought this up. I remember that also and remember looking forward to learning how to do it, but it never came up again.
It appears that this is accomplished by using the .clipShape modifier with a custom shape. If you Google “swiftui custom shape” you’ll find several resource to teach you about custom shapes. I’ve added it to my reading list also.
1 Like
@DaveC
Yeah that’s another way of doing it but creating a custom shape is probably only required if the border you require is more complex than a straight forward rectangle, square or circle.
I noted in Lesson 4 at 16:40 he talked about implementing that slant on the DetailView image but that didn’t eventuate. I don’t know why but my guess is that in hindsight it was considered to be adding complexity and would require considerable time in explaining what paths are and all that goes with creating a Shape. The overriding focus is to make these tutorials simple enough that it does not lose peoples interest.
For what it is worth, I created a shape to do that job and this is the code I used:
struct SlantShape: Shape {
    func path(in rect: CGRect) -> Path {
        var path = Path()
        path.move(to: CGPoint(x: rect.minX, y: rect.maxY * 0.9))
        path.addLine(to: CGPoint(x: rect.minX, y: rect.maxY))
        path.addLine(to: CGPoint(x: rect.maxX, y: rect.maxY))

        return path
    }
}
I created a custom color which I called slantColor with an “Any Appearance” of white and a “Dark” as black.
In Detail view I applied that Shape like this:
            Image(attraction.imageName)
                .resizable()
                .aspectRatio(contentMode: .fill)
                .frame(height: 300)
                .overlay (
                    SlantShape()
                        .fill(Color("slantColor"))
                )
and that looked like this in light and dark mode

3 Likes
Very helpful all the way around… I need to get smart on custom shapes, so this is motivation. Thanks for sharing
1 Like