STOCK TRACKER APP
I love this format for challenges and keeping a Journal. What a great idea, Chris!
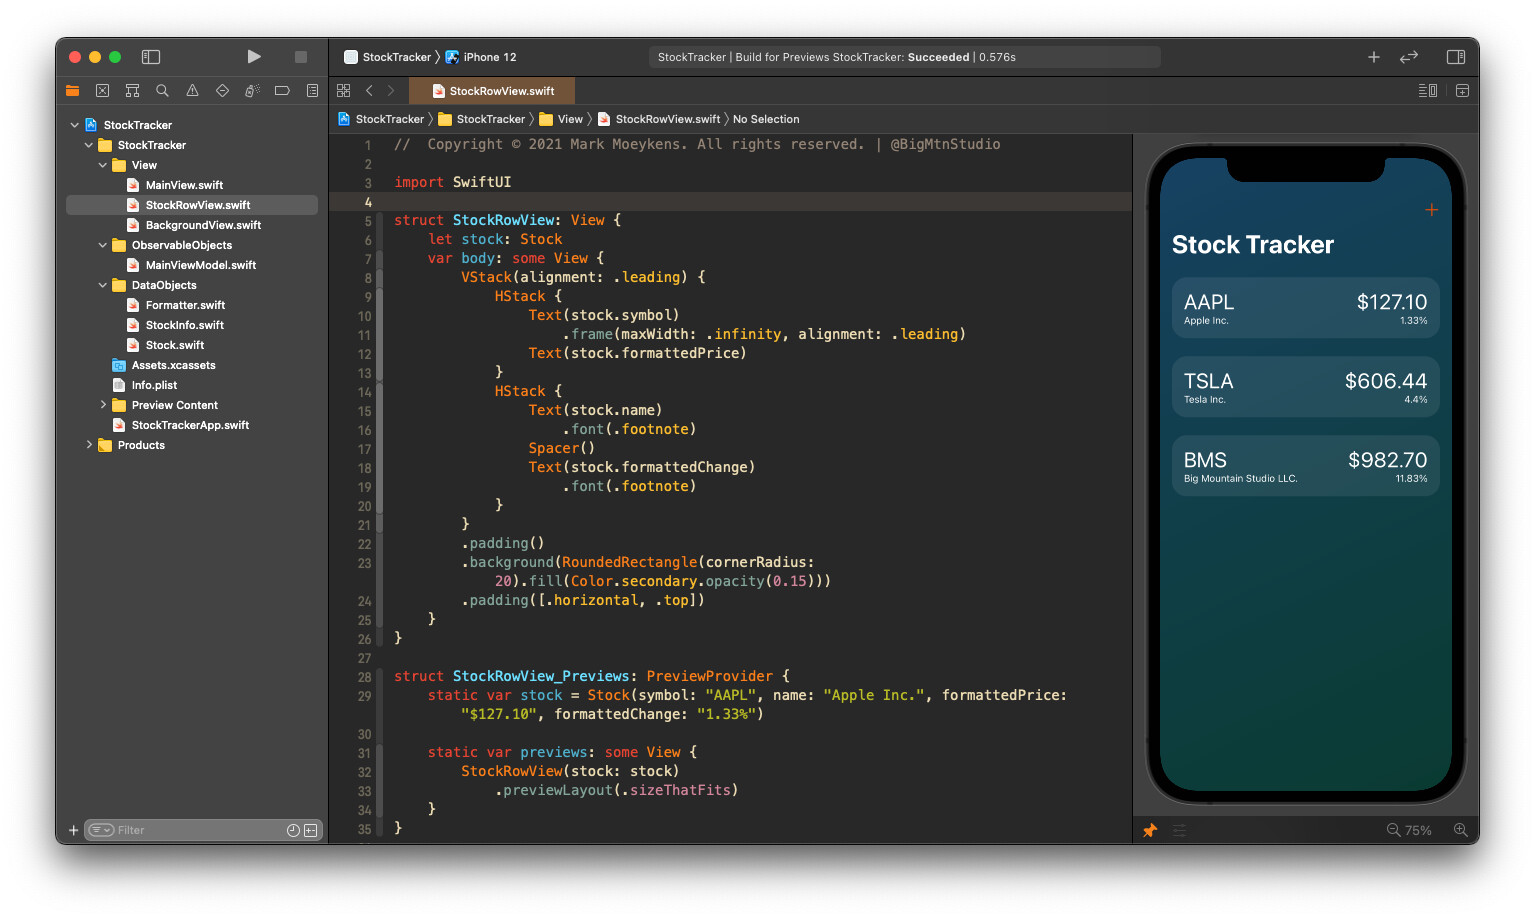
For this, I’m using SwiftUI.
 Day One
I don’t want to focus on UI right now. I’m going to work on the back-end first and make sure the data retrieval is working.
- I signed up for the API service so I could pull multiple stocks
- I am using Combine to pull the data
- After getting the Combine portion working I created a Mock observable object so I don’t keep making API requests. Looks like there’s a 250 limit on requests.
Here is the result of Day 1
4 Likes
STOCK TRACKER APP
Day Two
- I reorganized and broke out my project into folders using the VOODO architecture.
Note: This is an architecture I made up for SwiftUI projects. It consists of:
-
View
-
ObservableObject
-
Data Objects
It’s pretty liberal as far as where other logic goes. Super flexible. No rigid rules.
- I decided to do a gradient for the background. I like to make gradients semi-opaque (semi-solid) and use the system white and black backgrounds to lighten or darken the UI if the user changes it.
- Then I put a rounded rectangle behind each row. I’m using the
Color.secondary because it also changes for light and dark modes. But I also lower the opacity a lot until I got it to a point where I liked it.
3 Likes
Already looking great Mark!
1 Like
Whoah, Florian! You’re here! Ha ha ha, it’s a small world!
1 Like
Whoa, what? Chris made you moderator? Time to have a talk with him. 
STOCK TRACKER APP
Day Three
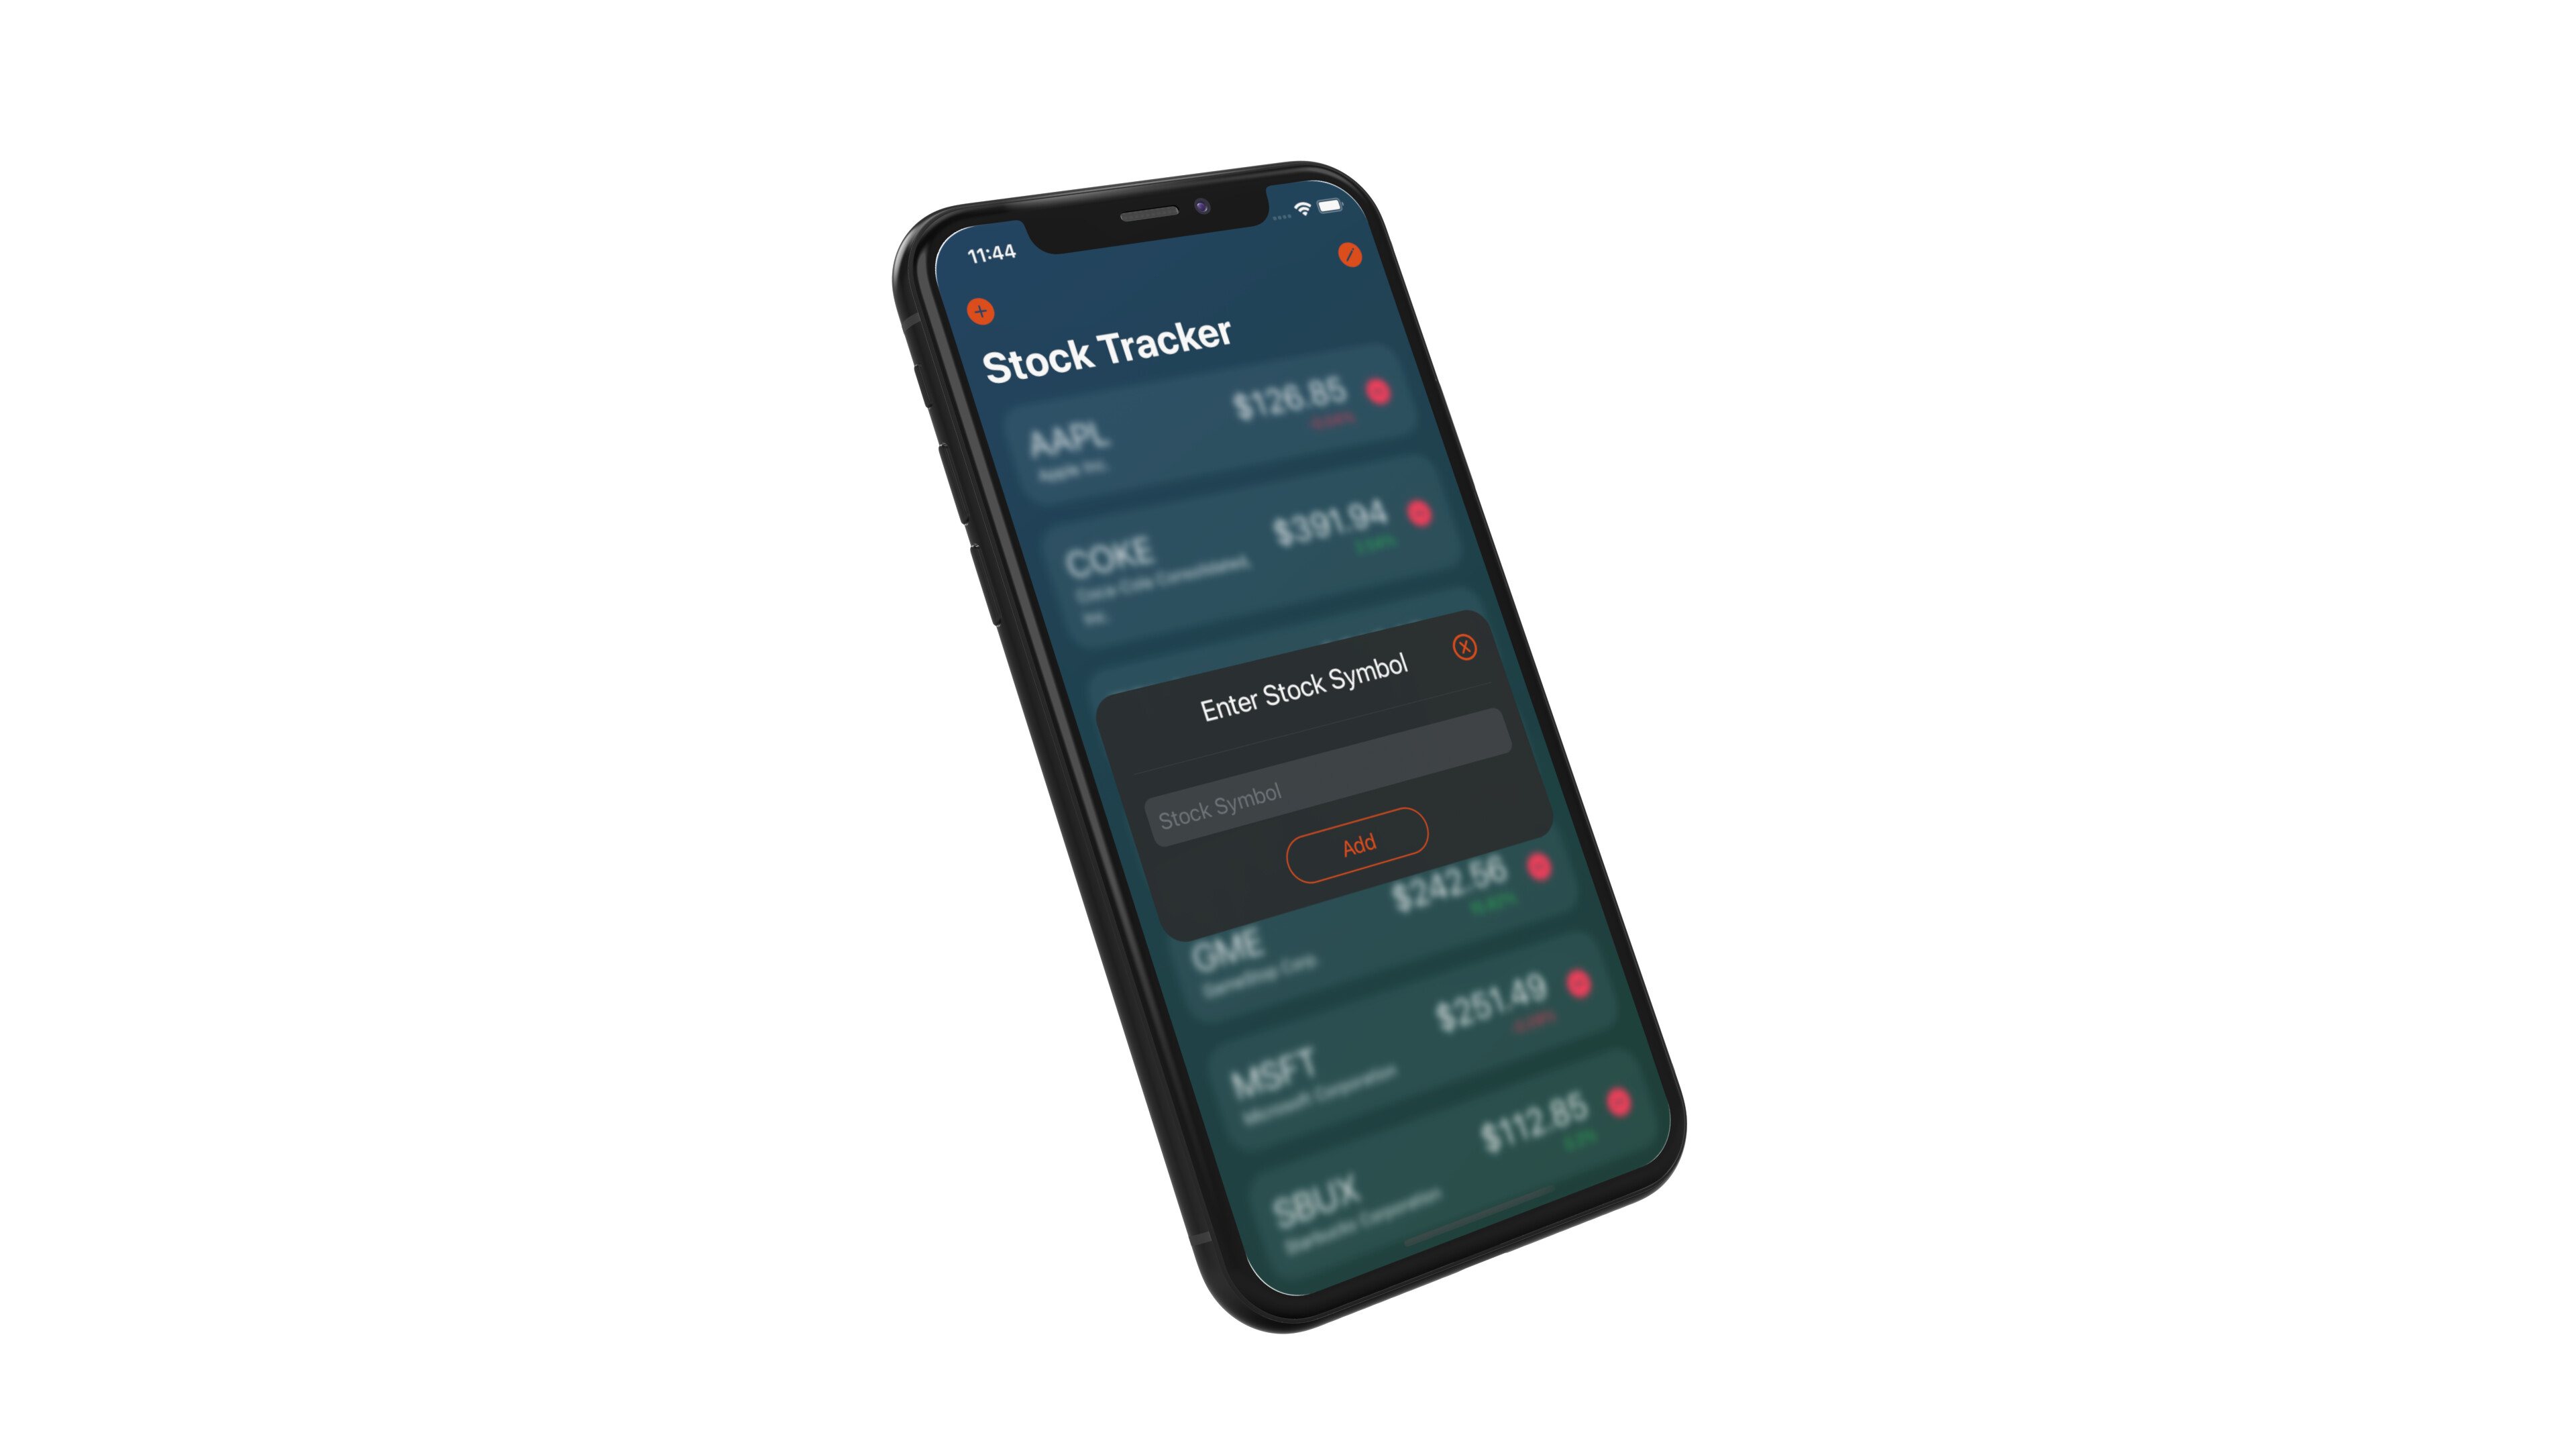
- Implemented adding stock symbol (blur background)
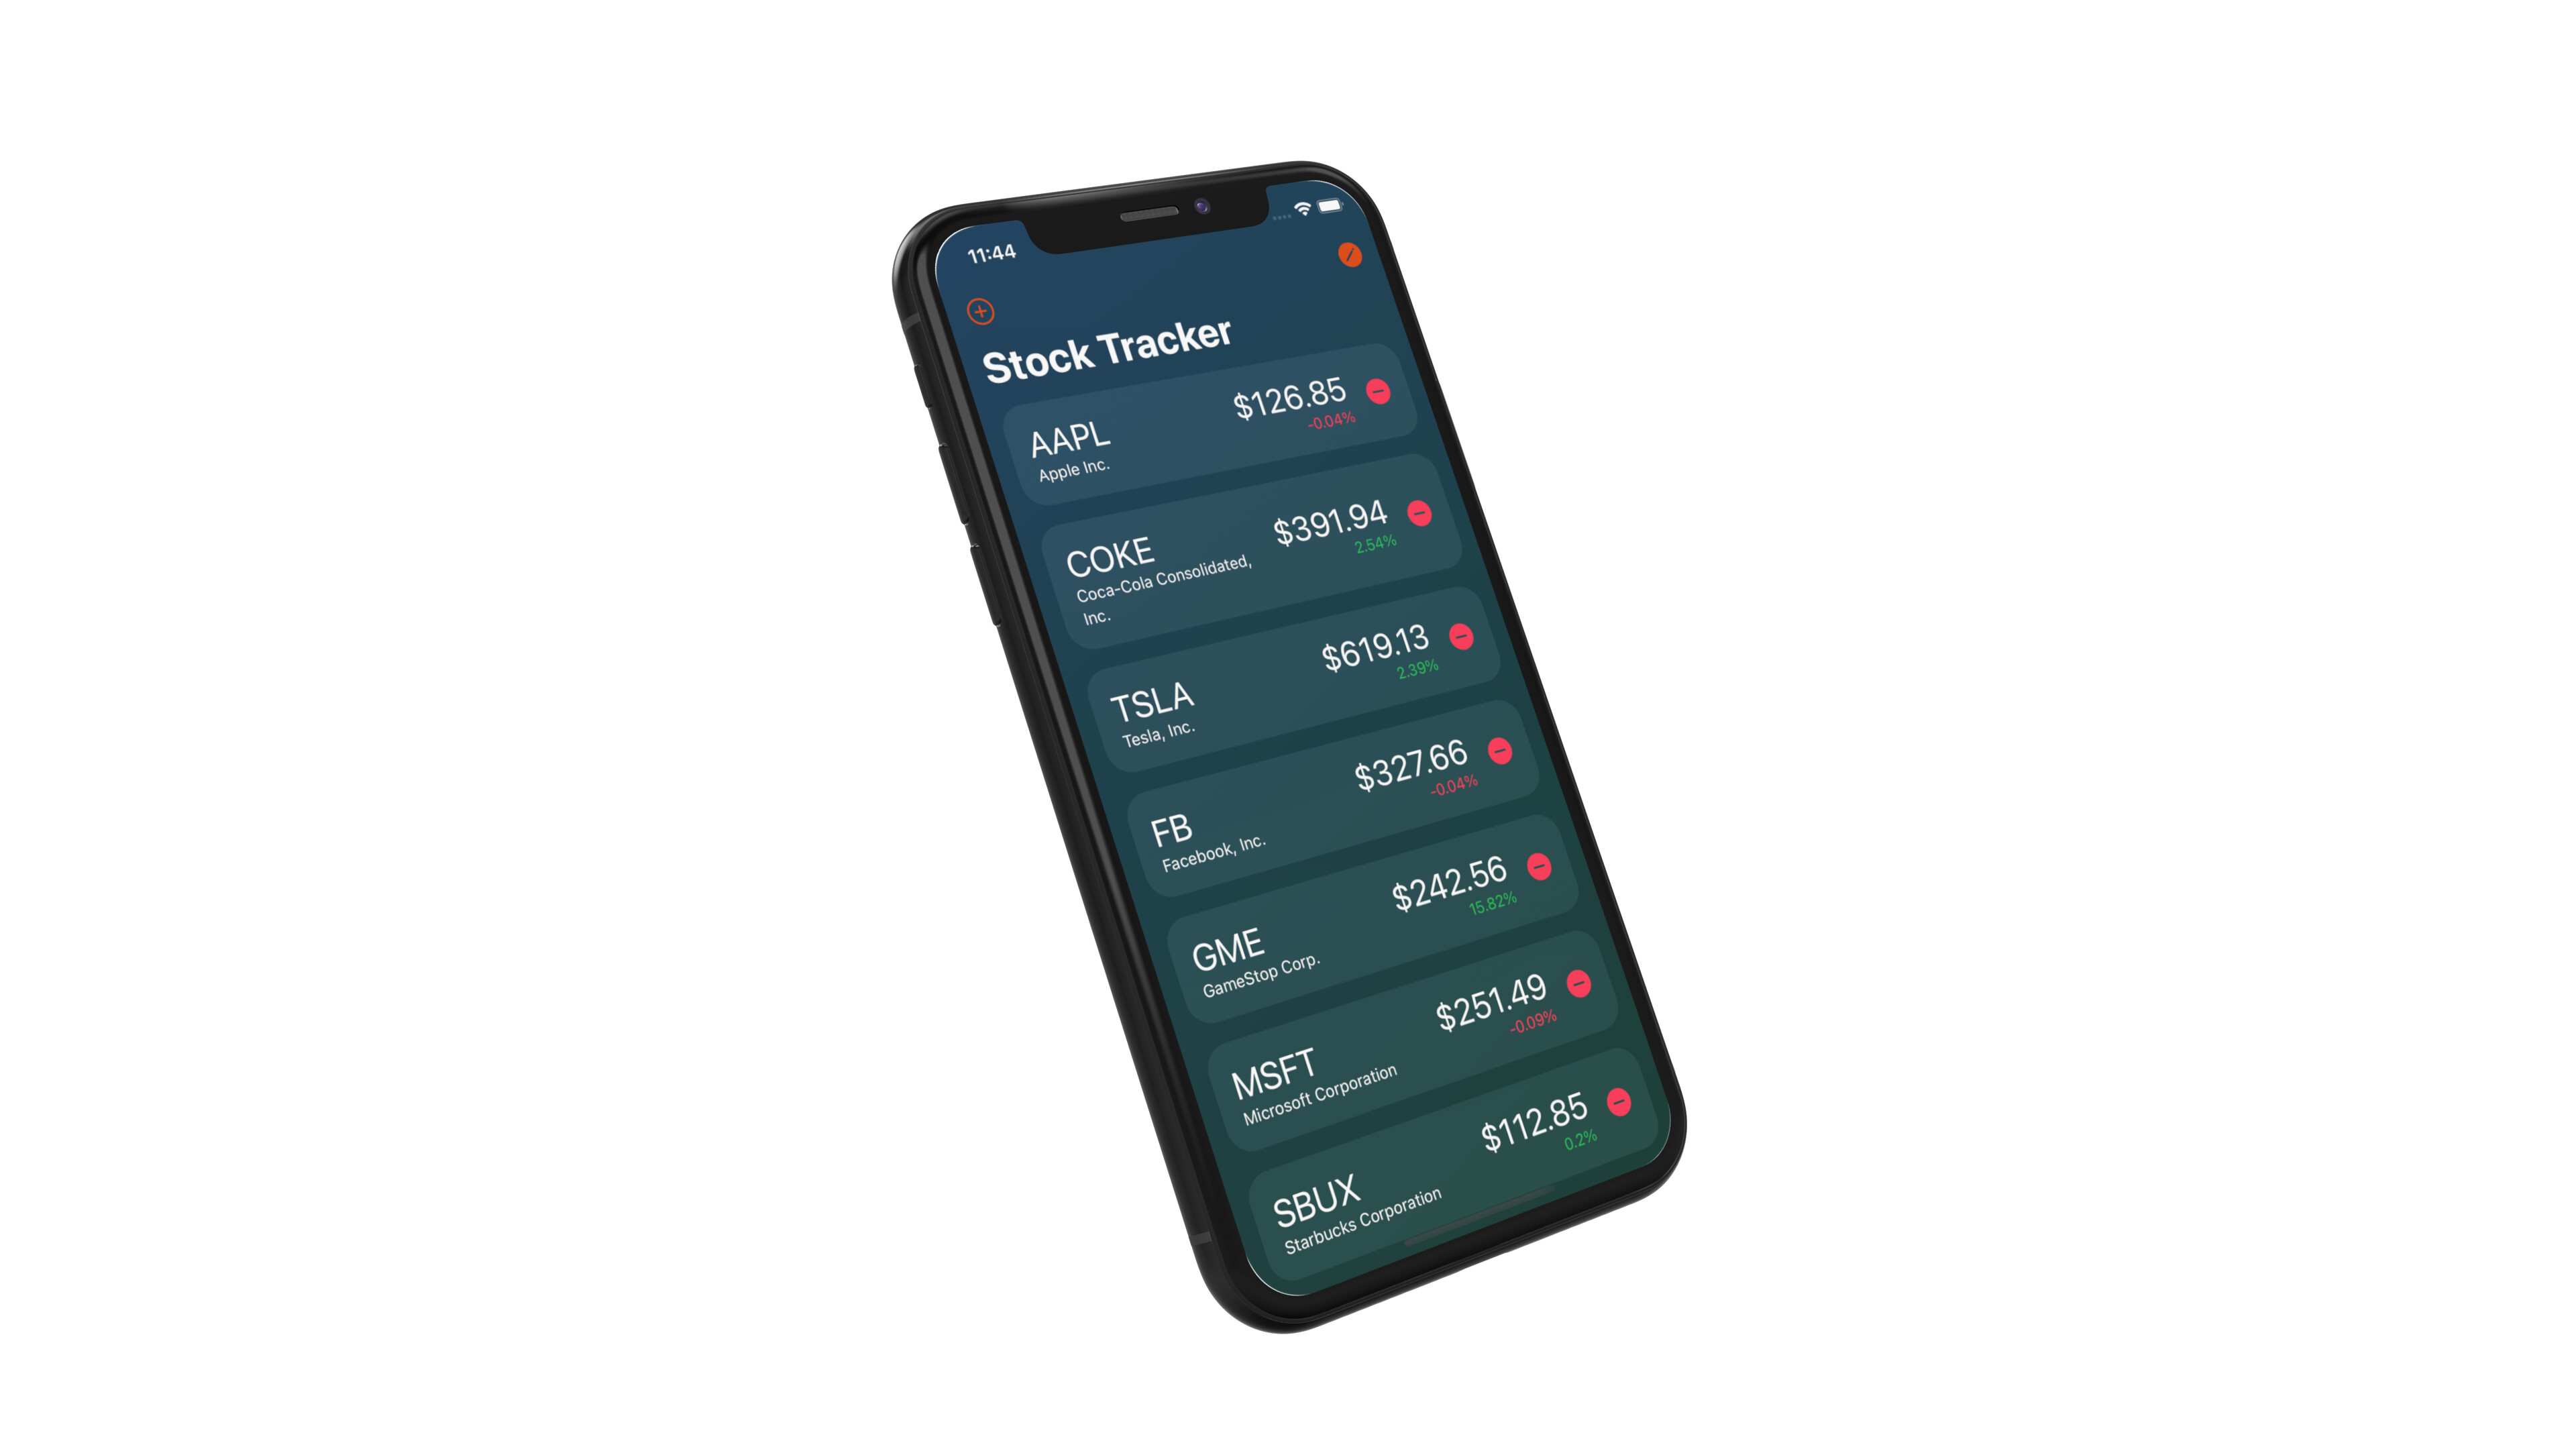
- Implemented deleting (tap to go into edit mode, shows delete buttons)
- Animations! Added a bunch of animations, mostly transitions. So much fun.
Here’s what light mode looks like:
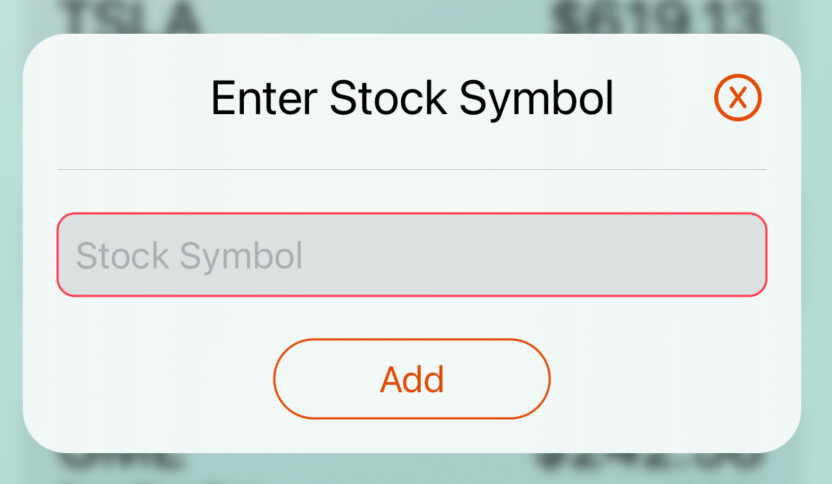
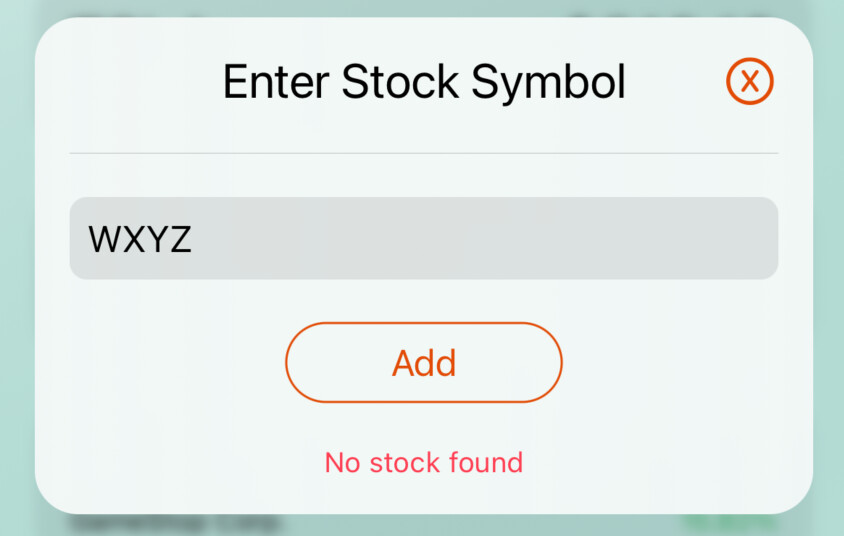
Did some validation too when adding a stock symbol:
- Is there a value?
- Does it already exist?
- Can it be found using the API?
If these fail, an error message shows and the add modal stays up.
Well, if no value entered, I add a red outline:
With error message:
3 Likes
Oh man, I totally missed the part about uploading a video of the app in action to STOCK TRACKER APP CHALLENGE
Thanks for the email reminder, Chris, just uploaded it!
1 Like
Is the little pop up just another view that you’re presenting? For adding new stocks?
1 Like
Yeah, I just created another view for that.
1 Like
The App looks great Mark. Does that API allow you to pull data to graph the movement?
2 Likes
Probably but I didn’t really want to spend more time exploring that. But Florian (@chflorian) did if you can find his project. He created a Shape to graph it.
2 Likes
WEATHER APP
I decided to do the previous challenge too!
Day 1
- Signed up to get my API key at https://openweathermap.org/
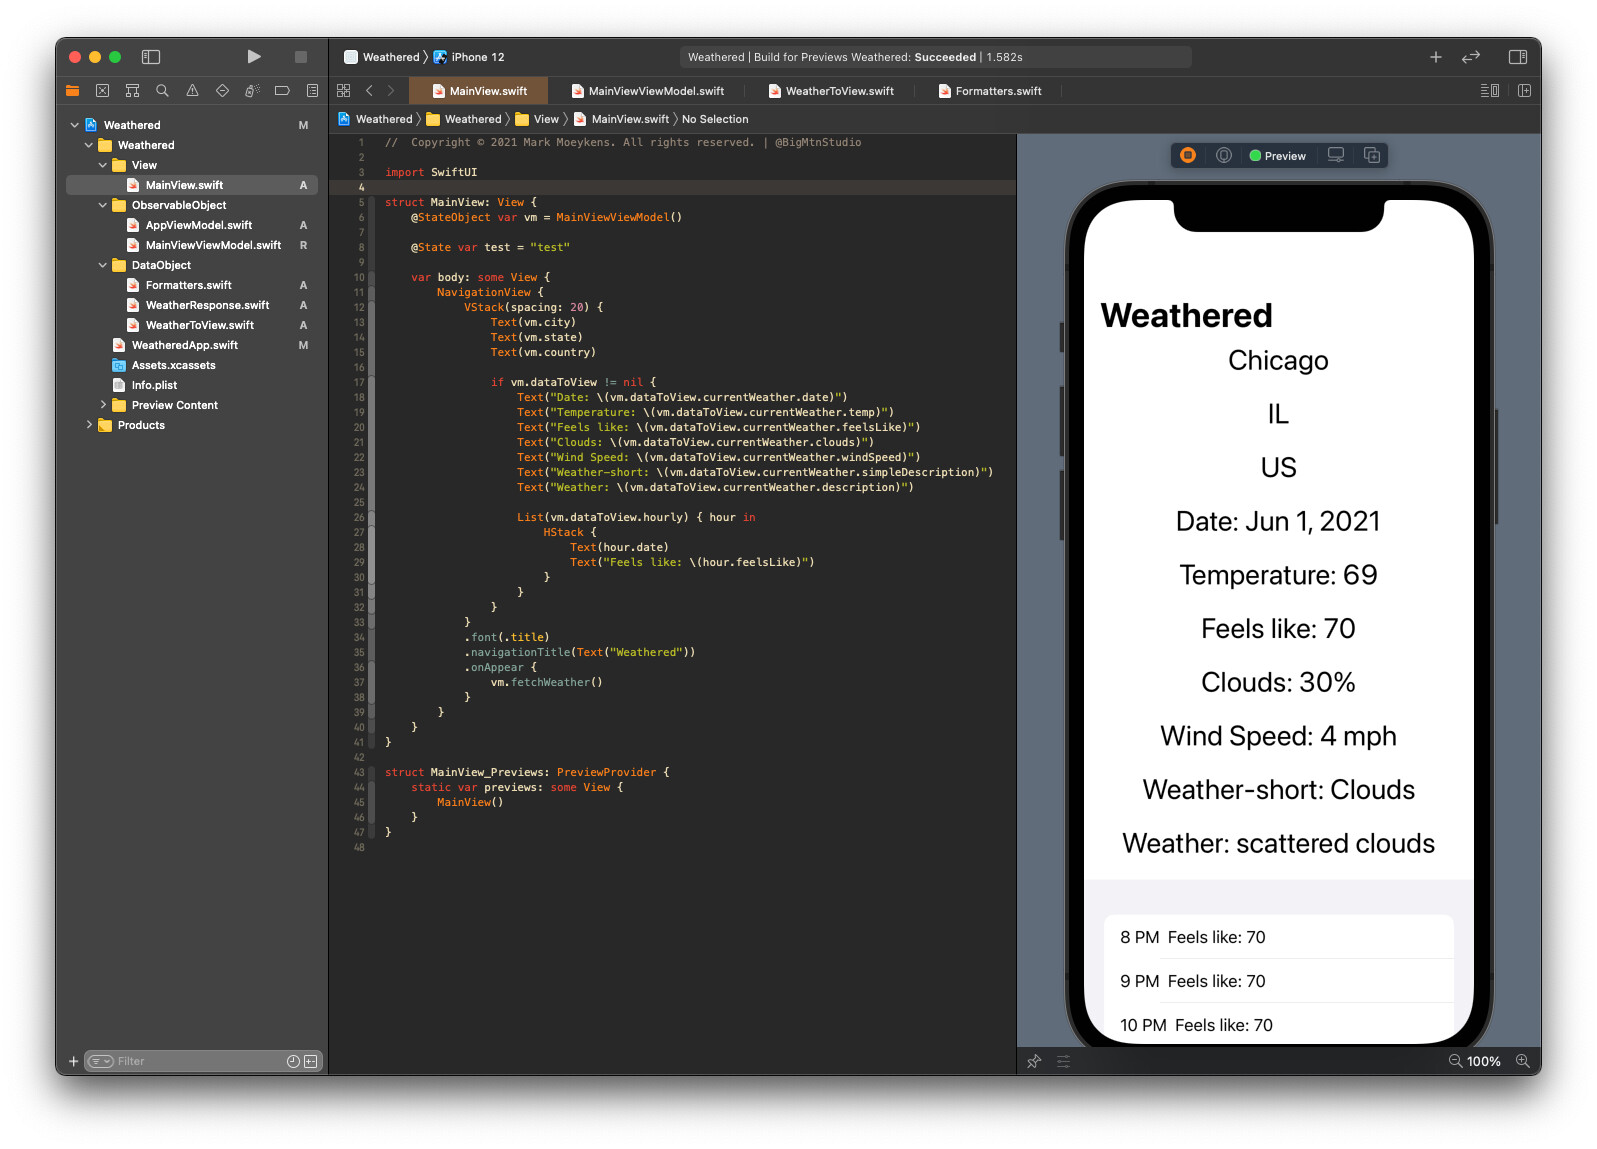
- Got the main API endpoint working to get weather data based on longitude and latitude
- Used Combine to call the service and decode the response into my data objects.
- Took a while to get all the formatting correct and ready for display. I have this feeling there’s a better way but it’s working for now.
- I’m hard-coding the longitude and latitude for now but tomorrow I want to implement another one of their endpoints that allows you to search by city and get back multiple results. I want to present this to the user so they can select the one they want.
It’s ugly now but the API is working and I’m formatting it the way I want for now so I’m happy with day 1.
3 Likes
I’m sure you will figure the Combine issue out  Who else if not you?
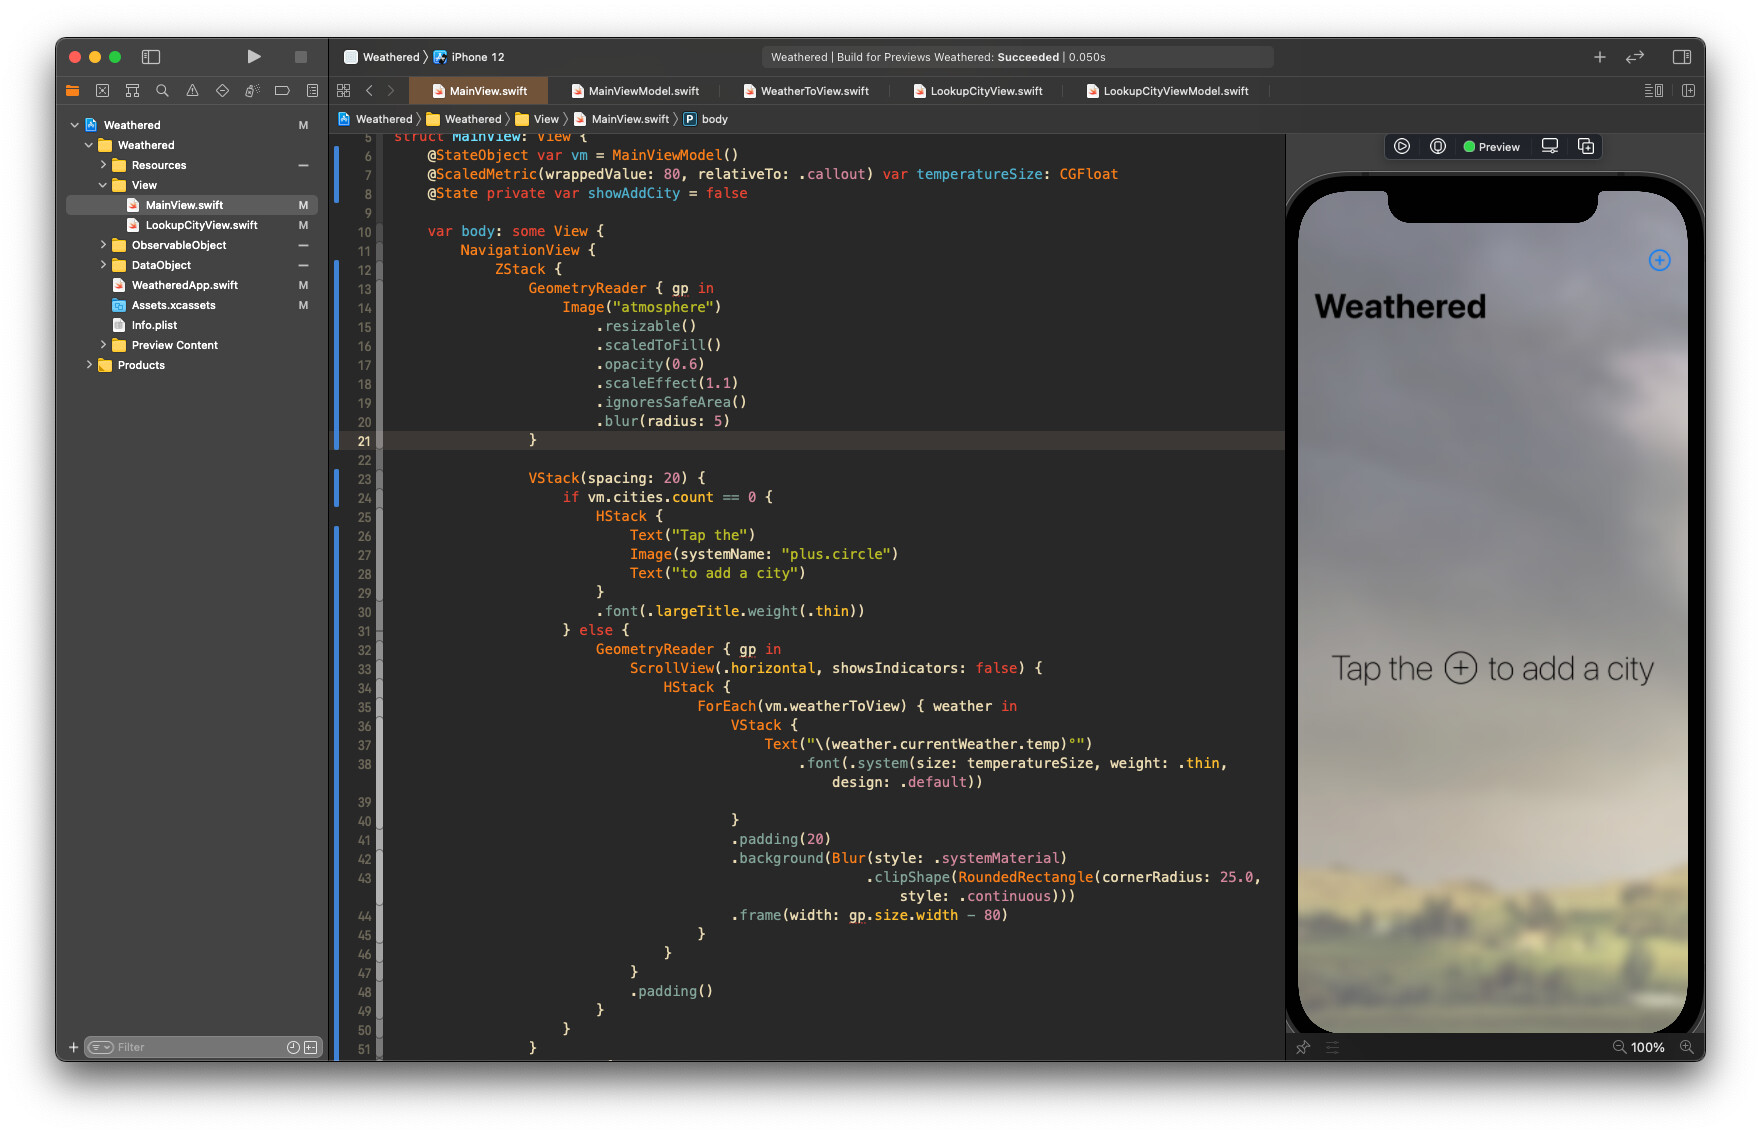
Quick question: Why are you using a GeometryReader around the atmosphere image?
Thanks, Florian!
Yeah, the Combine issue was fixed. It was actually an error on my part by decoding into the wrong object. The problem was Xcode couldn’t tell me that. It would just show this weird error when trying to compile.
Why the GeometryReader?
Great question. That image is larger than the size of that device. And when it’s larger it pushes out the containing ZStack.
This will mess up the other views.
The GeometryReader is kind of a hack to prevent the image from pushing out the ZStack.
Now I’m not saying this is the best way but at this time I couldn’t find a better way.
2 Likes
Oh wow, that is very interesting.
Would adding a frame of UIScreen.main.bounds to the image do the same thing?
If yes I think that’s a cleaner architecture, the GeometryReader looks really hacky to me haha.
WEATHER APP
Day 4
I learned quite a bit yesterday and feel I worked on this entirely too long because of so many problems I ran into.
Some of the problems I had to figure out while working with a Paging TabView:
Problem
- When adding a new city, I was trying to navigate to the new city BEFORE the API finished returning the weather data. This caused an “index out of bounds” error.
Solution
- Kept user on the Add City screen until the API finished returning the weather data.
Problem
- I wanted to navigate to the new city I just added. City weather is inside the Paging TabView. So how do I do this?
Solution
- I had to add a selection
@State property that I could change programmatically that is bound to the TabView. I change this property when the city lookup sheet is closed.
@State private var citySelection: Int = 0
…
TabView(selection: $citySelection) {
Problem
- Deletion proved a challenge. The actual deleting was fine. It was updating the UI. Originally, I would remove the item from the array and depend on the UI to update automatically. Which it did. But then crashed.
Apparently, the TabView is implementing a UICollectionView behind the scenes and I’d get an NSInternalInconsistencyException.
Solution
- Someone suggested I add a
.id(UUID()) to my TabView. While this did work, the app crashed again when swiping.
I think the problem was a new UUID() was getting created if the view refreshed. This caused the TabView to recreate again when swiped too. So I set the id to a stable value that ONLY changed after deleting. Causing the TabView to be refreshed (recreated).
Was this the best answer? Probably not. I think this is a bug. But with a new version of Xcode coming I’m not going to file a Feedback until I try the new version to see if it’s already been fixed.
Problem
- Originally I had the side-scrolling hourly temperatures below the TabView. And then when I swiped in the TabView, I detected the selection changed and updated the hourly temperature values.
This was very error-prone once I got into adding, deleting, and refreshing the TabView.
Solution
- I moved the hourly temperatures INSIDE the TabView to keep the values synced to the city.
I want to change the UI around a little though. Maybe later.
More to do
- The deletion of cities will take a little more testing to make sure it’s solid.
- I need a Settings view to change from Farenheit to Celcius. The logic is there, I just need a place to change it.
1 Like