Day 1
Background
My coding experience comes from scripting in bash/unix and a little in python (~10 years) but no OOP. Lot of the work I do involves learning how to run open source software to explore data and visualize it.
I have been on my iOS development learning journey since November of 2019. Most of that journey was using @twostraws Hacking with Swift free series. His stuff has been great but there are pieces in the material that seem to be missing like how to structure a project, how to connect multiple view controllers; how to pass/store variables between view controllers.
To learn some of those aspects, I have scoured the web and have been working on several App ideas as learning projects. I am no where near ready to publish anything. How to publish is also missing in a lot of the free content out there. When the spring sale came up, I checked it out and really liked the idea of having community and covering some of the topics missing from the free tutorials online.
Current problem
I have been playing with a photoApp idea I have and have been struggling with zoom and pan. I found a really cool extension for UIimageView that I have expanded but haven’t gotten it to work. I plan on revisiting the scrollview method for doing this. Why isn’t zoom/pan a standard library?
I will post more on this with code as I explore it. Right now I am just getting familiar with this forum and deciding where I want to start with @Chris2’s tutorials.
3 Likes
Day 1 continued…
- Mar 23, 2021
- 14 Day Beginner Challenge
Decided to start with the Beginner challenge. My initial foray into swift was using UIKit as swiftUI was still fairly new a year ago and most of the tutorials and solutions you can find online were for UIKit and old versions of swift. So I am exploring the Beginner’s challenge to learn swiftUI fundamentals.
Lesson’s 1 and 2
The first few lessons are about Apple development and Xcode, which I was mostly already familiar with.
Lesson 3
The third lesson is a remake of the classic “Hello, world” coding problem. What I found really interesting here is the command click of a method to show the swiftUI inspector. If you are new to swift you will not realize just how powerful a feature this is! To be able to look at all of the possible ways you can modify the object in a fairly organized manner. This is a huge advancement over UIKit coding where you are basically at the whim of the apple documentation.
I am anticipating that how you organize your methods will be really important for readability.
Consider making the following

- This is much harder to read
Text("Hello, World").padding().background(Color.green).padding().background(Color.yellow)
Than
            Text("Hello, World")
                .padding()
                    .background(Color.green)
                .padding()
                    .background(Color.yellow)
I will be interested to see what @Chris2 recommends to code formatting in later tutorials.
2 Likes
Day 2
- Lesson 4 and challenge
- Mar 24, 2021
As I expected, @Chris2 does say to make new lines for the modifiers in the project. I mentioned before that this is my first exposure to SwiftUI and I find this method of
modifier.modifier.modier
To be very similar to Unix command line where we pipe commands from one thing to the next.
ls -lha | awk '{print $NF}' | xargs -I xx echo xx
I will have to see how well that analogy holds up but if it does then I am going to really enjoy coding in swiftUI.
Notes from Lesson 4
I have decided to use this forum to take notes as I progress. I will avoid posting any answers to challenges but will include the modifiers I found useful from the lesson. I made the challenge much more complicated because I didn’t take notes from the lesson and didn’t use what he taught. 
Objects
- Text(“text”)
- Image(“name”)
As of now we can only call images that are in the assets folder of the project, at some point I will want to know how to display it from the phone or the photo’s library.
Stacks
This is how we are organizing content in swiftUI, Stacks have parameters that can be used to specify alignment and other properties (I haven’t looked them up yet), for now I just want to remember that those properties may be easier to accomplish a look than a modifier.
| Stack |
Description |
| VStack |
Vertical stack of Objects |
| HStack |
Horizontal Stack of Objects |
| ZStack |
Perpendicular Stack of Objects |
Modifiers
These can be applied to Objects or Stacks.
| Modifier |
Description |
Other |
| .resizable() |
Allow resizing |
|
| .aspectRatio() |
Keep Width and Height Fixed |
.fit |
| .cornerRadius() |
Modify object corners |
|
| .font() |
Modify the font size/type |
.caption, .largeTitle |
| .padding() |
White space around object |
.trailing, leading, .top, .bottom |
| .opacity() |
Make an object more see through |
|
| .background() |
Can change the color of the background |
|
| .foregroundColor() |
Change the color of the foreground text/object |
|
| .scaleEffect() |
You can increase or decrease the size of the Object |
|
| .frame() |
Add a frame around an object |
|
FYI: the last two were modifiers I found trying to complete the challenge the hard way. 
Colors
You can probably just name any color after the Color. and use it. There will likely also be a way to include Hex colors. Wonder if I could extend Color to allow that. That might be fun.
Color.white
So far so good. On to Lesson 5
3 Likes
Day 3 Lesson 5
Problem: Green background going off screen.
I ran into the Spacer() problem that occurs if you are not using a larger iphone like iphone12.
Solution: add .resizeable()
This will scale the background image appropriately and everything will stay on the screen.
Image("background")
                .resizable()
                .ignoresSafeArea()
It is still a little confusing as to hierarchy of the modifiers. For example .padding is a modifier but .bottom looks like a modifier but is supplied like a parameter inside .padding
Text("Player").padding(.bottom,10)
It just doesn’t seem intuitive yet. Wonder what I am missing.
Day 3 Lesson 6
This was a review of strings, and integers and print statement.
Day 3 Lesson 6 Challenge
@Chris2 There is a spelling mistake Lesson 6 Challenge: You can use it as part of the equ,on(the variable must
The challenge was straight forward as I have coded before and it appears the swift syntax is the same which is what I suspected. Only the swiftUI how the viewControllers are built part is different.
Day 3 Lesson 7 and Challenge
This was also a review of functions
2 Likes
Day 3 Continued …
- Mar 25, 2021
- 14 Day Beginner Challenge
Lesson 8 Structures
Good review of terminology. Wonder where modifiers fit in this.
- Structure
- properties = variables
- methods = functions
I had not heard of computed properties yet. It looks like an enclosure.
1 Like
Day 4
- Mar 26, 2021
- 14 Day Beginner Challenge
Lesson 9 Instances
Course covered the concept of an instance and covered how structs are used within the SwiftUI App
Also discovered that in the CWC+ courses module 1 is the same as the 14 Day Beginner Challenge. Oops. I could have just started with Module 1. Oh well.
Question: Can extend the contenView.swift and add contentViews in a separate file so that the original file doesn’t get too long.
Lesson 10 Buttons
It was nice discussion of Buttons with and without trailing enclosures, text vs images.
Day 5
- Mar 27, 2021
- 14 Day Beginner Challenge/Module 1
Module1:Lesson 11 State Properties
State properties seem great. It is a simplification of coding compared to UIKit. I went ahead and created a function named draw() and put all the commands that occur during the button press into that function. and placed it just below the @State declarations. It works great and keeps the viewController code clean.
Module 1: Lesson 12 If/else Statements
This was a review for me as they are common in all programming languages. Though I had forgotten how to make random integers so that was nice.
Int.random(in: 1...100) That third . always seems to trip me up.
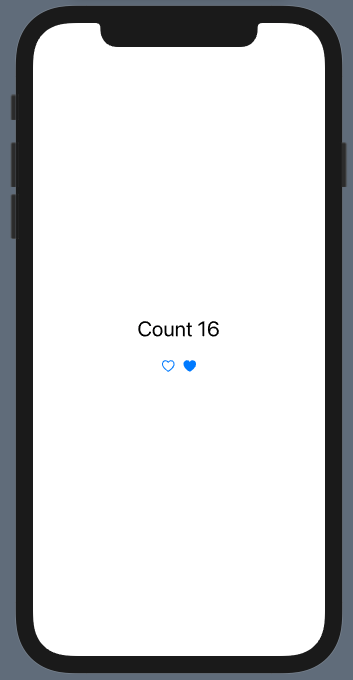
I was hesitant to do the challenge because I thought it was going to be too easy so it felt dumb. I did it anyway. I wanted to see if it I really could do it as quickly as I thought I could. It was good practice and I spent some extra time finding the SF symbols so I could use some of those as buttons.
I had originally thought I would use arrow.up and arrow.down but ultimately decided on heart and heart.fill.
You can download the SF Symbols app that makes it really easy to download from here
Looks like there is a bonus challenge in the 14 Day Beginner Challenge. That is all I have left before proceeding to Module 2 in IOSfoundations.
iOS Foundations: Module 1 Completed! Day 5 continued …
- Mar 27, 2021
- 14 Day Beginner Challenge/Module 1
I just finished the slots game. I was able to do it relatively quickly. I used an array for the images even though we haven’t learned it yet in this course. I am really liking swiftUI for interface building. I am curious to see how more complicated apps with multiple viewControllers.
I added an if statement to keep the the player from going into negative credits. It prints an “out of money” because I didn’t look up how to form the alert object. I might add that later.
Now on to iOS foundations Module 2 Recipe App.
Day 6 M2:L1,L2
iOS Foundations: Module 2: Lesson 1 and 2
Lesson 1 Overview
Lesson 2 Arrays
This was a good review of the possible arrays features.
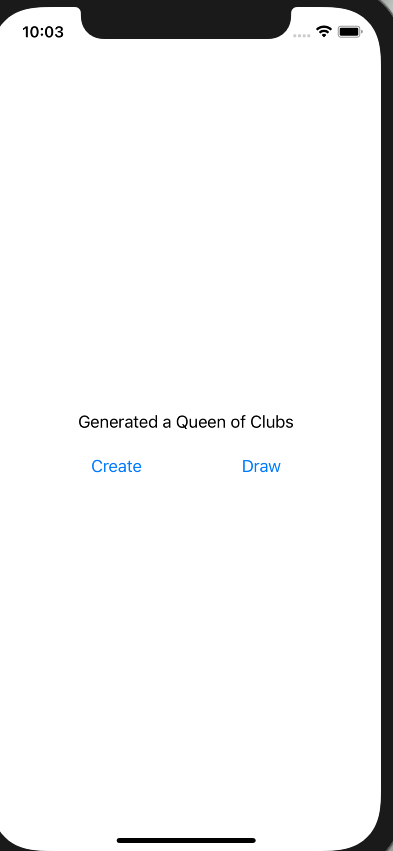
Lesson 2 Challenge
Not a bad challenge. I would have liked to have displayed a card that was being drawn but realized that the assets we were provided doesn’t include the full deck!
Question: Does anyone know if there are any playing card images that are free to use in our apps? Perhaps when we get to drawing shapes we can create them from scratch.
- Equatable was useful in the struct
- Enum for the suits
- CaseIterable allows for getting a random case from the enum
suit.allCases.randomElement()!)
I realize we haven’t learned enums yet but I had learned this before and it seemed like a logical place to put one but I had always struggled with the best way to use them. Being able to grab a random element of an enum opens up lots of possibilities.
My code preference is to create functions for the button actions. I think it looks cleaner. These functions however, I think need to be inside the struct. I will have to look into extensions again to see how or if it makes sense to have a separate file as the projects get more complicated for these types of functions. I suppose I could create a button class and call the functions as methods of the class.
        VStack {
            Text(text2Display)
                .padding()
            HStack{
                Spacer()
                Button(action: {create()}, label: {
                    Text("Create")
                })
                Spacer()
                Button(action: {draw()}, label: {
                    Text("Draw")
                })
                Spacer()
            }
        }
Day 7 M2: L3
This content is all new to me, but he introduces it pretty slowly.
- NavigationView
- NavigationLink
 NavigationView {
            List(array, id: \.self) { arrayElement in
                NavigationLink(
                    destination: Text("Destination"),

                    label: {
                        Text(arrayElement)
                    })

            }.navigationTitle(Text("My List"))
M2:L3 Challenge
This was a straight forward application of what we learned. Mostly cut and paste from the L3 project he showed us how to do.
Question: Is it possible to have the background of the Elements change color if the elements are color names?
Hey Andy, you’re making some awesome progress!
Thanks for pointing out that typo. I’ve corrected it!
2 Likes
Day 8 IOS Foundation M2: L4
Loops
- for
- for-in
- while
- repeat-while
Straight forward application in the challenge. started by copying the code from the previous challenge and modifying accordingly.
I need to start an Array extension file on github to make my array manipulations easier.
Day 8 iOS Foundation M2: L5
Classes
Great little exercise to review classes. Good to see the super used in the solution, I haven’t used that much yet in classes that I have made. I used a switch which I am getting a better handle on how to use.
Day 8 iOS Foundation M2: L6
Structs vs Classes
Structs (value type)
- more lightweight
- better for read only
- swiftUI views
Classes (reference type)
- better for read write
- modifying a single instance
Start with Struct then use class if needed.
Day 8 iOS Foundation M2: L7 MVVM
Model
- structs and classes that represent data
- recipes
- Shape of the data
View Model
- manages state and data user sees
- use class
- actual data
View
Day 9 iOS Foundations M2 L7 Challenge
Great review of what we learned in lesson 7. I keep feeling guilty for not being able to do it from scratch without looking for help from what was either covered in the lesson or online. I suspect this is normal but not healthy. From now on: Use the tools at my disposal . Google is my best friend and has been for years!
Also found a great new podcast: S2 Episode 11: Mobile Development with Mikaela Caron by SisterCodes • A podcast on Anchor ← @mikaelacaron
Follow her on twitter here → @mikaela_caron
2 Likes
Thanks so much for the mention!
1 Like
Github and online presence.
Decided it made sense to get organized, so I created a github repo to document my progress. It is currently a duplicate of what I have here and the text and images will continue to be cross posted. However, the github repo will give me more space to explore and collect code snippets that are generally useful and to version control the generation of useful code.
100 days of Code With Chris
You can also follow me on twitter @inversewander
Day 10 iOS Foundations M2 L8/Challenge
We learned
|
Where |
description |
| @ObservedObject |
View |
listening to said Object |
| @ObservableObject |
ViewModel |
makes object listenable |
| @Published |
ViewModel |
Object to update |
Challenge
Since the @Published variable is what is changing in the view, we want to make changes in the viewModel rather than inside the button. Not sure what how Chris was expecting us to try to change the first topping (topping1) since it is inside of the array and that array changed everytime you added a new pizza.
Actually, as long as I refer to the model.array.topping1 I can still get it to change correctly even within the button function.
I am kind of confused as to what Chris wanted us to do with this part When this button is tapped, change the "topping1" property of each pizza instance in the ViewModel to "Pineapple". Other than the correct solution, I am not seeing the way that wouldn’t work. It would be nice if this was shown in the answer commented out with // some code <- this doesn't work
Day 11 iOS Foundations M2 L9
Optionals
-
? to declare an optional
-
! to force unwrap an optional
-
if let a = b {} to optional bind where b is define above as var b:Int?
If you declare an optional, you have to set it when you want use it.
// declare array is an optional array string
var array:[String]?

// I now want to use it based on some action user took so create an empty array. This is no longer nil but an empty array with an array.count == 0
array = [String]()
Simple buttons
If you just need a button with text then you can just use the following. It does not contain any formatting.
Button("test"){
    print("another Button with action after")
}
Not just a simple button
To format the button with color and shape or image etc, we need to use this button style.
Button(action: {
    array = nil
},label: {
    Text("Nil").foregroundColor(Color.green)
})
What is the \.self thing?
From the Swift documentation
"The path can refer to self to create the identity key path (\.self). The identity key path refers to a whole instance, so you can use it to access and change all of the data stored in a variable in a single step. For example:"
oops, apparently, I missed seeing this used in lesson 3 List Demo
1 Like
Day 12 iOS Foundations M2 L10 Dictionaries
Dictionaries
Create a dictionary
var a = [String:String]()
Add/update a key value pair
a["E1"] = "John"
Remove or unset a key value pair
a["E1"] = nil
Declaring and initializing key value pairs
var employees = ["E1":"John","E2":"Andy"]
Loop through dictionary
for employee in employees {
  print(employee.key,"",employee.value)
  print(employee.value)
}
Loop through dictionary using a tuple
for (id, name) in employees {
  print("\(id) \(employee)")
}
I had difficulty going through the challenge. I understand the concepts but it is hard to make it work the way someone else has outlined. Not sure why. So I just going to move forward.
Day 12 iOS Foundations M2 L11 Introduction to JSON
JSON example
{
    "name" = "Shelby",
    "age" = 29,
    "likes" = Pizza"
}
JSON Array
[
  "Pizza",
  "Sushi"
]
Website where you can validate your JSON
jsonlint.com