Hey! Im working on my first app, so im totally new at it :))
But i still lil bit confused and Lost so i dont know
I have this problem
Thankss :)))
Hey! Im working on my first app, so im totally new at it :))
But i still lil bit confused and Lost so i dont know
I have this problem
Hi @Elaf
Welcome to the Code Crew community.
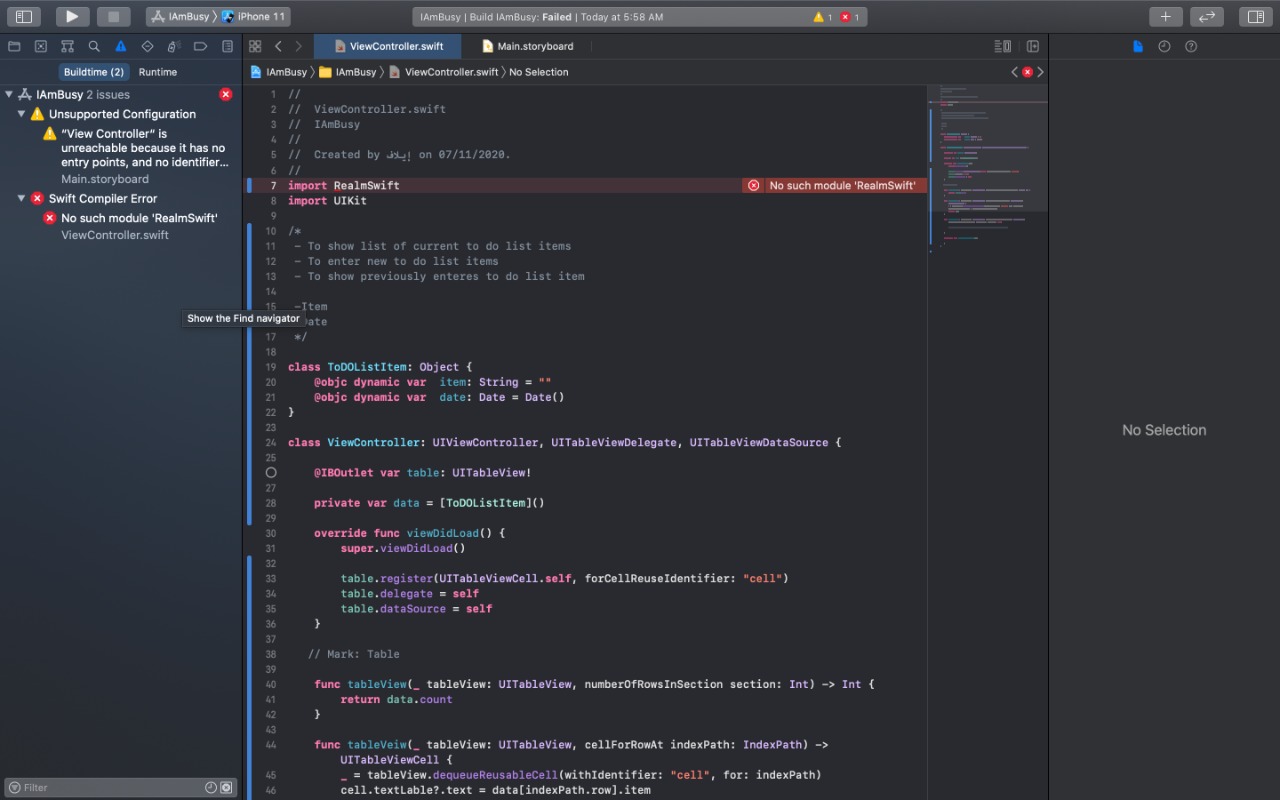
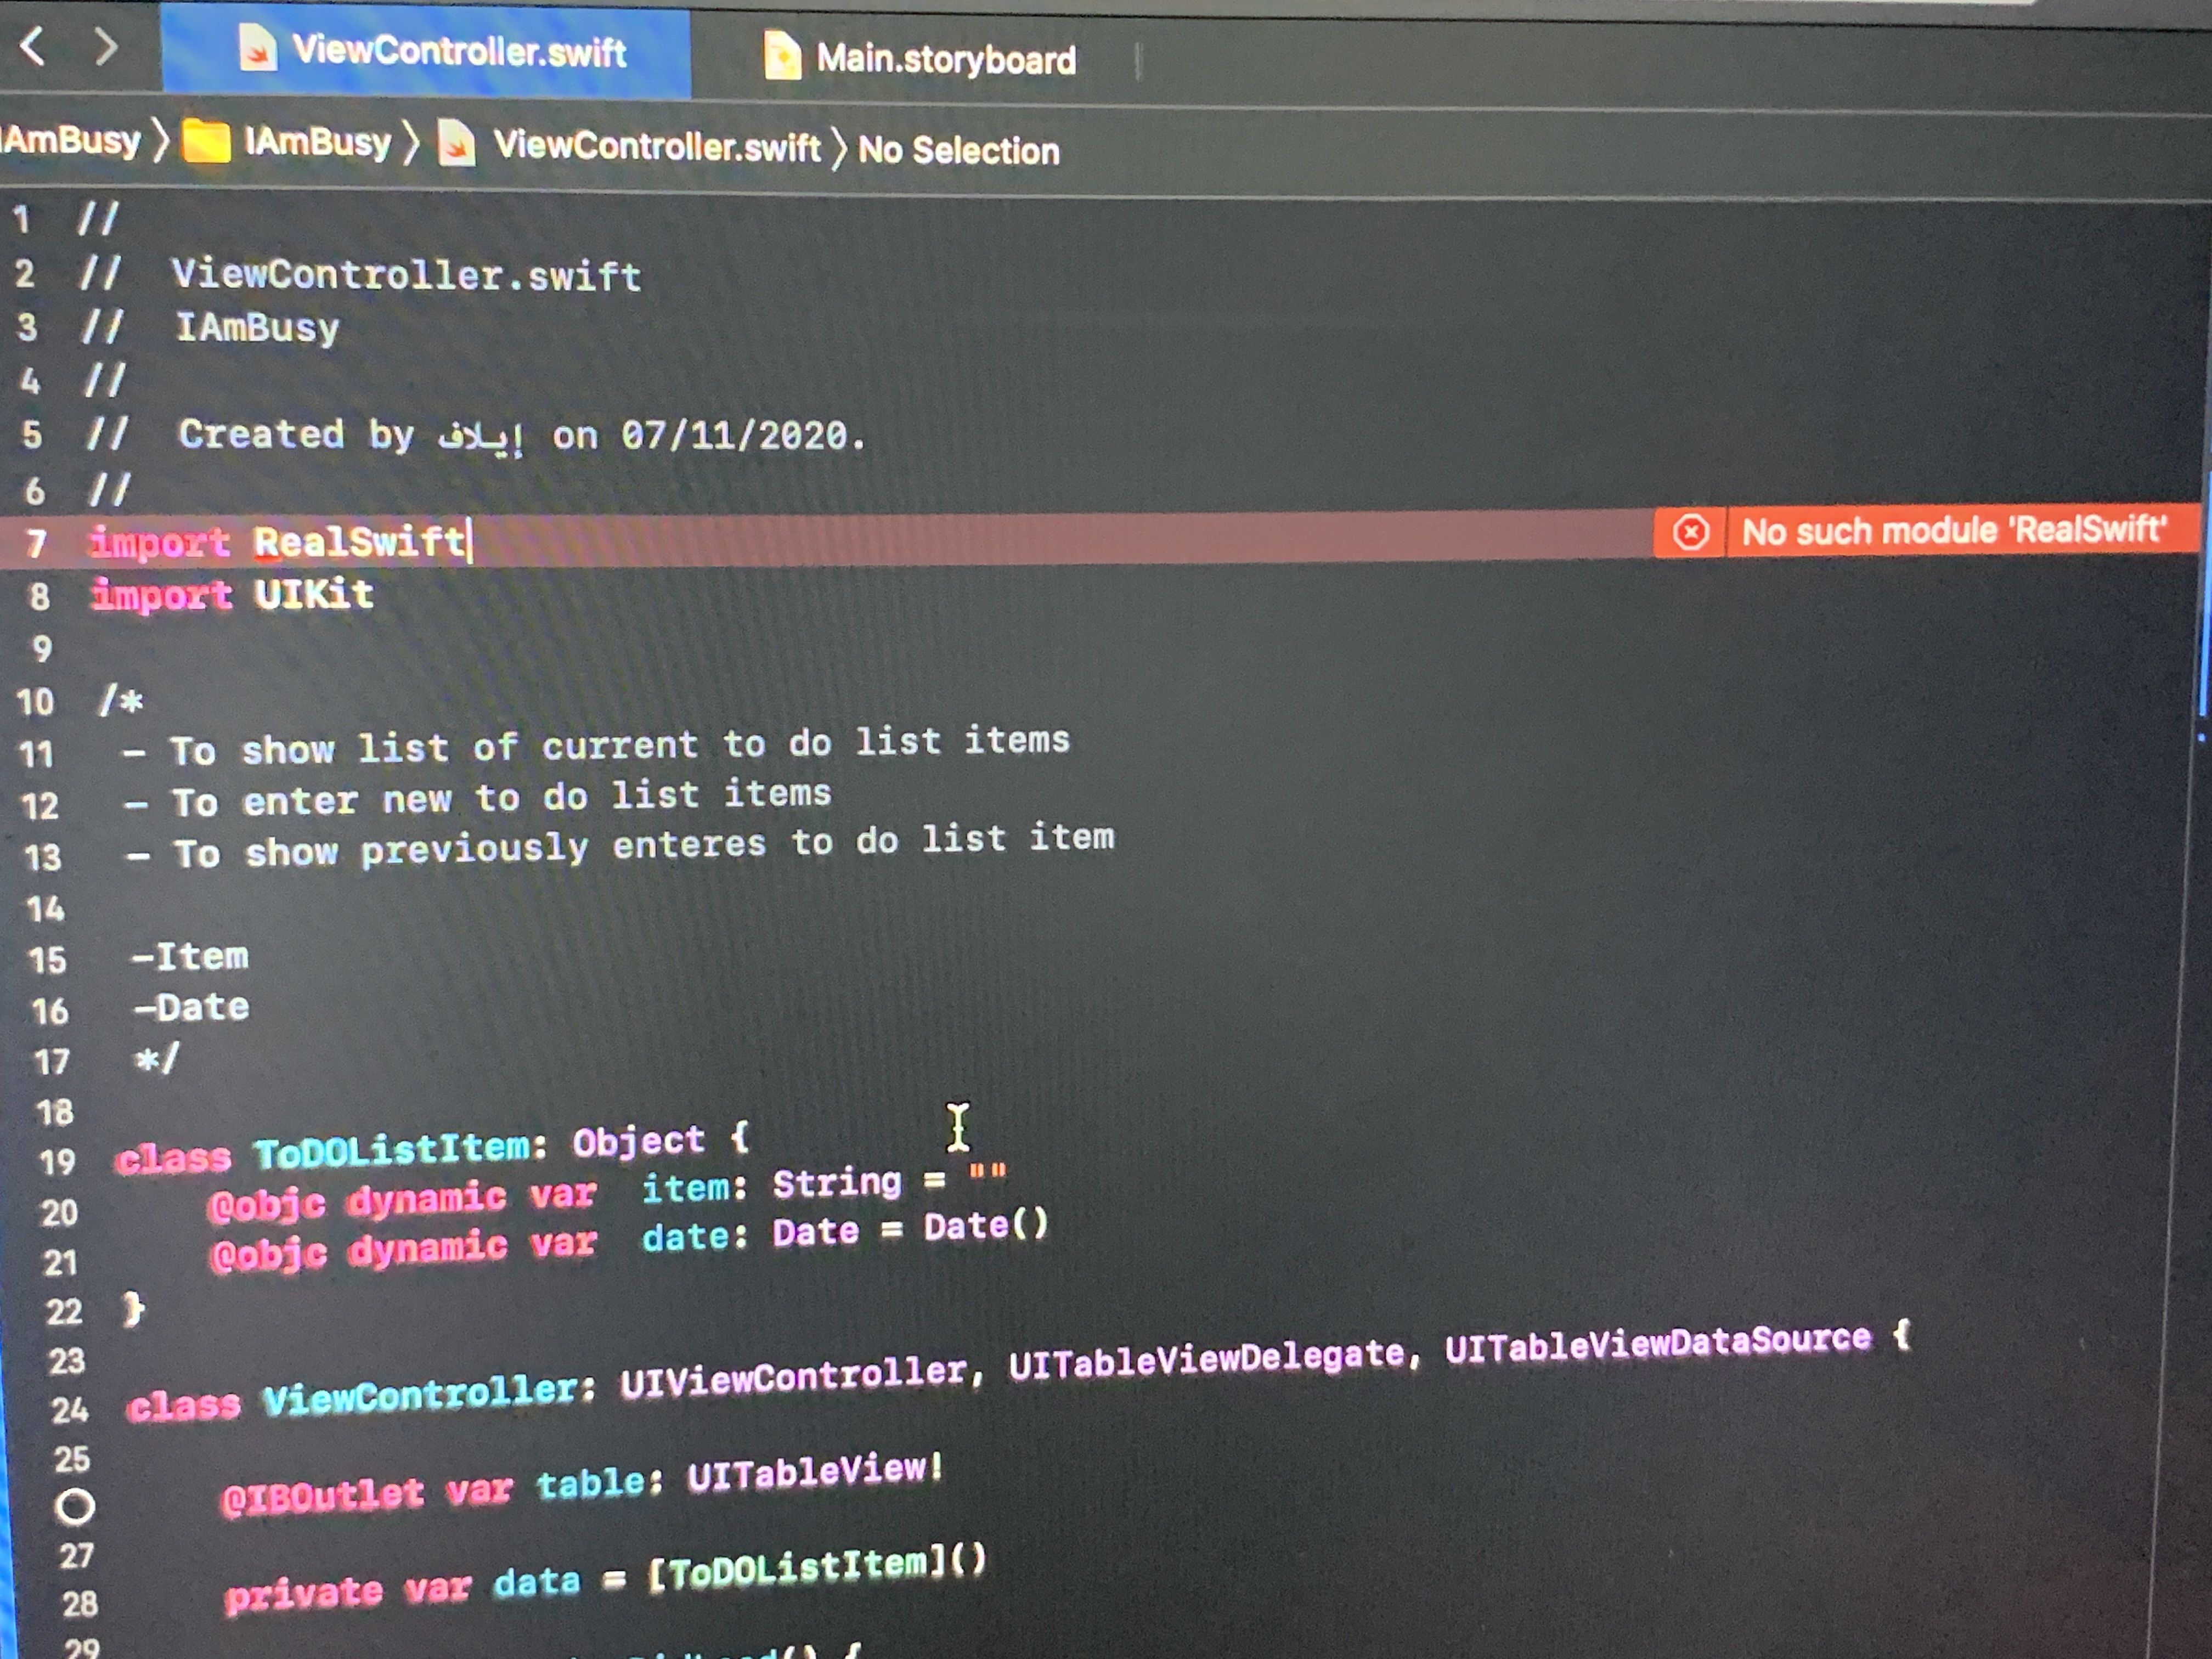
I assume that you are using the Realm Database (now owned by Mongo DB and generally referred to as MongoDB Realm)?
If so then you would have added CocoaPods to your project and configured the Podfile with the line:
pod 'RealmSwift'
In which case your import statement in your ViewController should be:
import RealmSwift
The other thing I need to point out to you is the method of adding screenshots from your Mac.
When you post images of your code, use the built in screenshot app rather than take a photograph. Photographs of code are very hard to view.
With the Mac ScreenShot App, you can capture the entire window, the entire screen or a section of the screen.
If you just want a small section, press Shift + Command + 4 which will change your mouse pointer into a set of crosshairs. Click and drag diagonally across the screen to capture the section you want. When you let go of the mouse button, the image will be saved to your Desktop and will be named something like “Screen Shot 2020-04-24 at 1.22.57 pm”.
Other options are available by pressing Shift + Command + 5 and an options bar will appear near the bottom of the screen.
Hey Chris!
Thank you for ur note, I screenshotted it now so it can be more clear
OK let’s go back to the basics here.
Are you aware that you need to install Realm by using the coccoapods process? If you are not then you need to do some research on Cocoapods and how to add Pods to your project in order to use the framework that the specific Pod facilitates.
This video will help.

Am I have to build my project from the beginning again! Cuz I already start it :((
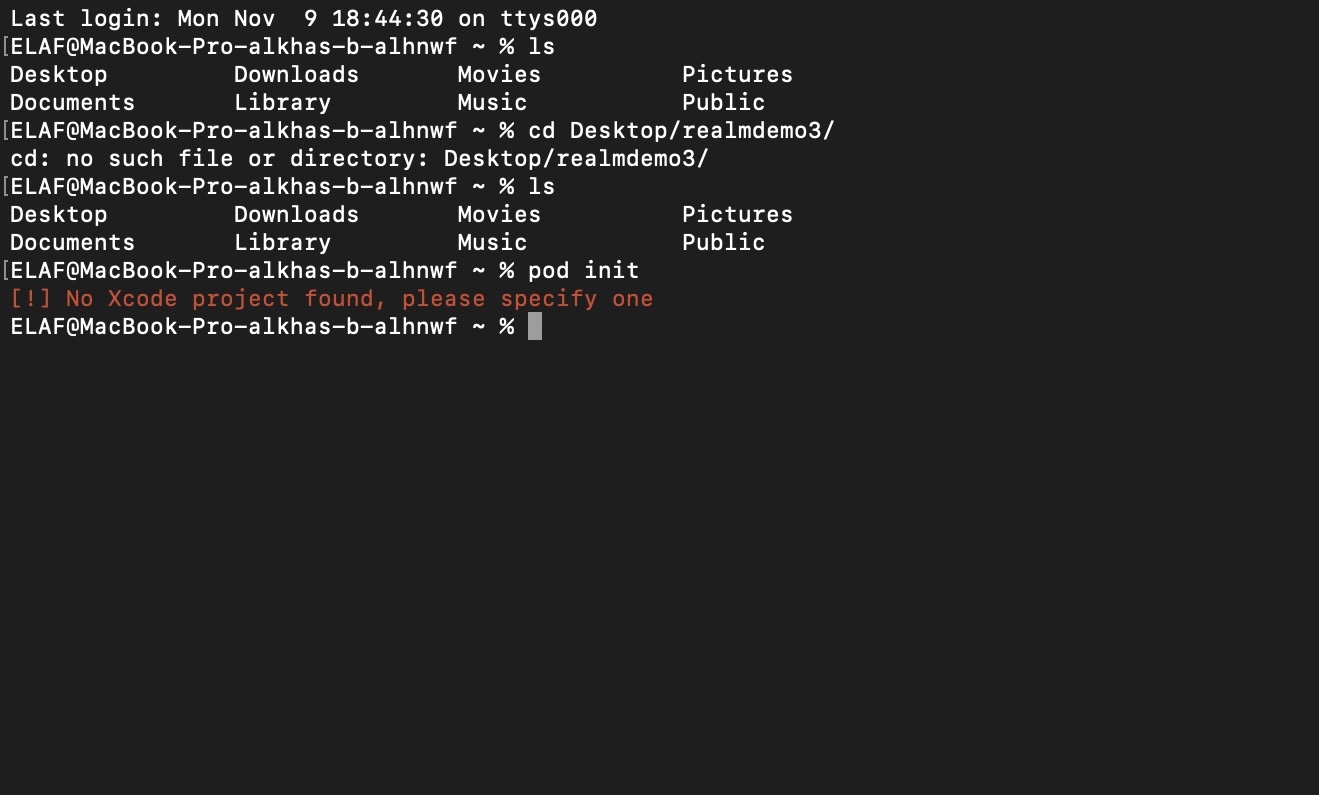
Try moving into the Desktop folder first and then use ls to list the contents.
When you have that list of items you can make sure that you have the name of the project folder EXACTLY and then use cd to move into that folder. Remember that all folder and file names are case sensitive.
I think things going complicated with me
Im so sorry but I can’t get a step😣
Can we make an instant video call so i can show you my screen directly and go step by step
This is my FaceTime
@eelaf.2012@icloud.com
Just tell me the time, it’s almost 8am here, my online school gonna start in one hour later then im gonna finish classes at 2pm, that means after 6h from now.
I have no idea where do you live so I don’t know what’s the suitable time for you
Thank you again, tell me if it’s good for you :))
What courses have you done so far on Cocoapods and Realm?
Things went so well with me about this tutorial https://youtu.be/oNKVVBN2JN0
But this https://youtu.be/PmsJW59rNY8 didn’t go well as i said, I already got my project started as I mentioned b4, the confusing point is your reply “ Try moving into the Desktop folder first and then use ls to list the contents.
When you have that list of items you can make sure that you have the name of the project folder EXACTLY and then use cd to move into that folder. Remember that all folder and file names are case sensitive.”
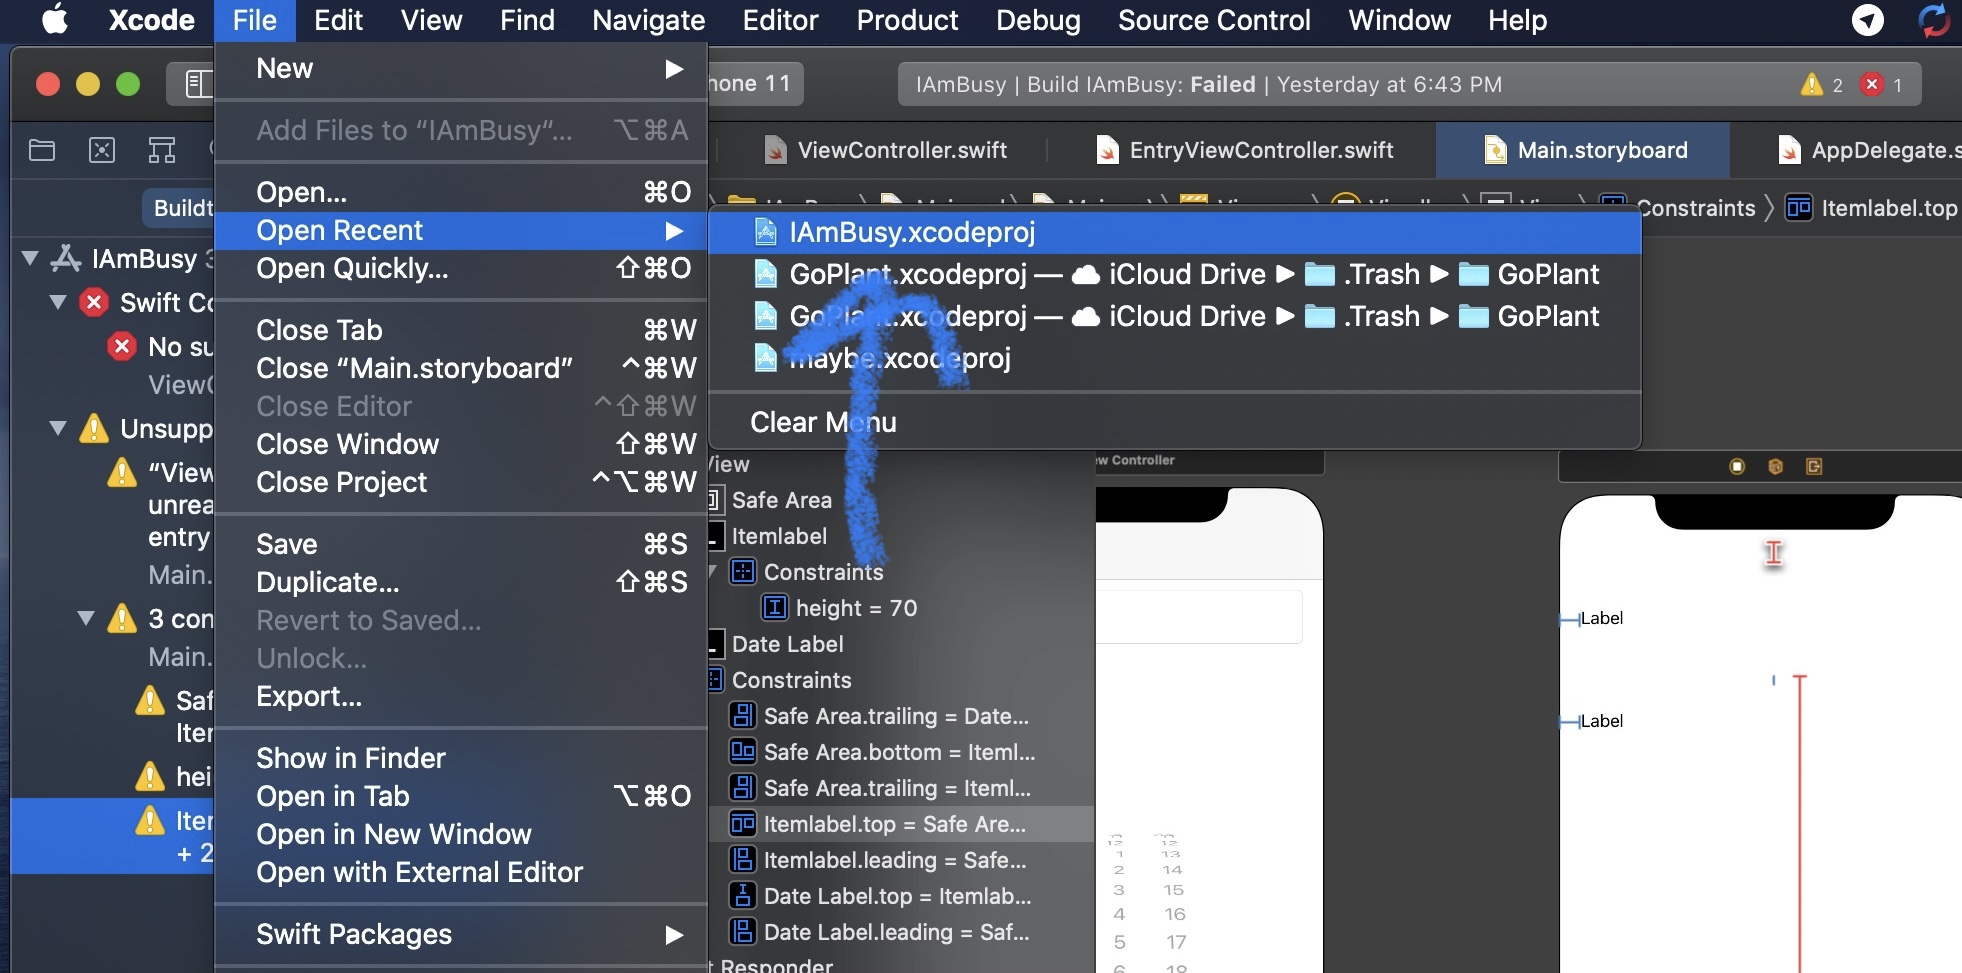
When i shared the last screenshot
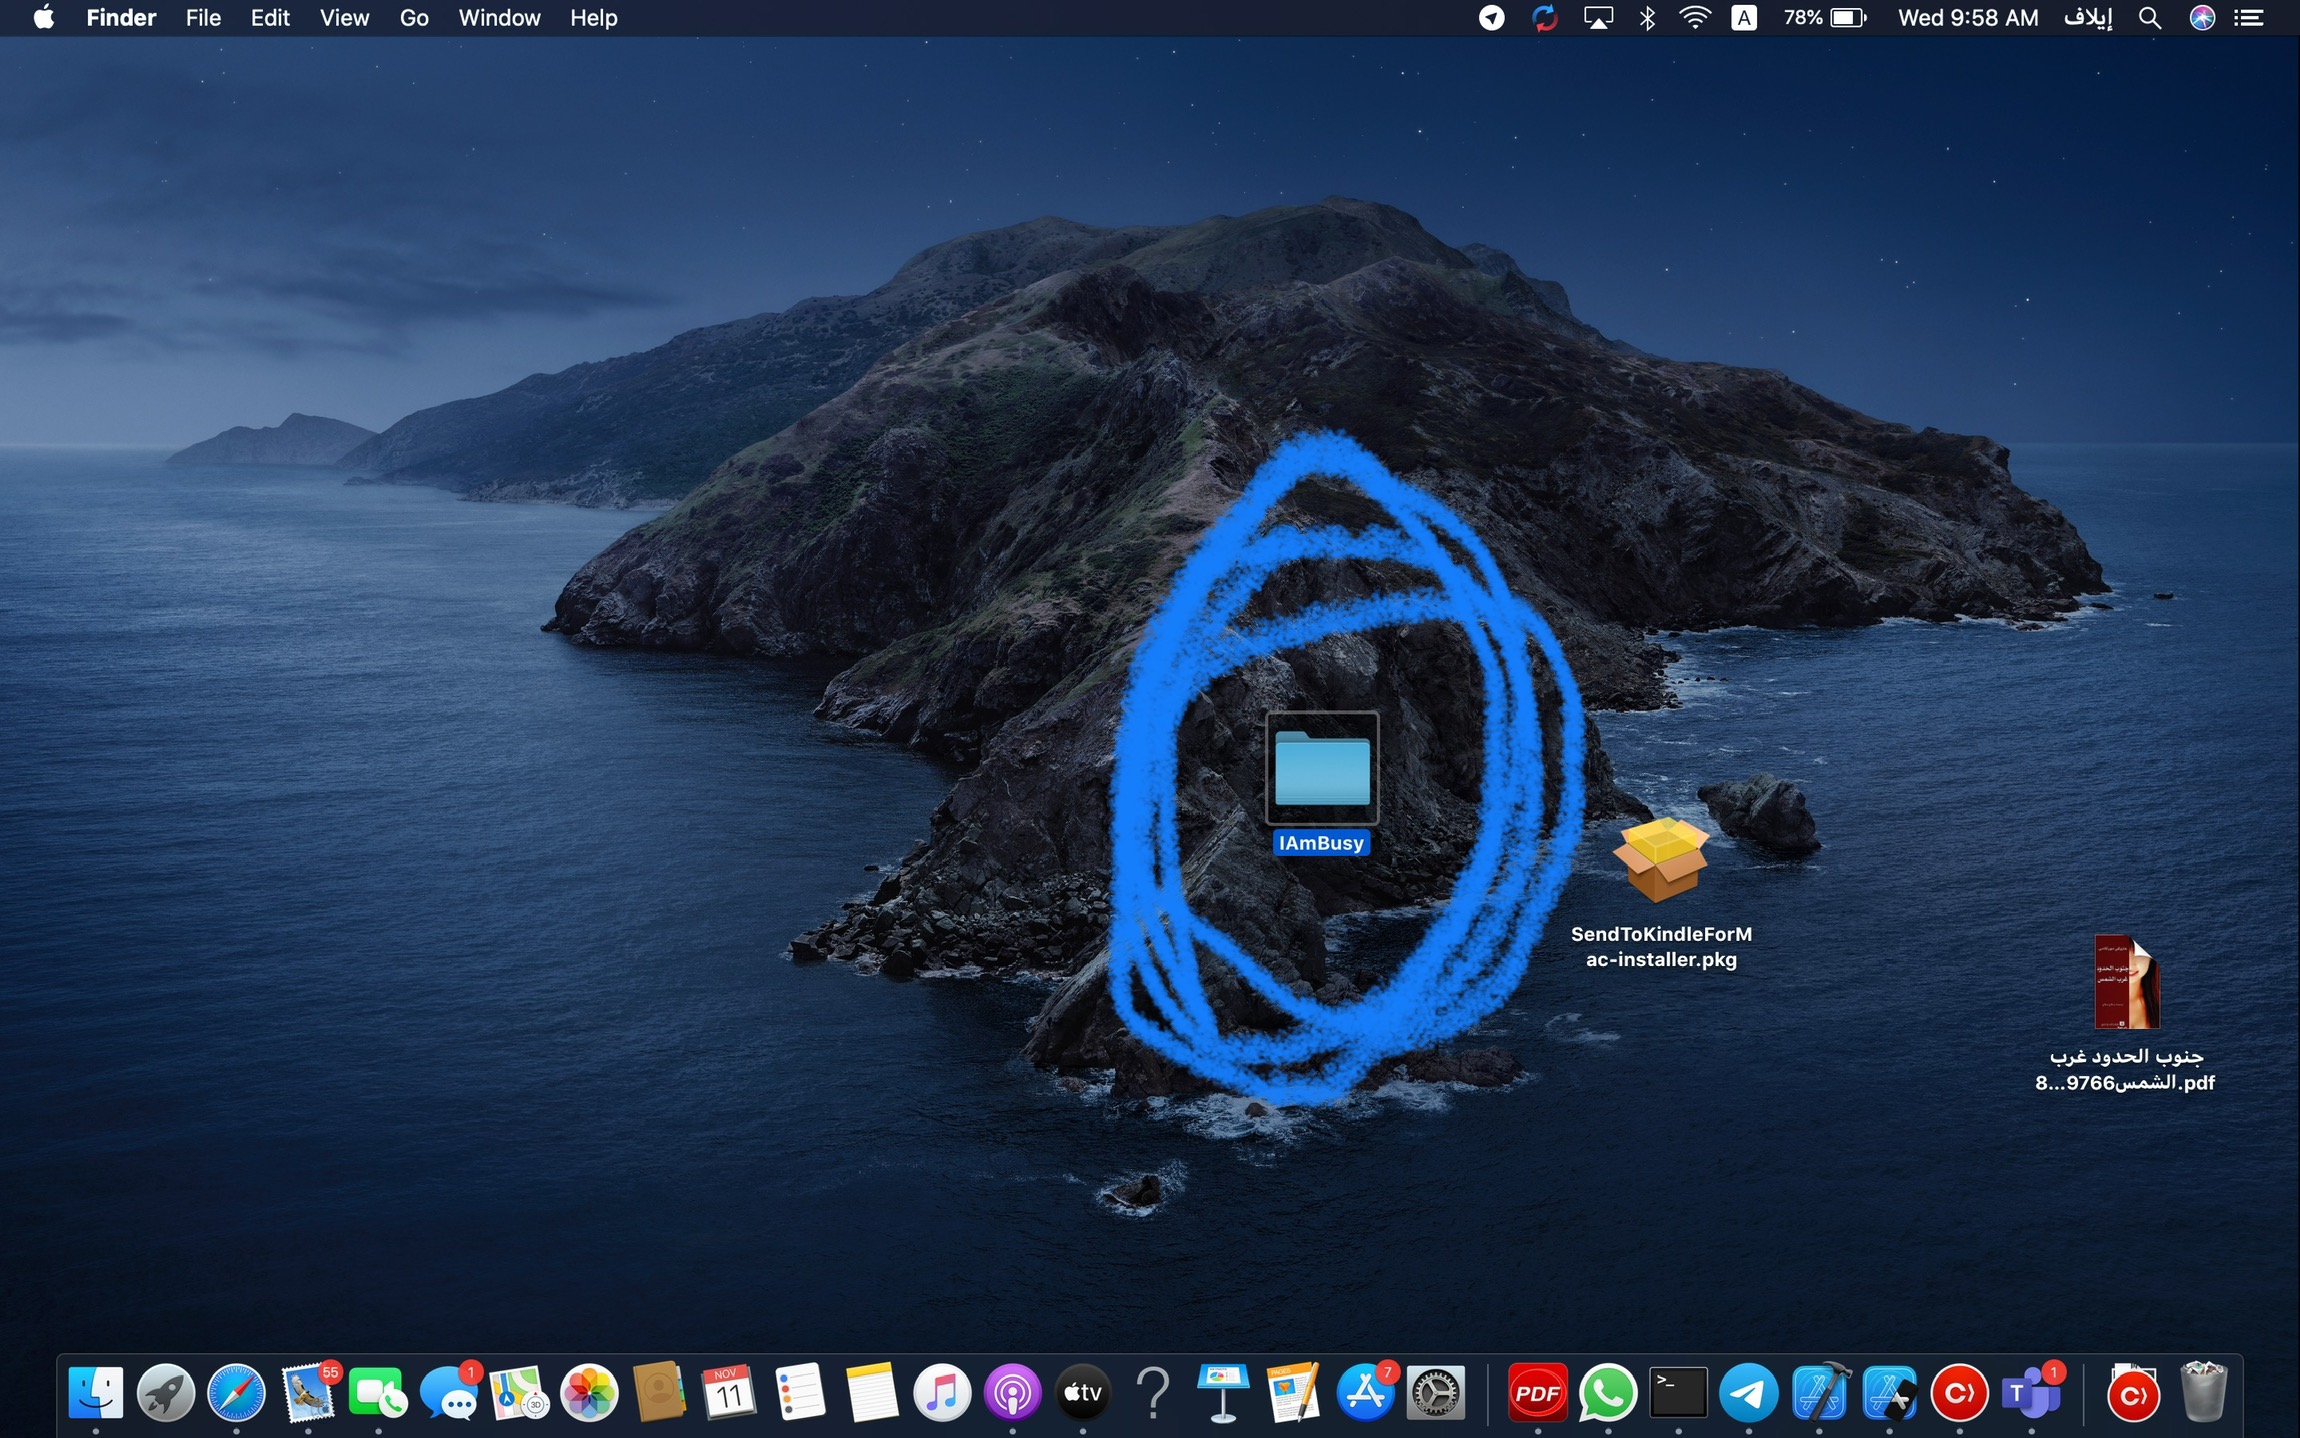
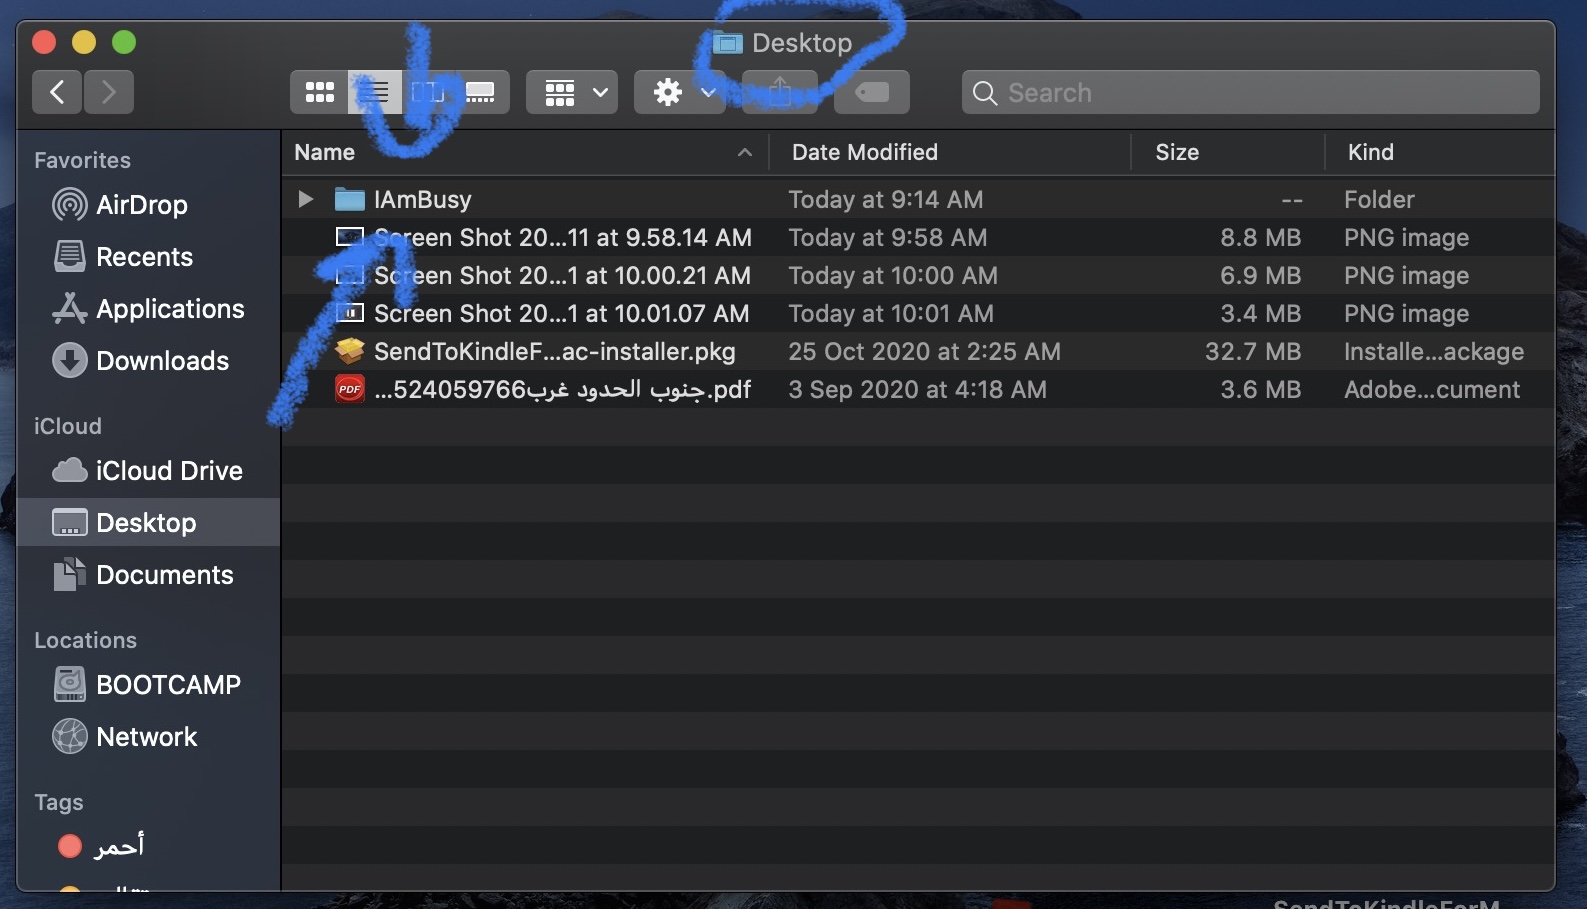
When you created your project, where did you save it?
Show a screenshot of where you saved the project folder so that we can see the name.
So IAmBusy is the folder name you need to navigate to in order to install CocoaPods for the project.
When you open terminal use the command:
cd Desktop
Then use the command:
cd IAmBusy
That will place you inside the project where you can install the RealmSwift framework using cocoaPods.
Use the command:
ls
which will list the folder contents.
Then begin the pod installation process
pod init
You should get something like this as an output from terminal when you issue all those commands:
Last login: Thu Nov 12 06:47:59 on ttys000
192-168-1-103 chrisparker 6:49:05 ~ $ cd Desktop
192-168-1-103 chrisparker 6:49:10 Desktop $ cd IAmBusy
192-168-1-103 chrisparker 6:49:15 IAmBusy $ ls
IAmBusy		         IAmBusy.xcodeproj
192-168-1-103 chrisparker 6:49:17 IAmBusy $ pod init
192-168-1-103 chrisparker 6:49:50 IAmBusy $ ls
IAmBusy		         IAmBusy.xcodeproj	Podfile
192-168-1-103 chrisparker 6:49:53 IAmBusy $
OK so the Podfile exists. Obviously your pod init command you used has worked. Now you have to edit the Podfile and add the line:
pod 'RealmSwift'
Read these instructions on how to install CocoaPods.
That didn’t work tho, still error
And CocoaPods app doesn’t work w me too, I installed it on my Mac but it doesn’t work I don’t know why, like I try to double click on these beside the arrow but nothing appears
It’s not necessary to download the CocoaPods App but that is an alternative way to install pods.
You can do everything you need to do through Terminal.